In this post, we will going through all the steps that help you switch your WordPress theme to Neve.
Neve is a popular WordPress theme and is available as a freemium. Meaning, it has a free version on the official WordPress website, and a premium version.
It is a multi-purpose and lightweight theme.
The free version of Neve comes with limited features. But Neve pro offers advanced functionalities.
Neve is SEO-friendly and also supports the popular page builders like Elementor, Beaver Builder, Brizy, Divi, Thrive, etc.
Plus, it has a reputation on the official WordPress website with 4.8/5 star rating and 300,000+ active installs.
All of these points make it a good choice for website owners to build their WordPress website using Neve.
Steps on How to Switch Your WordPress Theme to Neve?
Before we start the steps, I am assuming you already have another WordPress theme running on your website.
Step 1: Take Backup of your Website
Taking backup of your WordPress website is crucial before you make any changes.
If something goes wrong, you wouldn’t loose your data.
Nowadays, many good hosting providers like Bluehost and Cloudways offer a feature called auto-backup.
But, to ensure that each and every part of your WordPress website is backed up, you can use plugins like UpdraftPlus.
Note:- If you were using a theme that comes with its own page builder like Divi or Avada, then you might need to use a paid service like Nelio Unlocker. Otherwise, you will need to manually recreate the content.
Step 2: Download and Install the Neve Free Theme
For switching to the Neve theme, first go to your WordPress dashboard > hover your mouse on Appearance > and click on Themes.
This opens up the WordPress themes dashboard.
On the top, click on the ‘Add New’ button.
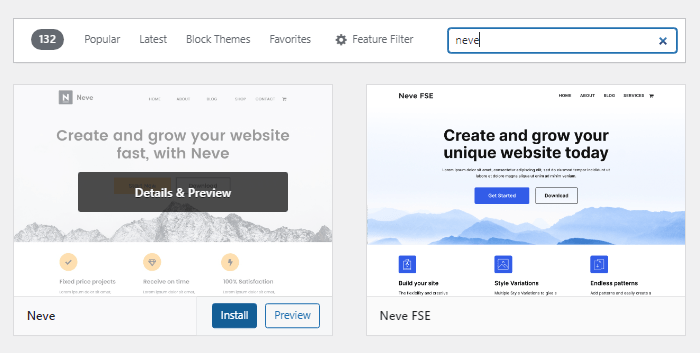
Now type in “Neve” in the search bar. Once you see the theme hit install.
Note:- Do not install Neve FSE, this guide only talks about the regular Neve theme, not Neve block theme.
Step 3: Activate Neve Free Theme On Your WordPress Website
After you have installed the free Neve theme, it is time you activate it.
Once you’ve activated the Neve free theme, you can get delete your previous WordPress theme.
Until this step, you have successfully completed installing and activating the Neve free theme on your website.
Meanwhile, you could also check out the Neve Options dashboard.
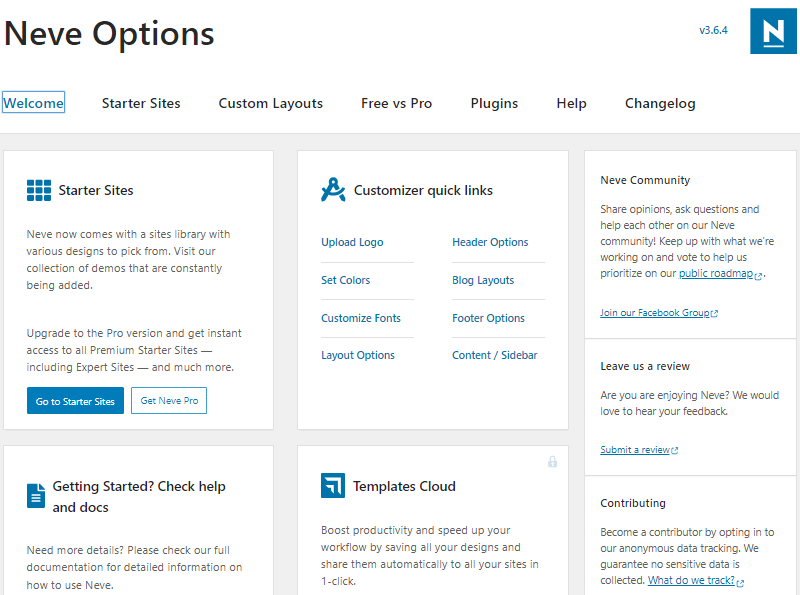
There are a few useful links for the free neve user like access to free starter sites, comparing Neve free vs pro, customizing few things like logo, header, footer, colors, fonts, etc.
All the customization available in the free theme is limited.
In the next step, we will look how to install Neve Pro as well.
Step 4: Purchase and Download Neve Pro
Neve theme comes with two versions, free and pro.
I have already laid out the steps of installing and activating the free Neve theme on your WordPress website.
Neve Pro offers multiple advanced features and functionalities like;
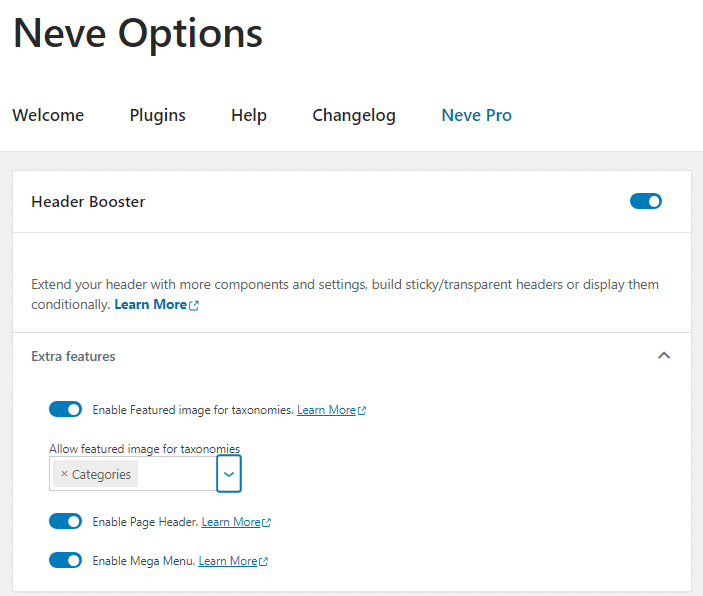
- Header Booster
- Blog Booster
- Elementor Booster
- WooCommerce Booster
- Custom Layouts
- Custom Sidebars
- and a lot more…
To switch to Neve Pro, you will need to purchase and download the Neve Pro Addon plugin from Themeisle.
What do I get with Neve Pro?
This table displays three different plans of Neve Pro, giving you a short overview of what’s the difference between Neve free vs pro.
| Features | Neve Personal | Neve Business | Neve Agency |
|---|---|---|---|
| Header Booster | ✓ | ✓ | ✓ |
| Blog Booster | ✓ | ✓ | ✓ |
| Custom Layouts | ✓ | ✓ | ✓ |
| Custom Sidebars | ✓ | ✓ | ✓ |
| Post Type Enhancements | ✓ | ✓ | ✓ |
| Elementor Booster | ✓ | ✓ | ✓ |
| WooCommerce Booster | ⨉ | ✓ | ✓ |
| Block Editor Booster | ⨉ | ⨉ | ✓ |
| Scroll to top | ✓ | ✓ | ✓ |
| Typekit Fonts | ✓ | ✓ | ✓ |
| Performance Module | ✓ | ✓ | ✓ |
| Content Restriction | ✓ | ✓ | ✓ |
| Easy Digital Downloads Booster | ⨉ | ✓ | ✓ |
| Lifter LMS Booster | ⨉ | ✓ | ✓ |
| Premium Starter Sites | ⨉ | ✓ | ✓ |
| White Label | ⨉ | ⨉ | ✓ |
| Template Cloud Access | ⨉ | ⨉ | ✓ |
Note 1:- None of the above mentioned features are available with the free version of Neve theme.
Download Neve Pro Addon
Once you have purchased Neve pro. Go to the Themeisle store.
Enter your login details and download your Neve pro addon zip file to your hard drive.
Step 5: Upload the Neve Pro Plugin
Upload the Neve pro plugin to your WordPress website.
Go to your WordPress dashboard and under Plugins, click on “Add New”.
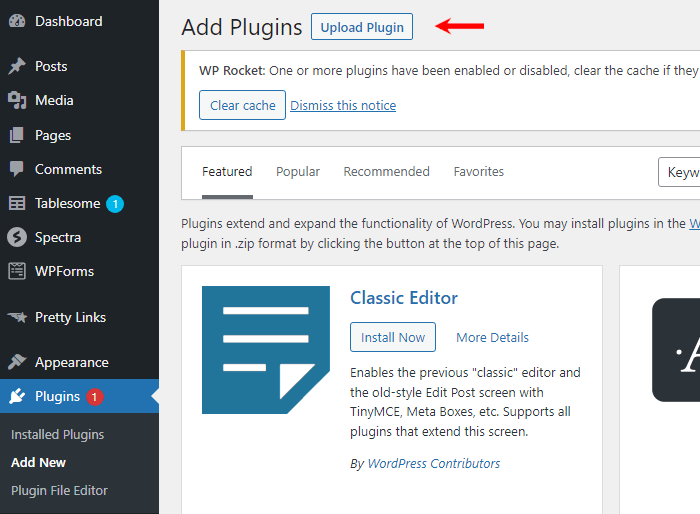
Then click the “Upload Plugin” button.
Now, upload the Neve pro zip file.
Once you have uploaded, click on install and later activate the Neve Pro plugin.
Step 6: Install Neve Starter Sites Plugin
In case you want to use an already created Neve Starter Site, you will have have to install the Templates Cloud plugin.
For doing so, click on Neve from your WordPress dashboard. It will open up Neve Options dashboard. Then click on the Starter Sites tab.
From there, click install and activate the Cloud Templates and Patterns Collection plugin.

Although, this is an optional step. But, it helps to know in case you don’t have the luxury of time and need to quickly create a Neve website.
Step 7: Enable Neve Pro Settings
After installing the pro addon of Neve, it is time you enable the premium settings.
Click on Neve, on your WordPress dashboard.
It will open Neve Options. From there, click on Neve Pro.
Now, enable all the Neve Pro settings one-by-one.
Following are the settings;
- Neve Header Booster
- WooCommerce Booster
- Easy Digital Downloads Booster
- Blog Booster
- Neve Post Types Enhancements
- Scroll to Top
- Performance
- Block Editor Booster – works only when you have Otter Blocks Pro
- White Label
- Custom Layouts
- Custom Sidebars
- Elementor Booster
- LifterLMS Booster
- Typekit Fonts
- Content Restriction
After completing this step, you have learnt how to switch your WordPress theme to Neve.
Step 8: Customize Your Neve Theme Website
After learning how to switch your WordPress to Kadence theme, it is also important that you know a little bit more about how you can customize your Kadence theme website.
Kadence already has a lot of options to customize.
Let me share some Kadence theme customization examples which you can right away perform from the theme customizer.
Installing a theme is one thing and customizing it is another.
Without customizing Neve or any WordPress theme for the matter, your content won’t really stand out.
Here, I share some basic customization points to help you get started.
Upload Logo, Set Your Brand Colors, and Customize Fonts
To upload your website’s logo, create a site identity with a tagline, setting your brand colors, and customizing your fonts for headings, content, and menu items, click on Neve (on your WordPress dashboard).
That will open Neve options for you.
You can make all the changes by clicking under on the quick links under the customizer settings.
Customizing Header and Footer
Under the WordPress dashboard, hover your mouse on Appearance, then click on Customize.
This should open the Neve theme customizer.
Over here, when you click on the Header and Footer, if you have installed the Neve pro addon, you will see lots of addons (components).
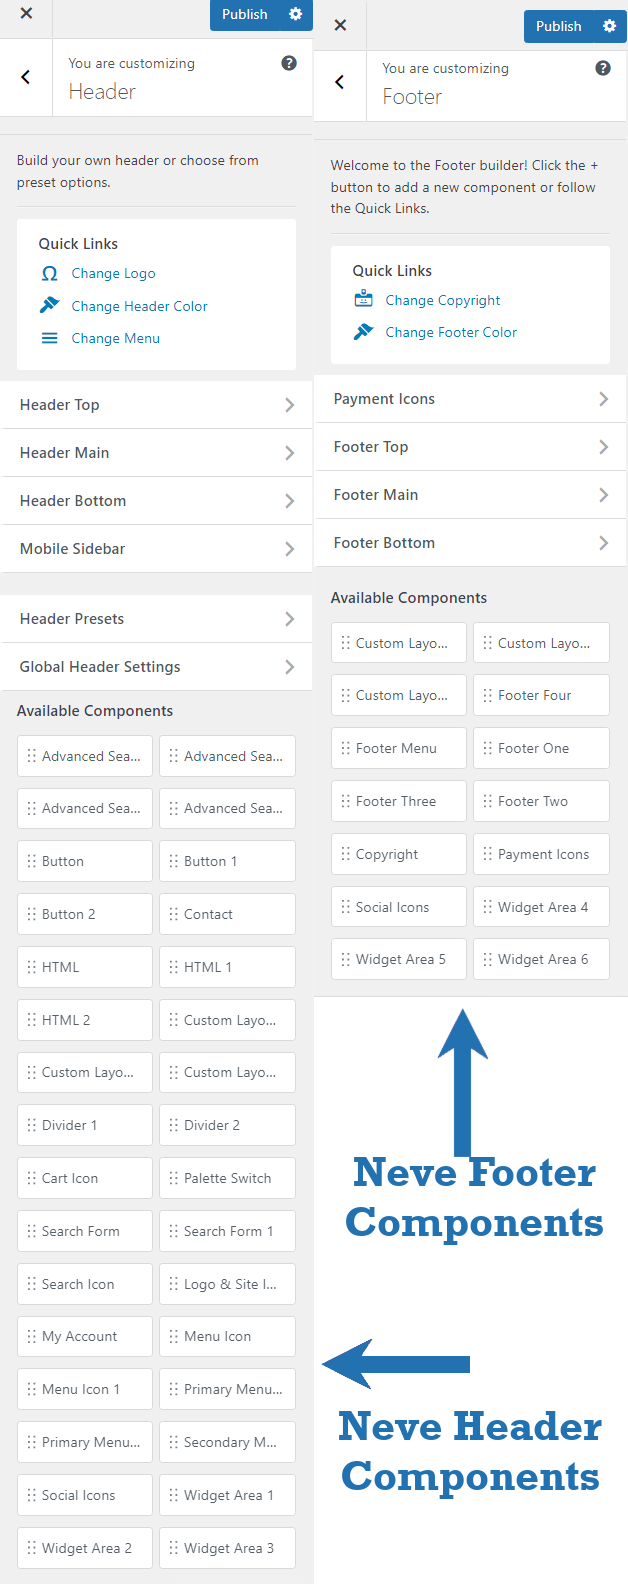
These addons can be dragged and dropped to the appropriate section in the header and footer builder.
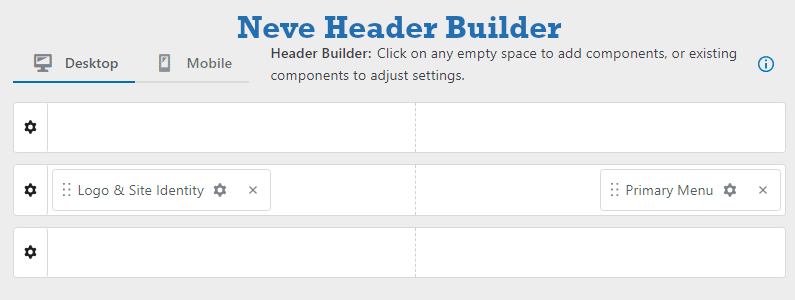
Neve Theme Header Builder
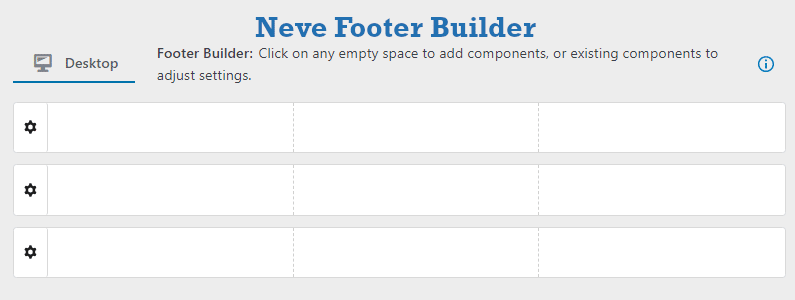
Neve Theme Footer Builder
Layout Settings
For customizing the overall layout of a Neve website, container size of pages, posts, etc., you will need to click on the Layout option under the Neve theme customizer.
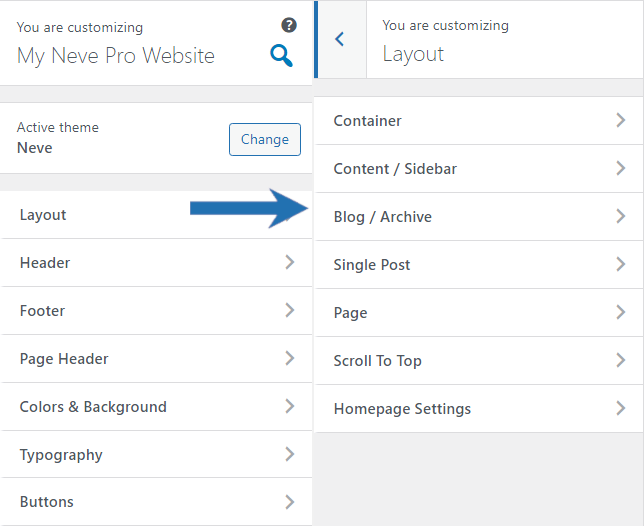
Also you can set sidebars for your blog posts and pages.
You can do a lot more. But, this is basic and it should be more than enough at the initial stage.
For more advanced customization, you can go for WordPress blocks plugins like;
Otherwise, you can even take the page builder route and simply go for Elementor.
FAQs – Switch Your WordPress Theme To Neve
Neve theme is available for free on WordPress.
Neve is a good WordPress theme. It is lightweight, multi-purpose, mobile-responsive, SEO-friendly, AMP ready, supports popular page builders, and offers lots of customization options.
Yes, you can easily change your WordPress theme to the Neve theme.
On your WordPress dashboard, hover on Appearance, click on Themes, then click on Add New button. In the search bar, type Neve. Once you see Neve theme, click on Install, and then Activate.
After installing the free version of Neve, go to Neve Options, click on the customizer quick links one-by-one to set up things like site identity, brand colors, fonts, layout, header, etc.
Neve is very good for beginners. It has a beginner-friendly dashboard to customize multiple things at once. Neve is so easy to use, that you can perform basic setup of your website under five minutes.
The benefits to switch your WordPress theme to Neve are it gives more features, free starter sites, good integration with Elementor, Otter Blocks, WooCommerce, supports popular SEO plugins
Neve pro comes with a sticky header feature.