This article is a step-by-step tutorial guiding you on how to switch your WordPress theme to Astra.
You must be thinking after creating a full-fledged website with layouts, sidebars, menus, etc. how can you make the switch without breaking anything.
Well, that is not entirely true.
With the right steps, you can change your website’s WordPress theme to Astra theme.
Astra is a super popular WordPress theme with more than 1 million active installs.
It is lightweight, mobile-responsive, SEO-friendly, integrates very well with popular page builders and WooCommerce, and offers enough customization features.
Astra is a freemium theme, the free version is available on WordPress. But, you have to pay for Astra Pro.
Astra theme has an amazing reputation on WordPress with an average rating of 4.9/5 and more than 5000+ reviews.
It also comes with lots of starter sites (templates) for almost every industry or niche. So, if you’ve planned to switch to Astra, then there will be an Astra starter template ready for you.
Because of all these positive points, website owners, bloggers, designers, freelancers, and even store owners, tend to switch to Astra WP.
Steps on How to Switch Your WordPress Theme to Astra?
We are staring the steps, assuming you already have another WordPress theme running on your site.
Step 1: Backup Your Website
Taking backup of your WordPress website is crucial before you make any big changes.
Most probably nothing goes wrong, but why to take a chance…
If you are using a good hosting provider like Cloudways or Hostinger, you will have an auto-backup feature already enabled, by default.
But, you can still use specific backup plugins, that are capable of taking a full backup in minutes.
I would recommend UpdraftPlus and WPvivid.
Step 2: Download and Install the Astra Free Theme
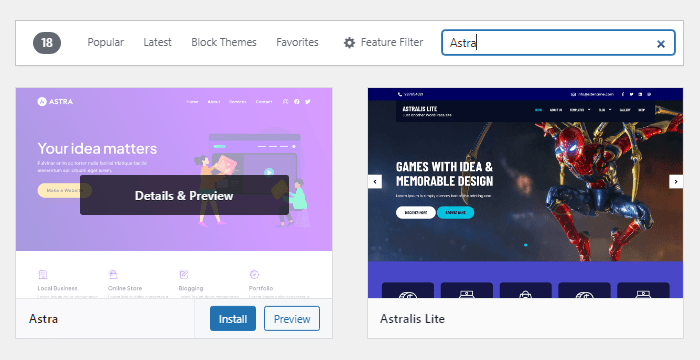
For switching to the Astra theme, go to your WordPress dashboard > hover mouse on Appearance > and click on Themes.
This will open the WordPress themes dashboard.
Right at the top, click on the ‘Add New’ button.
Step 3: Activate the Astra Free Theme on Your WordPress Website
Right after you’ve installed the free version of Astra theme, you need to activate it on your WordPress website.
You can get rid of your previous WordPress theme after activating the Astra free theme.
Until here, you have completed installing and activating the free version of Astra theme.
Now, go to your WordPress dashboard, hover your mouse on Appearance, and click on Astra.
It will open the Astra dashboard for you.
As you can see from the image below, there are a few Astra theme settings in the free version. But, they all have limited functionalities.
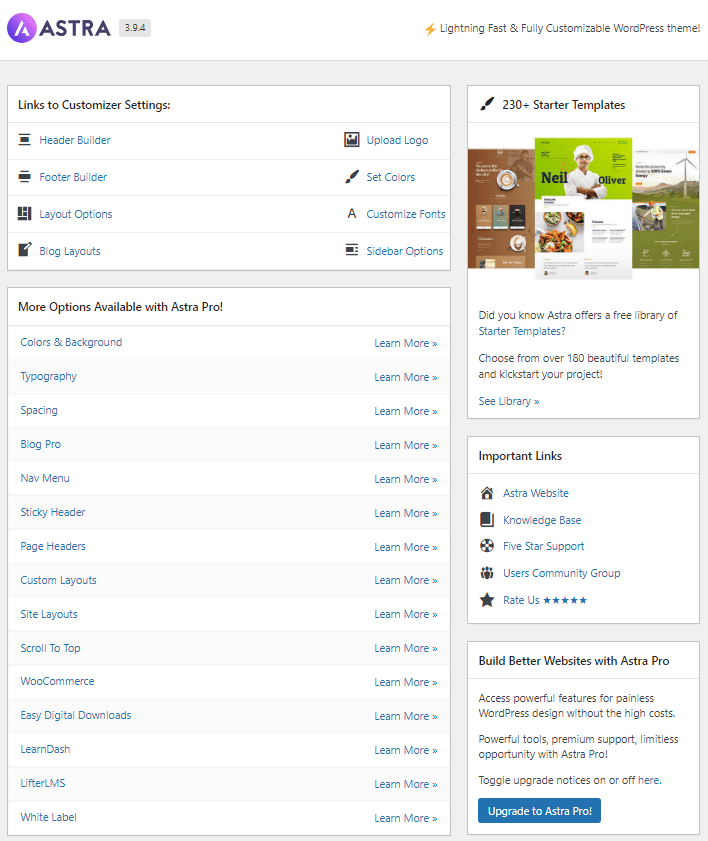
Notice, there are more customization options under Astra pro.
In the next step I will show you how to how to upgrade to Astra pro.
Step 4: Purchase and Download Astra Pro
Astra theme comes with two versions, free and pro.
The previous steps are all about installing and activating the free theme of Astra.
From this step onwards, we go a bit further by showing you how to install, activate and finally customize Astra pro. So that, you can successfully switch your WordPress theme to Astra and also have the premium version running on your website.
Astra Pro offers multiple advanced features like;
- Better Color and Typography options
- Granular Spacing Customization features
- Blog Pro for blog page, category page, and single posts
- Navigational Menu – more header addons
- Sticky Header
- Page Headers
- Custom Layouts
- and a lot more…
To switch to Astra Pro, you will need to purchase and download the Astra Pro Addon plugin from WPAstra.
What do I get with Astra Pro?
The following image is just an overview of what you get with Astra pro and Astra bundles. This image just shows an overview of what you get in all the plans.

For a much detailed comparison, you need to check the differences between the free and premium versions, with respect to general settings, header and footer, blog-related features, sidebar manager, WooCommerce features, etc.
Important
To understand all of that, head over to Astra Free vs Pro vs Bundles to understand all the differences between the plans.
Note:- All the above features are not available in the free version.
Download The Astra Pro Addon
Go to the Astra’s pricing page and select the plan that is right for you.
You will be taken to Brainstorm Force’s store where you will need to create your login credentials and also need to select your payment method.
They accept Paypal, Credit, and Debit cards. Make the payment and then head over to Account -> Downloads -> download your Astra pro plugin zip file to your computer.
Step 5: Upload The Astra Pro Plugin
Upload the Astra pro plugin to your WordPress site.
Go to your WordPress dashboard and under Plugins, click on “Add New”.

Then click on the “Upload Plugin” button.
Now, upload the Astra pro zip file.
Once you have uploaded, click on install and then activate the Astra Pro plugin.
Step 6: Verify Astra Pro Settings Are Enabled
After installing the pro addon of Astra, it is now time to verify that you can use Astra Pro’s advanced settings.
On your WordPress dashboard, hover on Appearance, and click on Astra Options.
This will again open the Astra dashboard.
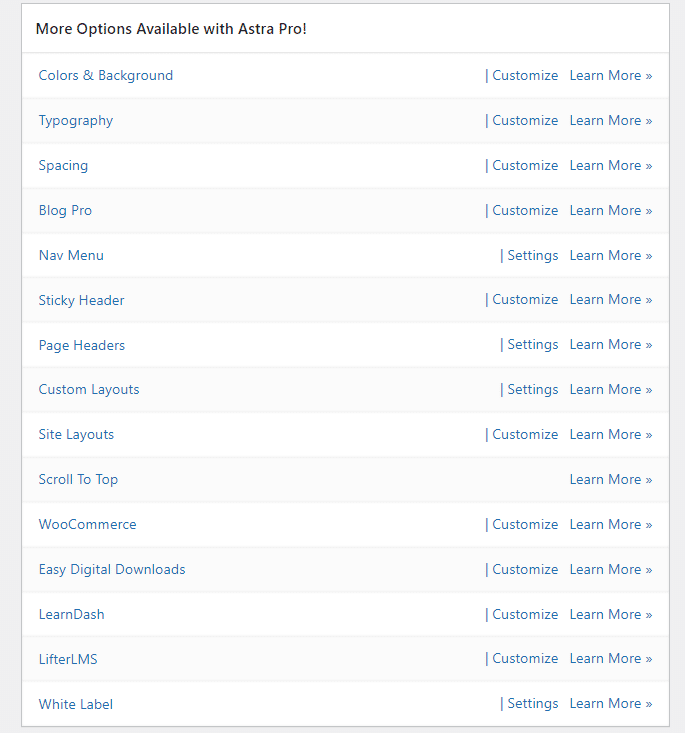
From here, you can directly reach the customizer and customize an Astra pro setting.
Step 7: Install The Astra Starter Templates Plugin
On your WordPress dashboard, go to Add New Plugins.
Search for Astra Starter Templates plugin, install and activate it.
Astra has tons of starter sites for you to get started.
Plus, at the time of installing the starter site, you get the option loading customizer settings and avoiding content.
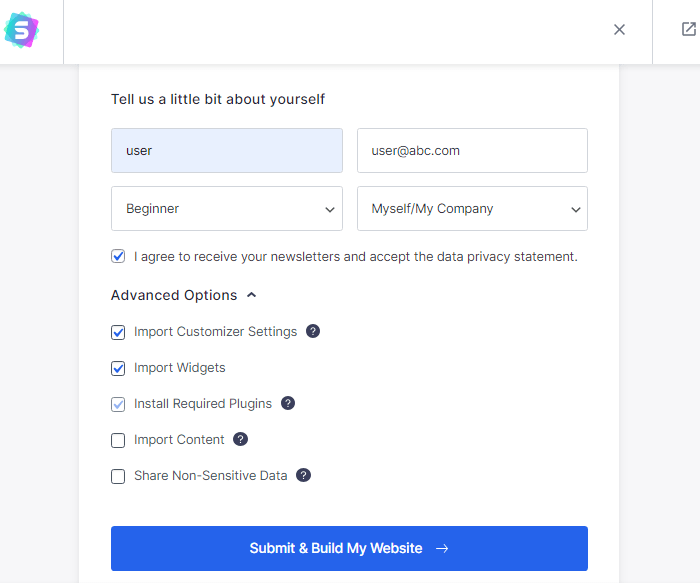
This helps when you already have content and are switching from another WordPress theme to Astra.
Note:- If you enable “Import Content”, you will get default content of that starter template loaded on your website. You do not want that to happen.
Step 8: Customize Your Astra Theme Website
Now that you have Astra Pro, you can customize your website anyhow you want.
If you have installed an Astra starter template, or are going to design everything by yourself. Either way, it is best to start with logo, site identity, website tagline and header design.
Followed, by menu items in the header.
For both of them, you need to head to Header Builder.
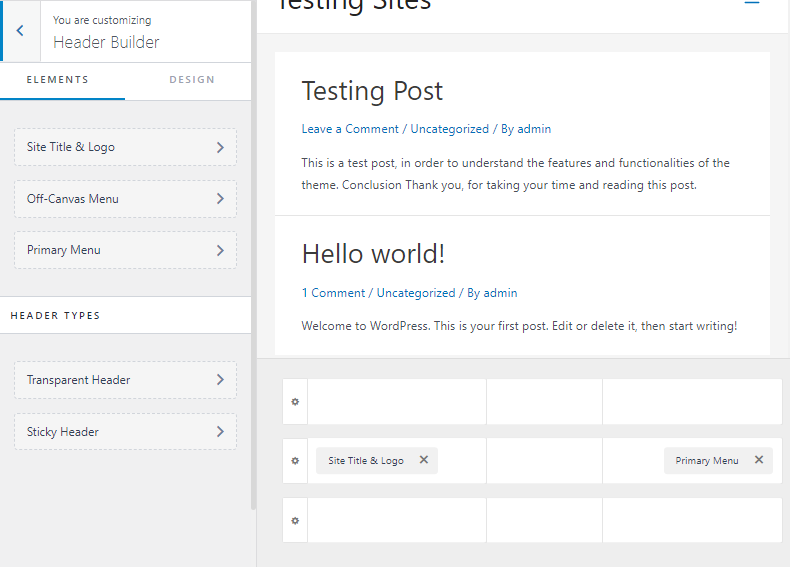
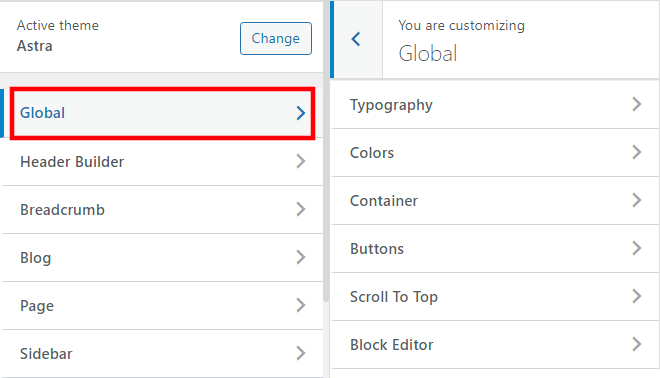
Next, add your brand colors and customize the fonts for headings, content, etc.
For that, you need to head to Global settings under the theme customizer.
If you have a blog page and several blog posts, then Astra pro gives you additional settings.
Start customizing the blog page and single blog posts.
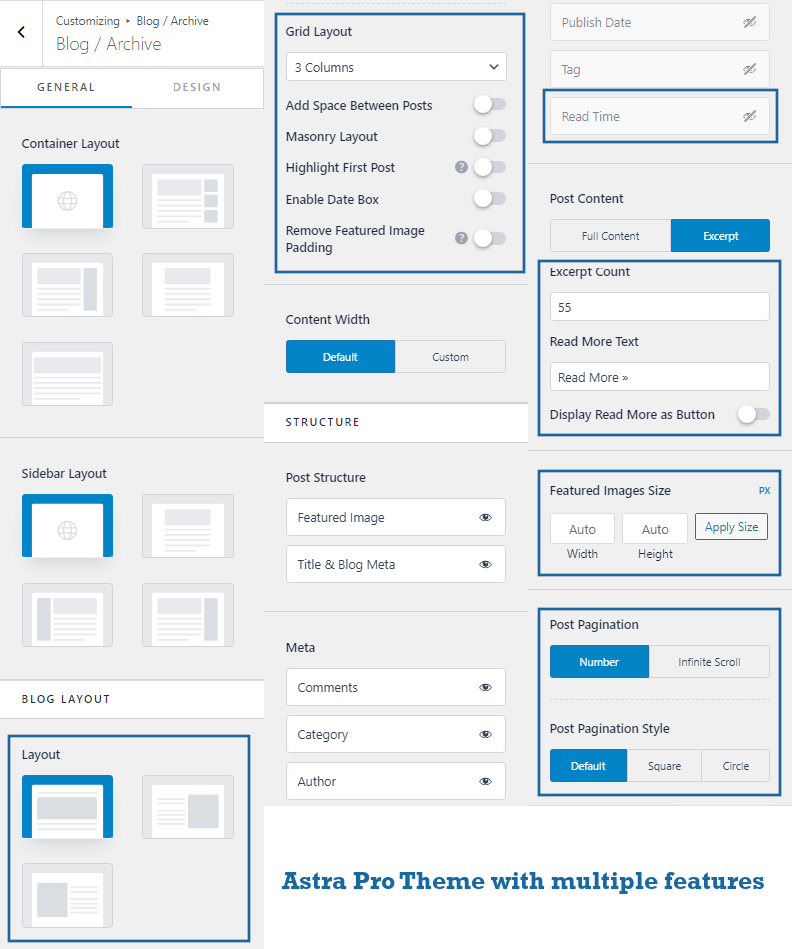
Multiple blog page layouts, grid layouts with columns, post pagination, etc. are all available with Astra pro.
There are added features for single posts and pages as well.
Before we end, Astra has a bulk edit plugin. In case you want to make changes to multiple pages or posts at once, use the Astra bulk edit plugin.
You can do a lot more.
For more advanced customization, you can go for WordPress blocks plugins like Stackable, Kadence Blocks or GenerateBlocks. Otherwise, if you’d like the page builder approach, simply go for Elementor.
FAQs- Switch Your WordPress Theme To Astra
Astra has over 1 million active installs on WordPress. This is by far the highest in number. Thus, I can say many users feel Astra is one of the best WordPress themes.
Astra is a WordPress theme.
Yes, Astra has built-in schema markup. Therefore, it is good for SEO.
Yes, you can easily change your WordPress theme to Astra theme.
On your WordPress dashboard, hover on Appearance, click on Themes, then click on Add New button. In the search bar, type Astra. Once you see Astra theme, click on Install, and then Activate.
After installing the free version of Astra, go to Astra Options, click on the customizer link settings one-by-one to set up things like site identity, brand colors, fonts, layouts, header, footer, etc.
Yes, Astra is beginner-friendly and very easy to use and setup.
Astra pro plugin offers you sticky header feature, not the free version of Astra.

