In this GenerateBlocks tutorial we are going to learn how to easily create a top bar using GenerateBlocks flex styling options and sizing controls.
Very recently, GenerateBlocks has come out with their latest update called GenerateBlocks 1.7 that consists of some major changes. Taking a brilliant step towards how users can easily control their website layout.
This is a major release like the one we saw when they came out with GenerateBlocks 1.5 update.
GenerateBlocks Pro users will see GenerateBlocks pro 1.5 as their latest update with Accordion block and Tabs Block.
Unfortunately these two blocks are not seen in the free version of GenerateBlocks.
Yet, users running the free version will get to see flexbox styling, difference under container blocks, buttons block, and very handy sizing controls.
Steps to create Top Bar Using GenerateBlocks Flex Controls
- Insert an Outer Container Block with a max width of 100%
- Insert the first Inner Container Block
- Add a Button Container Block to insert 4 buttons block for social icons on Top Bar
- Insert the second Inner Container block
- Add a Headline block for Top Bar message
- Insert the third Inner Container block
- Add 3 Headline blocks for different language links on the Top Bar
What is a Top Bar?
The top bar or hello bar is also sometimes called as a notification bar. It is a horizontal banner that is at the top of your website and appears on all pages of your site.
Usually, it displays information like a sale or promotion, message from the vendor, and might even have some social links, and/or language switching links.
It could be kept sticky or left as it is. The point of keeping a top bar is to let your visitors know about an update from your side, capture leads, or send your visitors to certain part of your site.
How to Create a Top Bar Using GenerateBlocks 1.7?
You guessed it right, we are better off making this top bar using the latest GenerateBlocks features that have come with the 1.7 update.
To give you a clear understanding;
GenerateBlocks 1.7 comes with the usual blocks – Container, Gird, Image, Query Loop, Image, Buttons block.
But, gives you better web designing controls with Flex settings and Sizing controls.
GenerateBlocks Pro 1.5 comes with the following additional blocks.
- GenerateBlocks Tabs block
- GenerateBlocks Accordion block
In this tutorial, we will try to create a top bar design similar to image below.
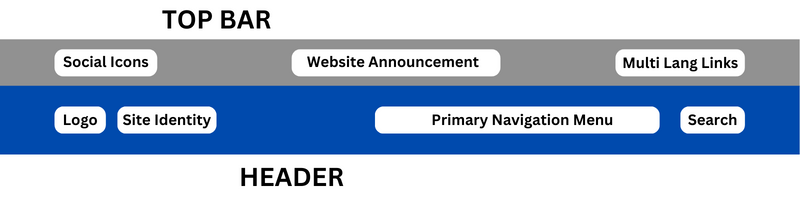
The grey background shows a top bar.
Notice, it is a full width element with three sections in it.
Before the GenerateBlocks 1.7 update, we had to create an outer container block holding a three column Grid block with various different elements into the Grid’s section.
Not to mention, also applying custom layout size for each Grid’s container.
This method required you to adjust the margins, padding, width, etc. of each and every element present in the Grid container and also apply appropriate horizontal gaps between those containers.
It used to be a time consuming task.
Now, with Flexbox layout settings and Sizing controls all of this can be achieved under 10 minutes.
Have a look at the image below to see what exactly I’m talking about.
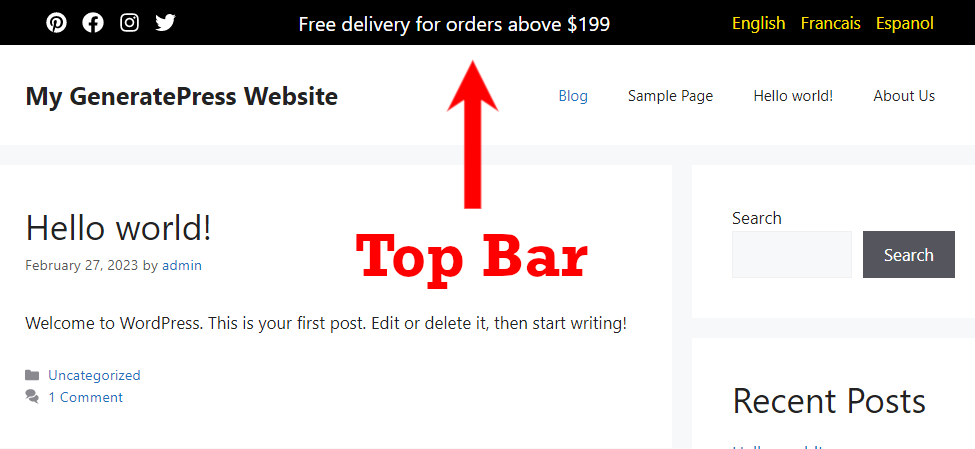
Let’s start.
Note:- I have created the Top Bar on a GP Premium website with free version of GenerateBlocks.
We need to start by creating a block element in GeneratePress. Elements are only available with GeneratePress premium.
Step 1: Create a GeneratePress Block Element
Since, we are creating a top bar that is going to be visible on all the pages of a website, I’m going to create a GeneratePress block element.
From your WordPress dashboard, hover your mouse appearance, and click on Elements.
Once the Elements page is open, click on Add a New Element and select Block element from the drop down list menu.
Step 2: Customize the GeneratePress Element Block
What I mean by customizing the GeneratePress Block Element is that give it an appropriate name, select Element type, and give Hook name.
Also, keep editor width to 100%, since top bars are always full-width of a website.
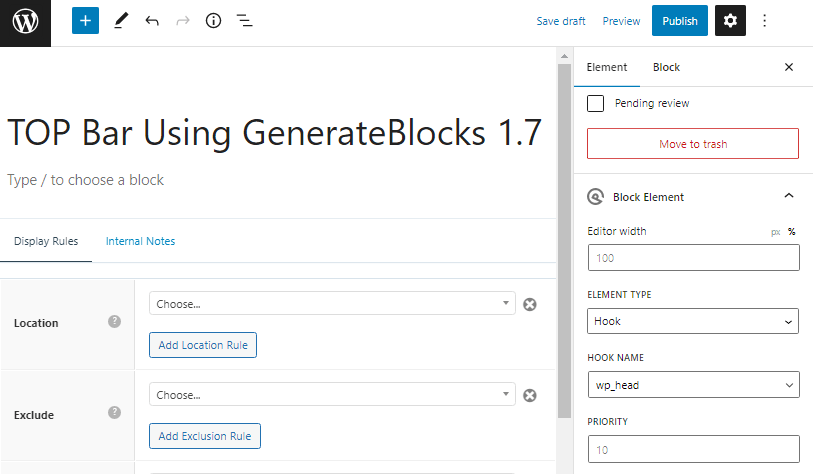
I have given the name ‘Top Bar Using GenerateBlocks 1.7’, you can give any name. It does not appear on the front end.
Leave the Editor width to 100% and Element Type to Hook.
Just select wp_head as Hook Type.
Note:- We will apply display rules to our block in the end.
Step 3: Add a GenerateBlocks Container Block and Customize it
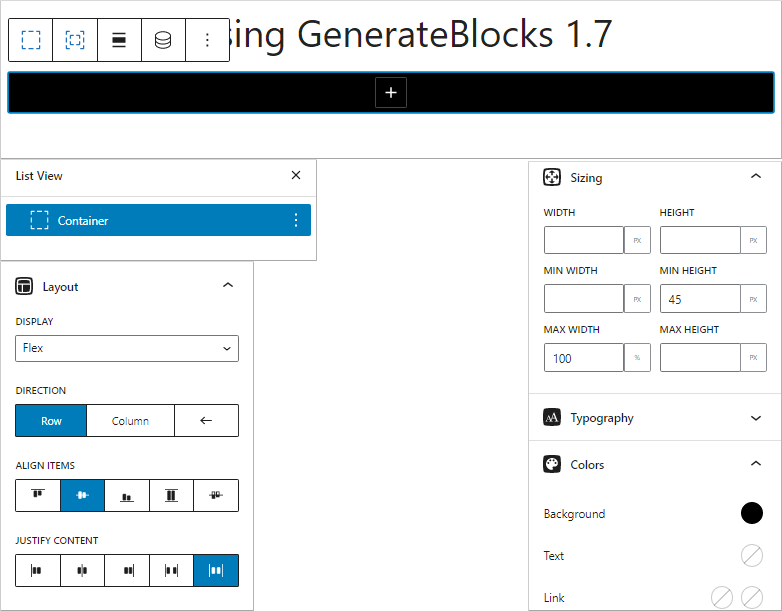
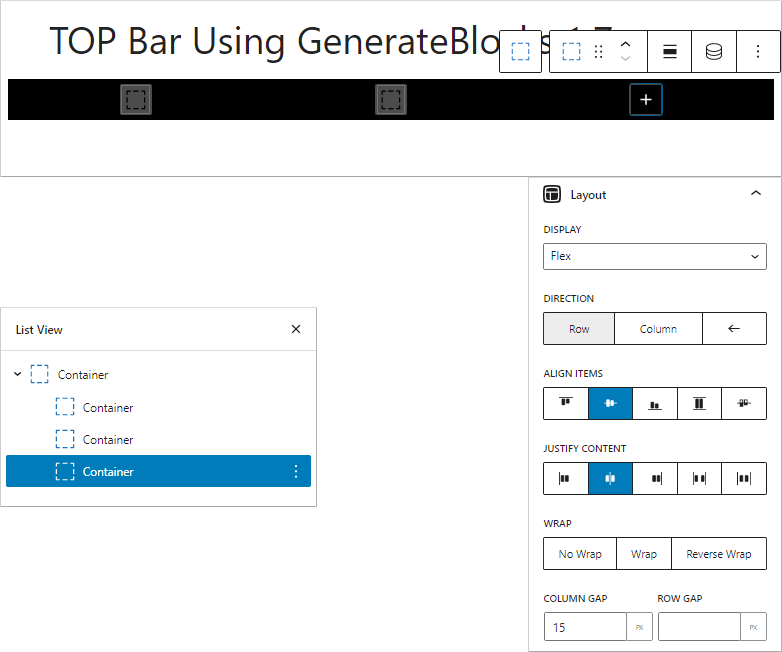
Click on the plus icon and add a GenerateBlocks container block. This is your outer container block (entire top bar) that holds all the other blocks in it.
Under Layout, choose to display the outer container block as Flex display, give flex direction as row, align flex items to center, and justify content with space around.
What is happening in CSS is that, GB is using display: flex, flex-direction: row, align-items, and justify-content properties under the main axis of the flex container.
Earlier, you had to code all of this. But, now you can simply click to achieve the desired results. Like I said earlier, with this update, GenerateBlocks is giving granular design controls and saving you lots of design time.
Under Sizing controls, give minimum height to your top bar of 45 pixels and set the maximum width to 100%
Also, apply a black background to the GenerateBlocks outer container block.
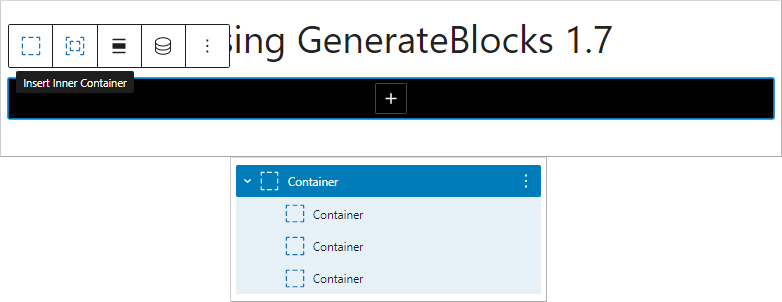
Step 4: Create Three Inner Container Blocks
In the GenerateBlocks 1.7 update, if you need an inner container block, you will have to click on ‘Insert Inner Container’ icon.
Since, the automatic insertion of inner container block within the outer container block has been removed.
Again, this has been done to reduce additional DIV elements in the DOM. However, if you need an inner container, you can easily create one.
These three inner container blocks will contain three sections – social icons, website announcement message, and multiple language links.
Before GenerateBlocks 1.7, we had to create a three column Grid block, adjust margins & padding, set grid column layout percentage to fit everything in line. This used to take up a lot of time.
In this step, you just press the icon to insert an inner container and duplicate that twice to get a total of three inner container blocks.
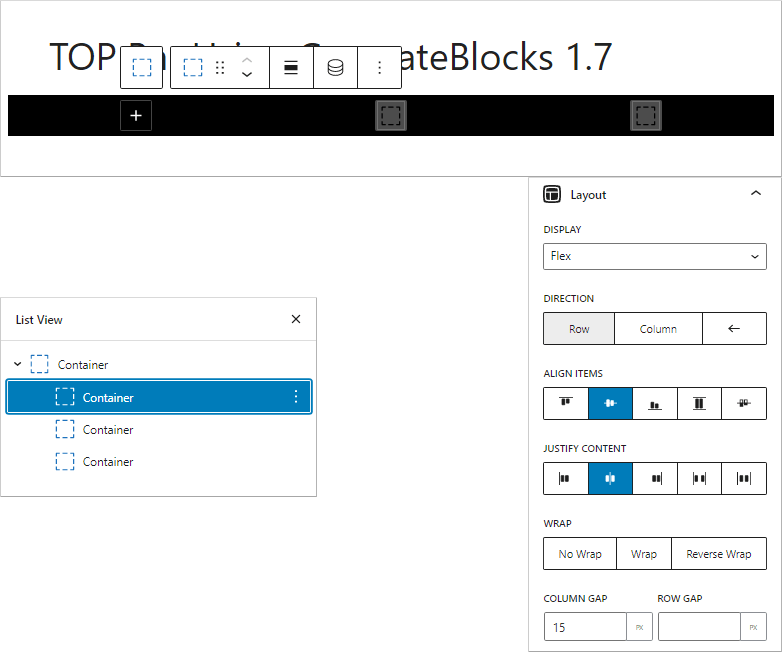
Step 5: Customize the First Inner Container Block
Change the first Inner Container block layout from default to flex.
We need our internal elements to align and justify in the center. Therefore, also select the options to align items and justify content to center.
Since, this container is going to house four social icons, we need to give some space between them. Hence, apply column gap of 15 pixels.
Step 6: Customize the Second Inner Container Block
Similarly, customize the second inner container block like the first one.
Make the layout as flex display, align items and justify content to center.
Just don’t give any column gap, since there is going to be only one website announcement created via a headline block, in this inner container block.
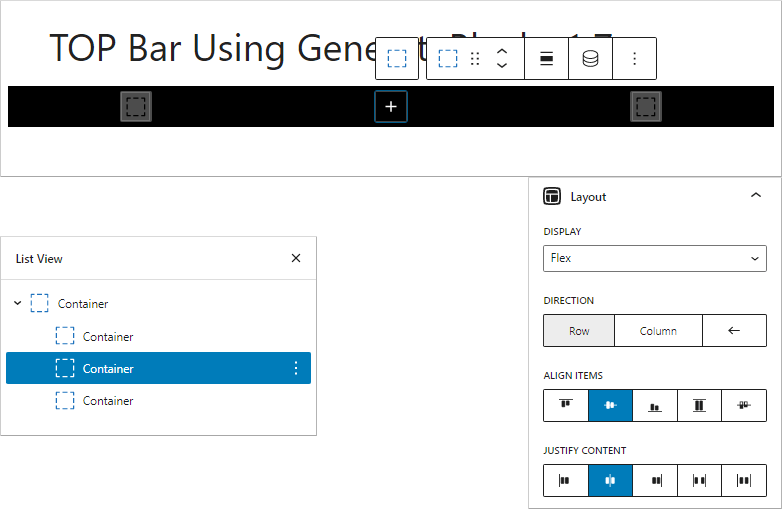
Step 7: Customize the Third Inner Container Block
Just like the first inner container block, this one has also got multiple blocks in it.
Hence, you not only need to select flex layout and align items with justifying content in center, but also apply a column gap of 15 pixels.
This inner container block will contain three headline blocks displaying multiple language links.
Step 8: Add Social Icons to First Inner Container of GenerateBlocks Top Bar
After customizing all the three inner container blocks, it is time to now add elements into them.
The first Inner Container contains social icons.
Let us add them and customize them simultaneously.
We will create the social icons using GenerateBlocks button blocks.
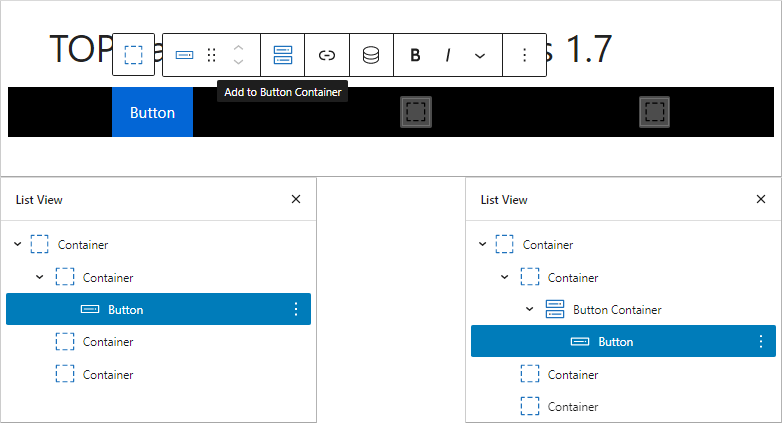
Add a GenerateBlocks button block.
Like the Container block, GenerateBlocks has removed the automatic creation of button container.
Since, you need 4 social icons, click on the ‘Add to Button Container’. This will add a GenerateBlocks Button Container with a Button block in it.
By default, a GenerateBlocks button block comes with some padding around it. Remove all the padding, select the social icon, toggle the ‘Remove Text’ switch, and increase the icon size to 1.25em.
Set the button (icon) background color of normal and hover to black.
Now, you just need to duplicate the Button block three more times, change the social icon, and apply your social links to it.
Since, the inner container block has got a Button container block, it has inherited the flex layout from the inner container block, without the column gap.
Therefore, under Column Gap, increase it to 15 pixels.
In the back end, column-gap CSS property is used on the flex container (button container) that is housing multiple elements and setting the gutter gap between them as 15 pixels.
Step 9: Add Website Announcement Message to Second Inner Container of GenerateBlocks Top Bar
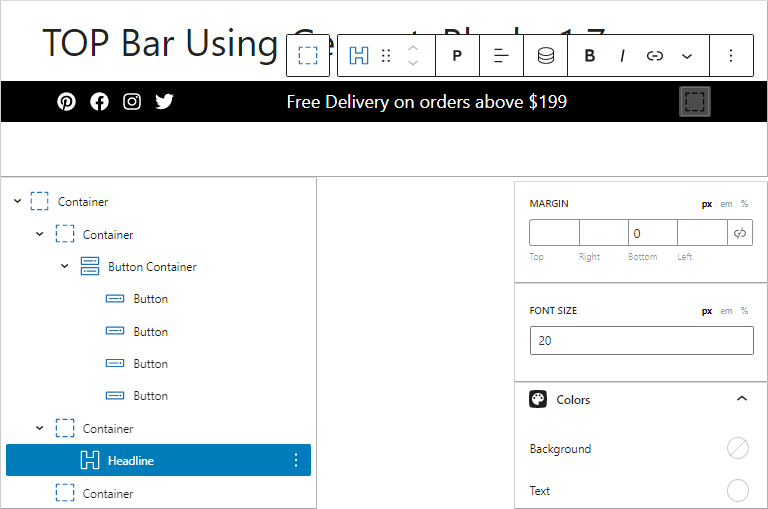
For adding a website announcement message, simply click on the second inner container block and add a GenerateBlocks Headline block.
Change its tag from H2 to Paragraph tag.
Increase its font size to 20 pixels.
Change text color to white.
By default, GenerateBlocks adds 25 pixel bottom margin to its Headline block. We do not need it, so remove the bottom margin.
Step 10: Add Multiple Language Links to Third Inner Container of GenerateBlocks Top Bar
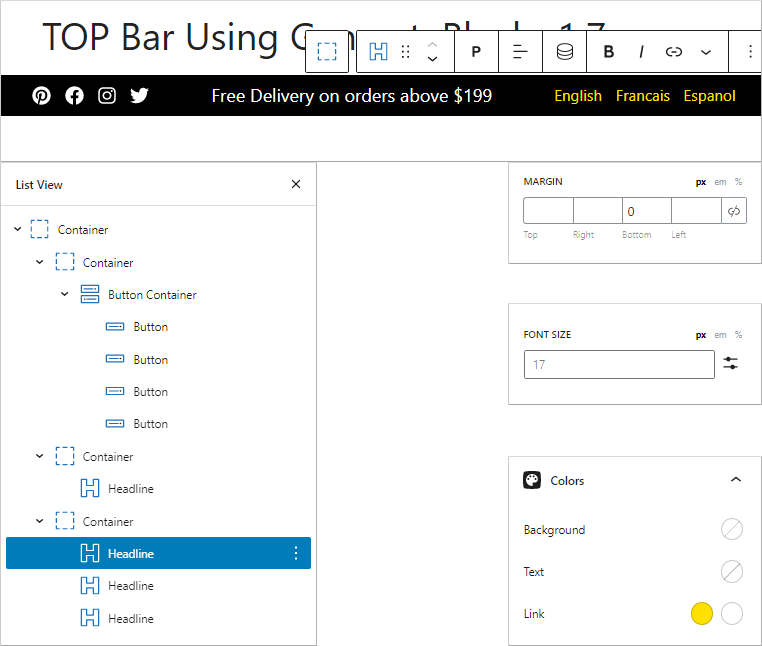
In the third inner container block, add a Headline block and change its tag from H2 to paragraph tag.
Leave the font size to 17 pixels give appropriate link color for normal and hover conditions.
Duplicate the block two times to get a total of three headline blocks, update the text, and apply appropriate links to all the headline blocks.
Step 11: Apply Display Rules to the GeneratePress Block Element
We have created a Top Bar using GenerateBlocks, and now we need it to be displayed all over our website.
Hence, you need to select location as ‘Entire Site’.
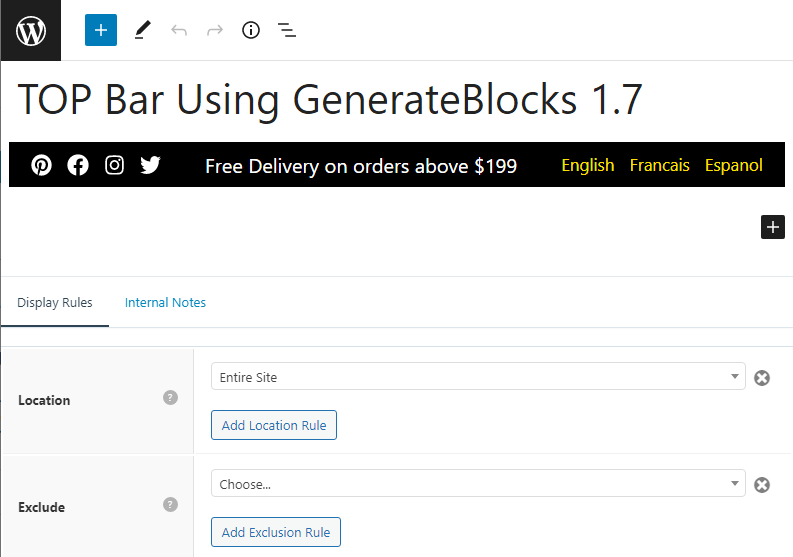
That’s it, all the steps are done.
You can finally publish your GeneratePress Block Element and see the Top Bar on the front end of your website.
Conclusion
See how easy it was to create a top bar.
Carefully read and implement the steps shown in this post and if you face any problem, let me know in the comments section.