Looking for how to add a header template in oxygen builder here is the step-by-step guide to accomplish this.
Oxygen builder is fast compared to its competitor Elementor. But Elementor is quite popular because of its ease of use for beginners.
Oxygen will be your favorite when you will become familiar with it. Some people face difficulty in adding header templates in Oxygen builder. Before working on the process of adding a header let’s have a basic understanding of the purpose of the header.
What is Header
A website header at the top of your website serves some very important purposes. The header is common for every page like the footer and sidebars. It is space for the website’s logo and navigation menu.
It may differ from website to website but most commonly it serves navigation, search bar, branding, and consistent browsing for your website.
Depending on the type of website it may contain a shopping cart, login/logout buttons, phone number or user profile link, etc.
Now we know what is to be added to a header and need to learn how to add a header using oxygen builder.
Oxygen Builder Installation
Oxygen builder is a plugin that acts as a page and theme builder. When you will install Oxygen Builder it will disable your preinstalled WordPress theme completely. In this condition, your theme’s style and layout will not work as long as Oxygen is active.
You can build header, footer, sidebar, and every element of your website with Oxygen Builder.
During installation of Oxygen, it will ask you to install either “Default Installation” or “Blank Installation”
If you want to use a prebuilt template you can choose Default Installation set up and if you want to build everything from scratch you can install Blank Installation.
In Default Installation, Header and Footer will be added while in Blank Installation page builder will be installed without Header and Footer.
How to Build Custom Header Template with Oxygen Header Builder
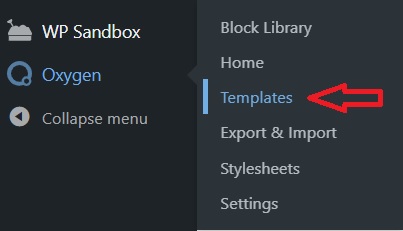
Step 1: First of all go to Oxygen tab in the main WordPress Dashboard and click on Templates.
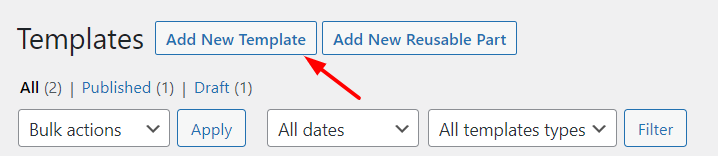
Step 2: Now click on Add New Template
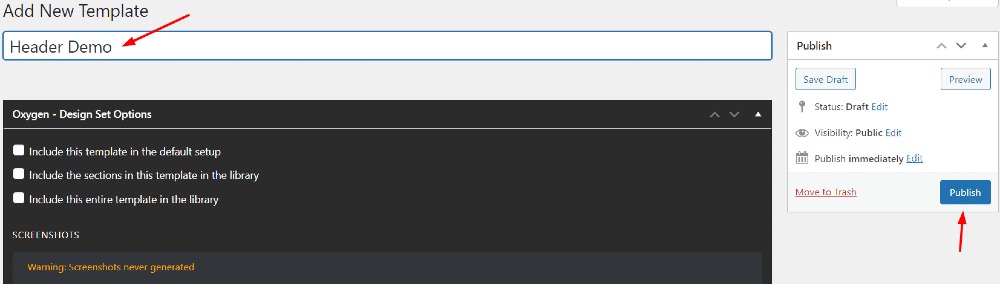
Step 3: Give a name to Header and hit Publish Button
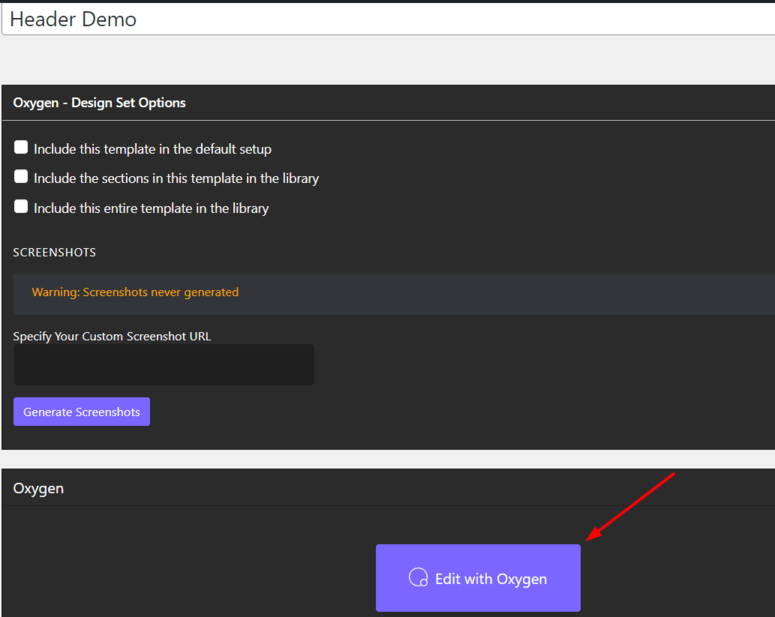
Step 4: After hitting publish button, a button Edit with Oxygen will appear on the same page. Click on Edit with Oxygen.
Step 5: This is the interface where we can add and customize header and other elements. Click on + icon to Add New Element
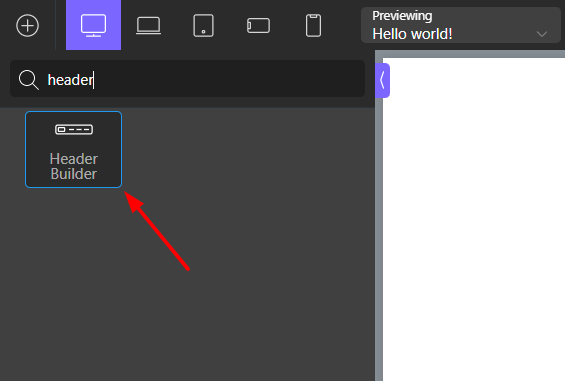
Step 6: Search for Header in the search bar and click the Header Builder icon to add the header.
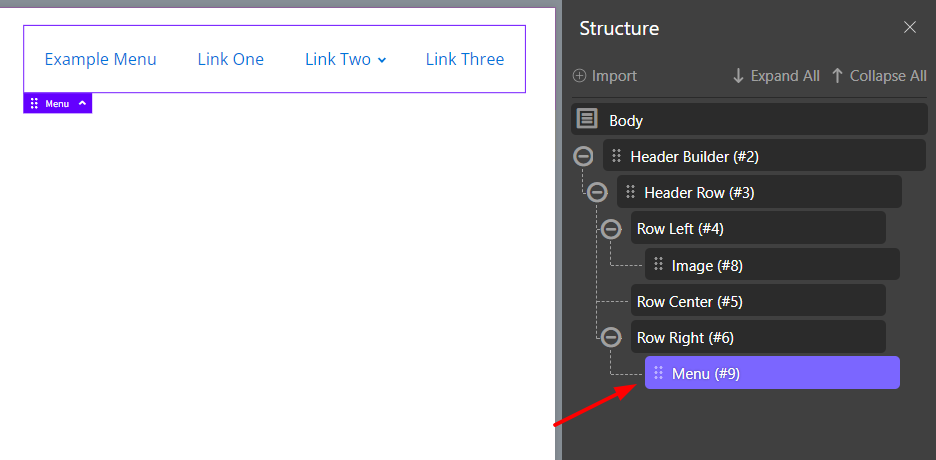
Step 7: Click on structure button to view and edit structure of header. From this structure tab you can move
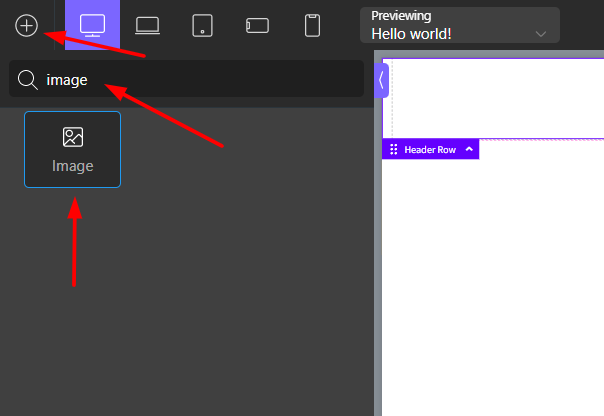
Step 8: Click on the + icon and search image. Now click on Image tab to add logo of your website.
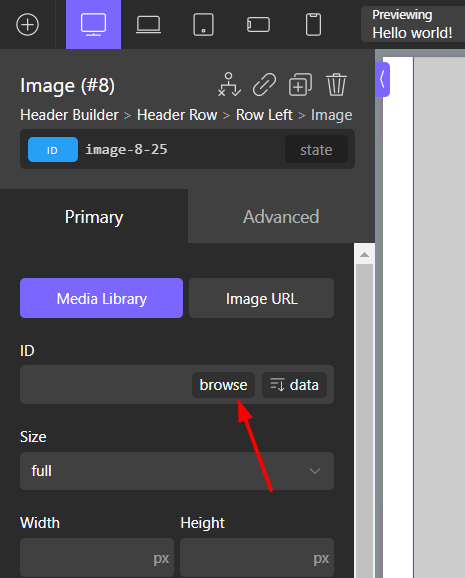
Step 9: Now click on browse button to upload image.
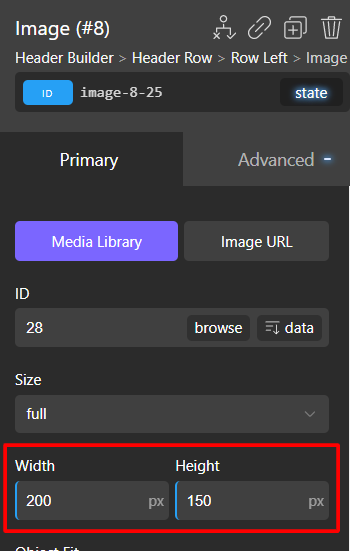
Step 10: You can resize image according to your requirement.
Step 11: Click on the + icon and Search Menu in the search bar.
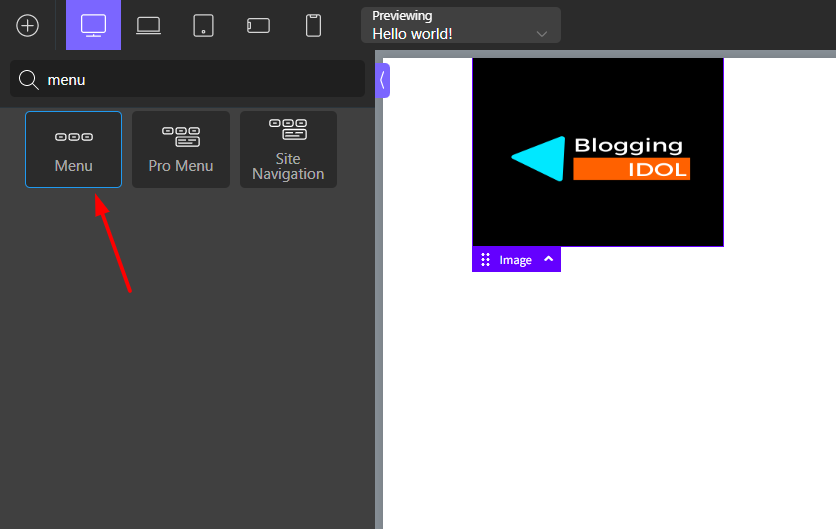
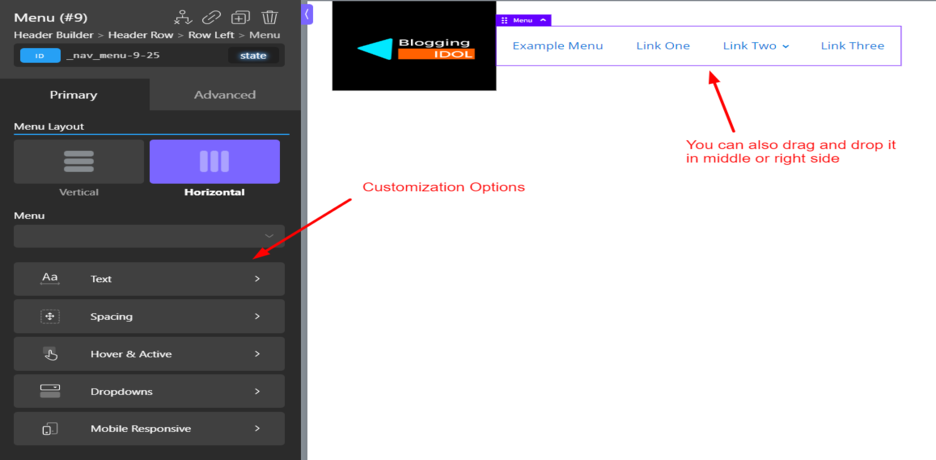
Step 12: You can change the location of this menu i.e. you can drag and drop in left, middle or right side. You can also change its location from settings under structure tab.
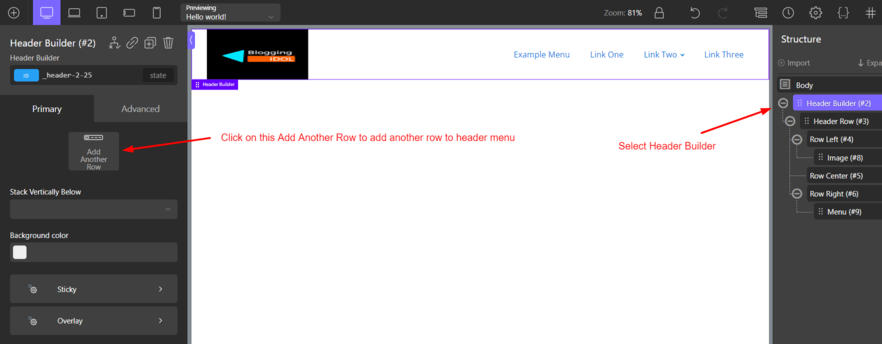
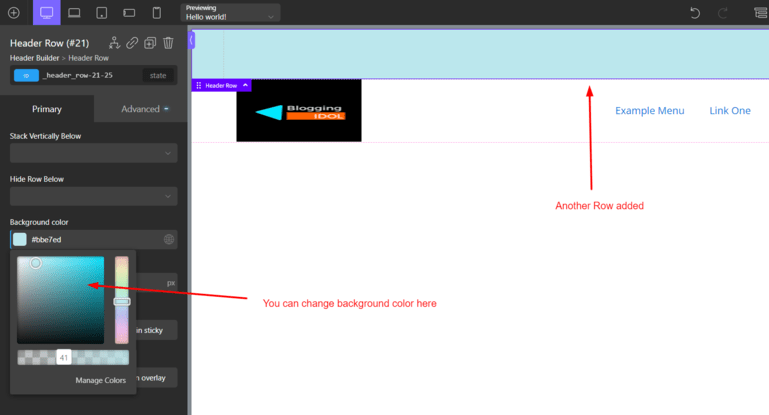
Step 13: If you want to add another row to the header menu, you have to select Header Builder from structure tab. Then Add Another Row will appear in the left side under Header Builder. Click on Add Another Row and a new row will be added to main menu.
Step 14: You can change background color of this new row and also do more customizations.
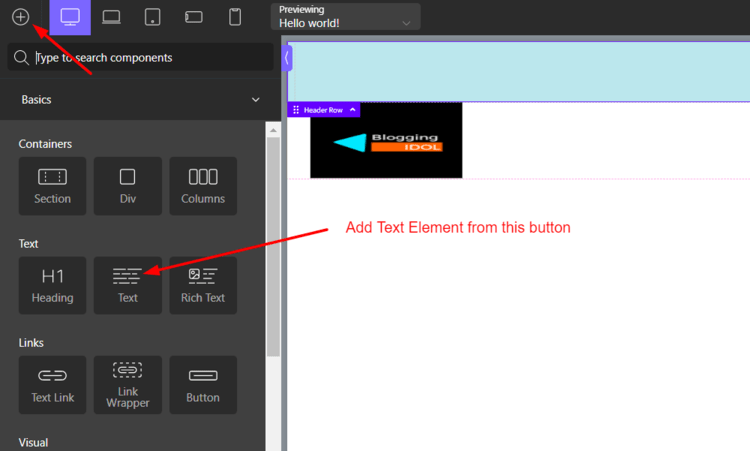
Step 15: We can add some text to this newly added row. To do that Click on the + icon and search text. Click on the text tab.
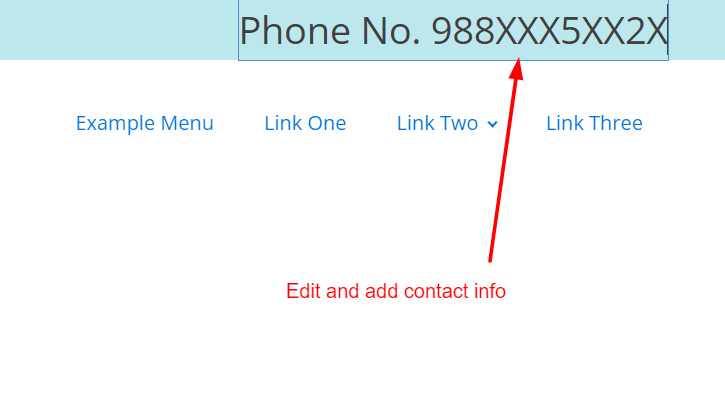
Step 16: You can edit text and add contact info or whatever you want to add.
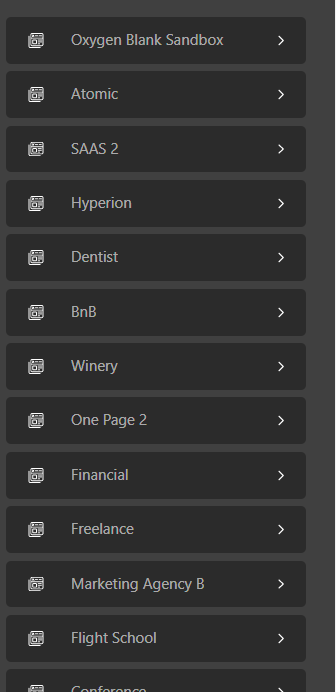
Add Header Using Prebuilt Templates
If you want to use prebuilt templates you can follow these steps.
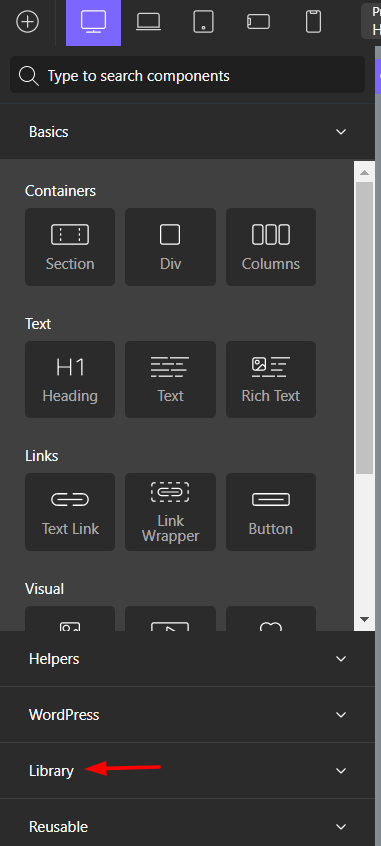
Step 1: Click on +icon and go to Library Tab.
Step 2: Now click on the Design Sets tab under Library Tab.

Step 3: Go to any design and look for Sections & Elements. Now expand this.
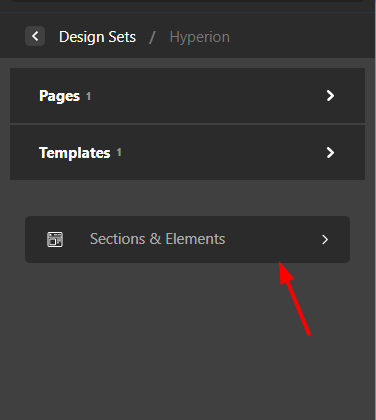
Step 4: Look for Header’s tab expand this and find Headers. Now choose your header from the list.

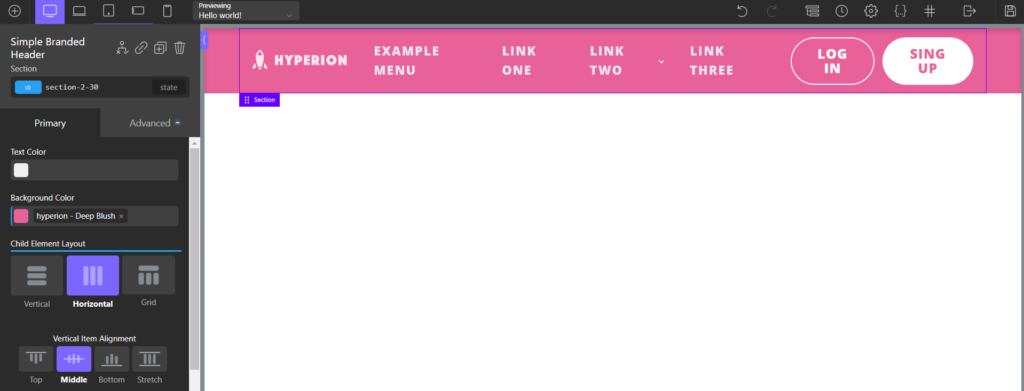
Customize this prebuilt template as we did for custom template.
More Related Articles to Read: