In this Kadence Blocks tutorial, you will learn how to create a Pros and Cons box using Kadence blocks.
To create this pros and cons section, I have used the free version of Kadence blocks on a Kadence pro website.
To understand what are features you get with free version and Kadence blocks pro, have a look at the Kadence blocks review post.
Steps of pros and cons box using Kadence blocks
- Insert an outer Kadence Row Layout block with 850 pixels max width
- Add an Inner Kadence Row Layout block with two sections; for pros and cons
- Customize Pros section
- Add first Row Layout block in pros section for background icon
- Add second Row Layout block in pros section for thumbs-up icon
- Add third Row Layout block in pros section to hold ‘Pros’ title and Pros points
- In the third Row Layout add Advanced Text block for ‘Pros’ title
- Again, in the third Row Layout add Icon List block for pros points
- Use Kadence Copy and Paste styles from Section 1 to Section 2
- Copy all 3 Row Layout blocks from Section 1 to Section 2
- Modify colors, icon, and icon list accordingly
Why Create a Pros and Cons box using Kadence Blocks?
Kadence blocks does not come with a built-in pros and cons box. Thus, you will need to create one.
Firstly, if you already have Kadence blocks, it is easy to follow the steps and create a pros and cons section.
Secondly, Kadence blocks works on all WordPress themes.
Third, displaying a pros and cons section for a product or service review is beneficial for your readers.
If you are a blogger, affiliate marketer or review publisher, displaying a pros and cons table is very important. Your visitors rely on positive and negative points before making a buying decision.
Just like pros and cons box, displaying affiliate box and pricing tables are equally important for your website.
Steps to Create Pros and Cons Box Using Kadence Blocks
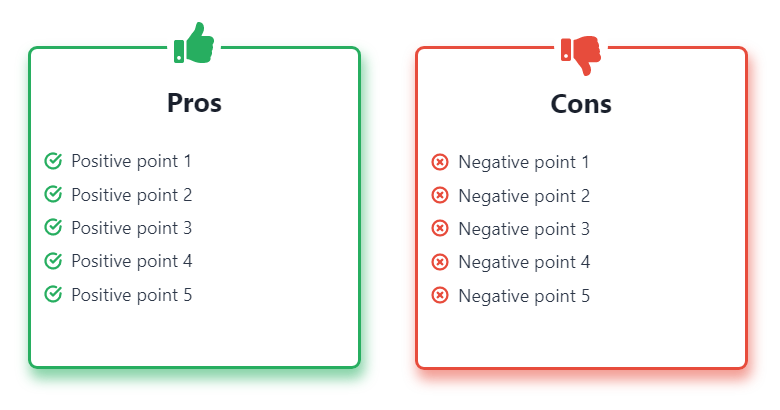
Before we start our step-by-step procedure, I’d like you to have a look at what we are going to create.
Time needed: 10 minutes
In this ‘how to’ guide, we are going to use Kadence blocks Row Layout block, Advanced Text block, Icon block, and Icon List block.
- Start by adding a Kadence Row Layout block
First, you need to add a Kadence Row Layout block. Hit the plus icon, add a single column Row Layout block, give overall padding of 25 pixels and under Structure settings give Custom Content Max width of 850 pixels.
Note:- To keep the page content width, select Inherit from theme.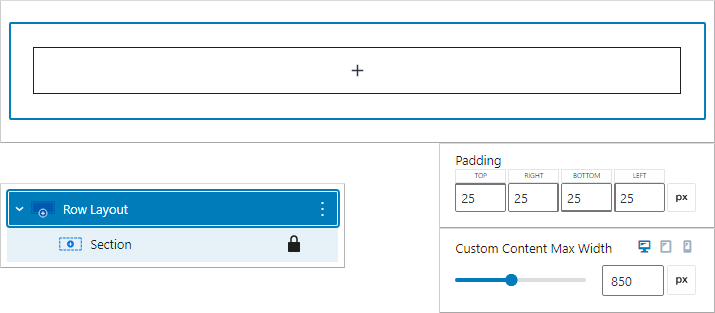
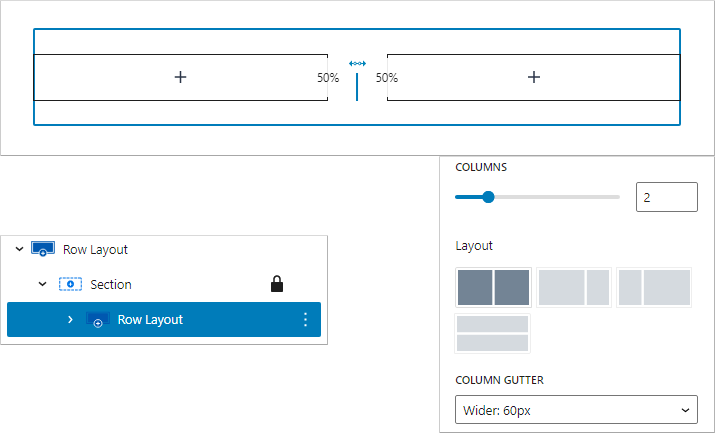
- Add a two column Row Layout block for Pros and Cons sections
Next, from the list view, click on the outer Row Layout block’s section and add a two column Row Layout block.
A two column Kadence Row Layout block gives you two sections. We will use the first section for the pros box and second section for the cons box.
Also apply a Column Gutter width of 60 pixels.
- Customize the first section for Pros box
To customize the first section for Pros box, go to the list view, click on the first section under the 2 column row layout block then change padding, apply border, border color and box shadow to border.
Follow the customization;
Top padding – 10 pixels
Right padding – 15 pixels
Bottom padding – 10 pixels
Left padding – 15 pixels
Border Styles
Width – 5 pixels overall
Radius – 10 pixels overall
Color – 27AE60
Box shadow – Color:27AE60 alpha 0.55, X:3, Y:10, Blur:14, Spread:1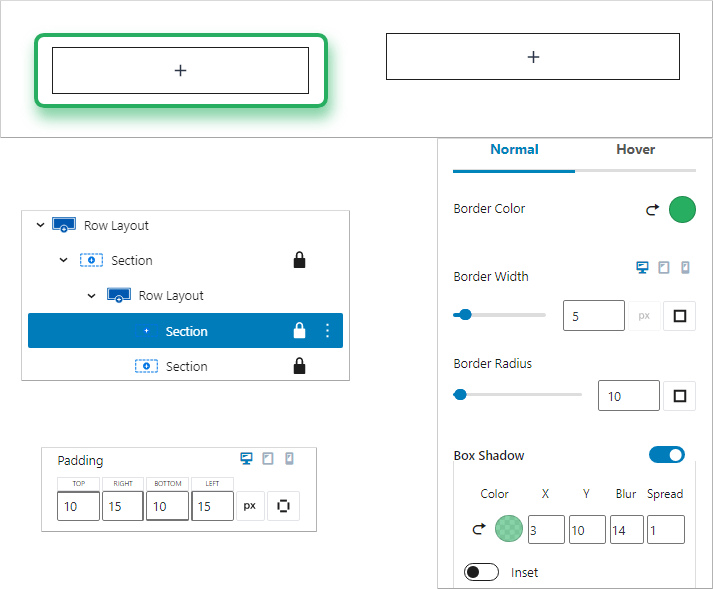
Now, we will need to add two Kadence Row Layout blocks, each having one Kadence Icon block. - Add the first Kadence Row Layout block in the section
Go to the list view, click on the section and add your first Row Layout block.
Add a Kadence Icon block in this Row Layout block, and reduce the Row Layout block’s top margin to -85 pixels.
Change the Icon size to 90 and color to FFFFFF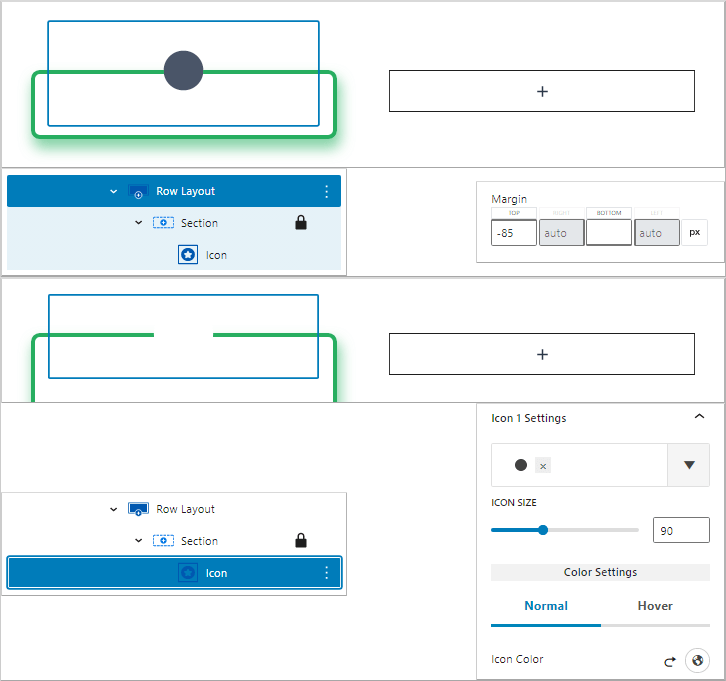
- Add the second Kadence Row Layout block in the section
Again click on the section and insert another Row Layout block.
Reduce the Row layout’s top margin to -135 pixels.
In this Row Layout block, add another Kadence Icon. This time you need to find the thumbs-up solid icon.
By default the icon size will be 50, leave it to that. Just change the icon color to 27AE60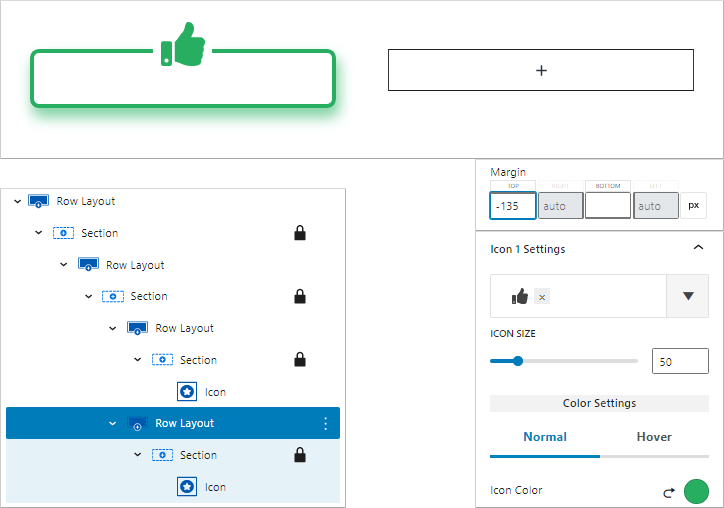
This way you can give a better appearance to your thumbs-up and thumbs-down icons for pros and cons sections respectively. - Add the third Row Layout block for ‘Pros’ title and pros points
Go to the list view, click on the pros section, and add the third Row Layout block.
In this Row layout block, we are going to add Kadence Advanced text block and Kadence Icon List block.
The Advanced Text block will hold the ‘Pros’ title, and the Icon list block will display all the pros points.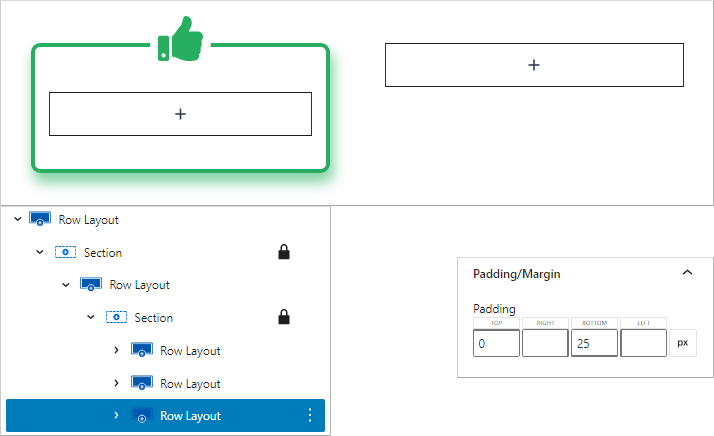
- Add Kadence Advanced Text block for ‘Pros’ title
Under the third Kadence Row Layout block, click on the Section and add a Kadence Advanced Text block.
Align to center and change the heading tag to H3, because your Pros and Cons section will already have a H2. So make sure that the ‘Pros’ and ‘Cons’ titles in each section are H3.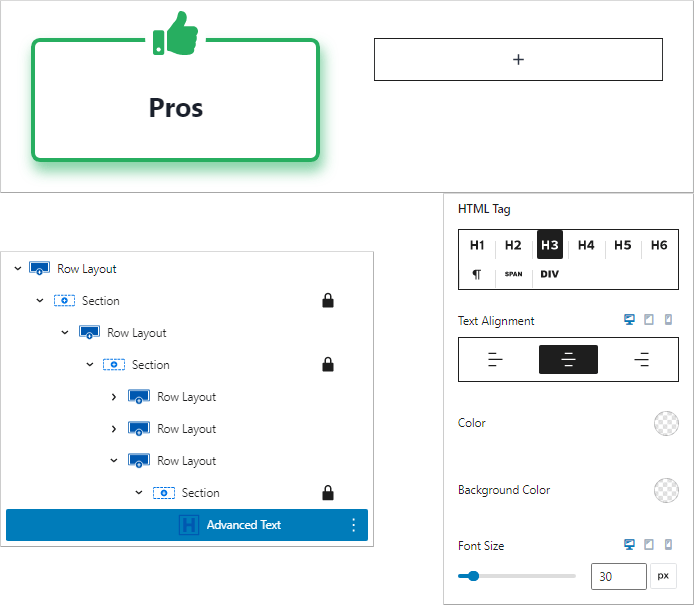
- Add Kadence Icon List block for pros points
Now that you have completed adding the ‘Pros’ title, add a Kadence Icon List block for inserting the pros points.
An Icon list block comes with icons on the left side, giving a neat list style look.
Go to the third Kadence Row Layout’s section and add Icon List block. Add multiple lists to describe the positive points.
Perform the following customization;
Font size – 20 pixels
Under Edit All Icon Styles Together
Icon size – 20
Line width – 3
Icon color – 27AE60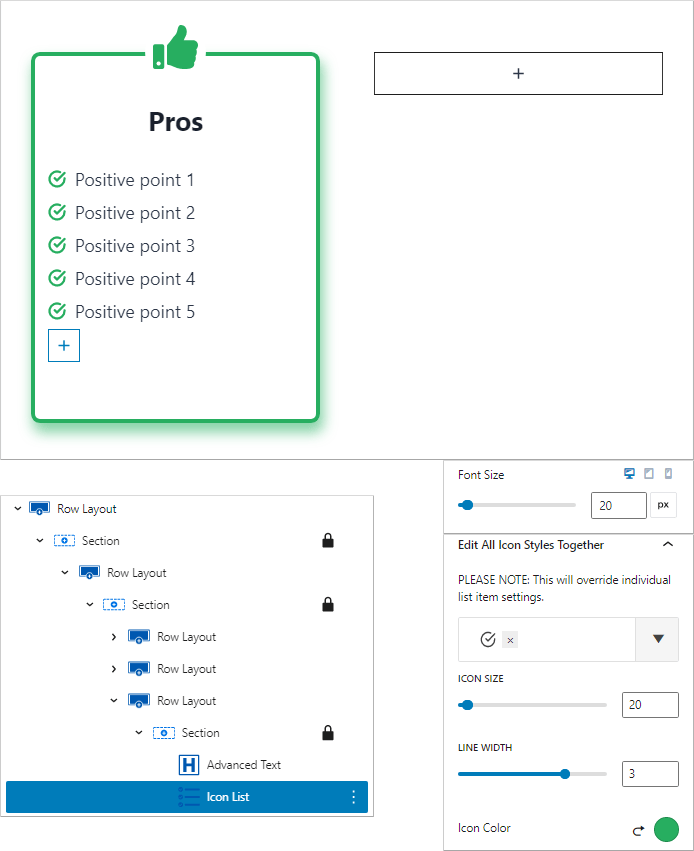
- Use Kadence Copy/Paste Styles feature
Since, we have already made the pros section, you need to copy and paste styles to the next section (cons section).
For this, you need to go to list view, click on pros section block and from the option above, click on copy styles.
Then, click on the Row Layout block’s next section and paste those styles.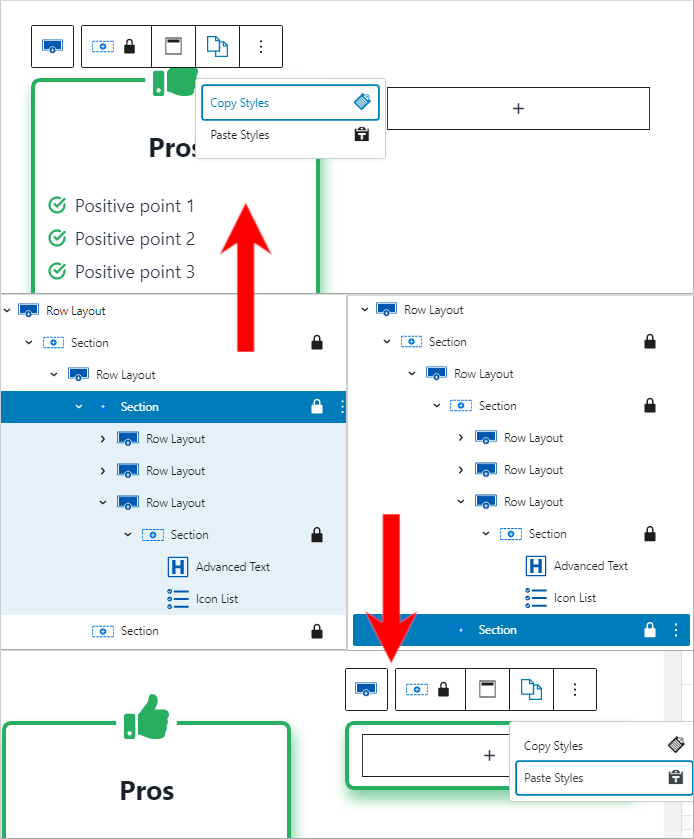
- Copy the 3 Row Layout blocks of ‘Pros’ section and paste into ‘Cons’ section
To make our work simpler let us copy the 3 Row layout blocks from the ‘Pros’ section and paste them into the ‘Cons’ section.
Go to list view, drop down the section that holds all the 3 Row layout blocks, select all of them, and copy the blocks.
Now, go to the next Section block, insert a paragraph block, and then paste your copied blocks.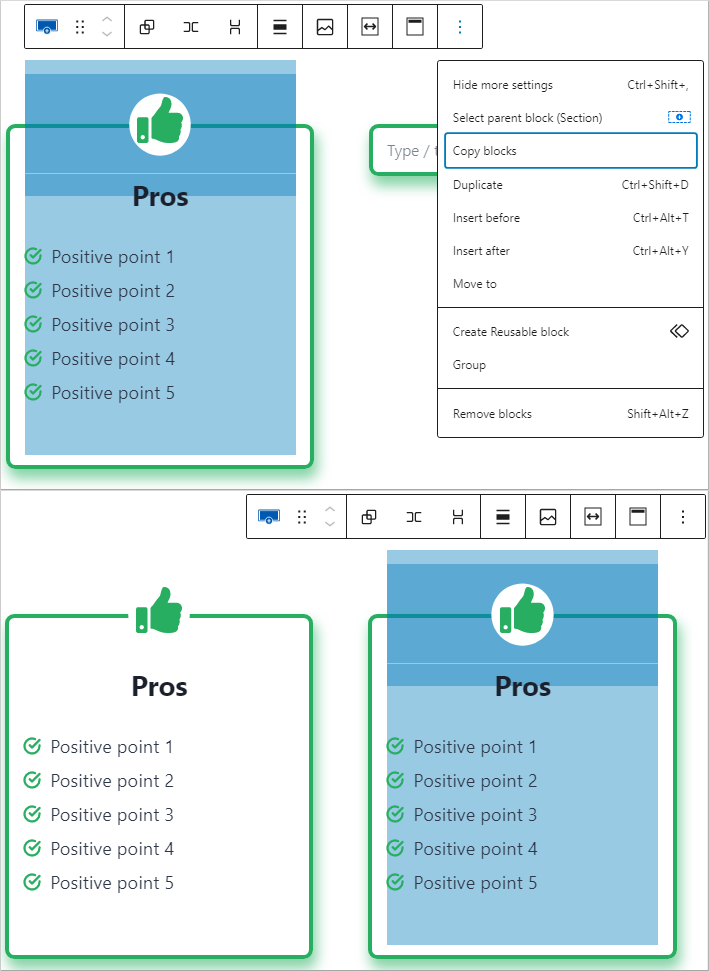
- Change Border color, Icon, Icon color, and title of section to ‘Cons’
You need to change the border color, icon color and title to ‘Cons’.
From the list view, click on the Section, change border color and box shadow color to E74C3C
Just change box shadow alpha channel settings to 0.55, remaining settings are same as the ‘pros’ section.
Also, go to 2nd Row Layout block and modify the Icon from ‘thumbs-up’ to thumbs-down’.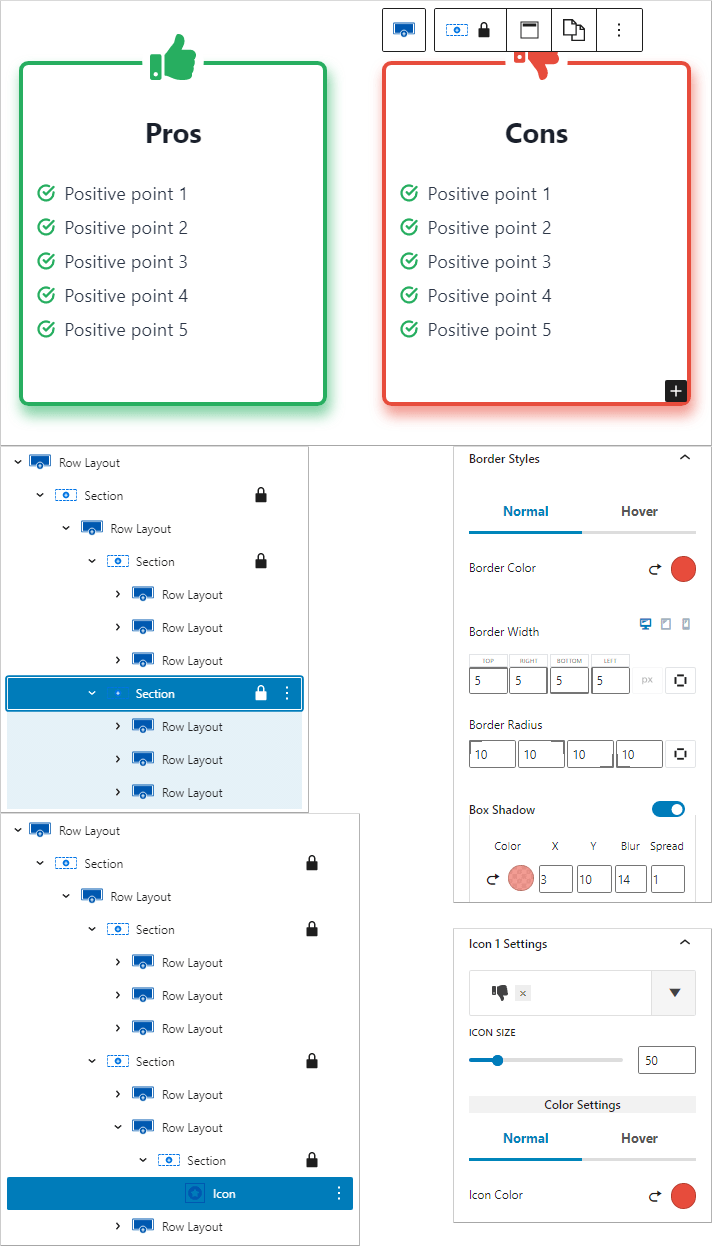
- Adjust the margin of the Icon block and modify Kadence Icon List block
If you carefully see the ‘Cons’ section’s thumbs-down icon, we need to re-adjust the margin to make it vertically aligned with the thumbs-up icon of the ‘Pros’ section.
From the list view, go to the 2nd Row Layout block of section 2 and reduce the top margin to -120 pixels.
Plus, go to the 3rd Row Layout block, click on the Kadence Icon List block, under ‘Edit All Icon Styles Together’, change the icon type.
Finally, update your cons with drawbacks (negative points).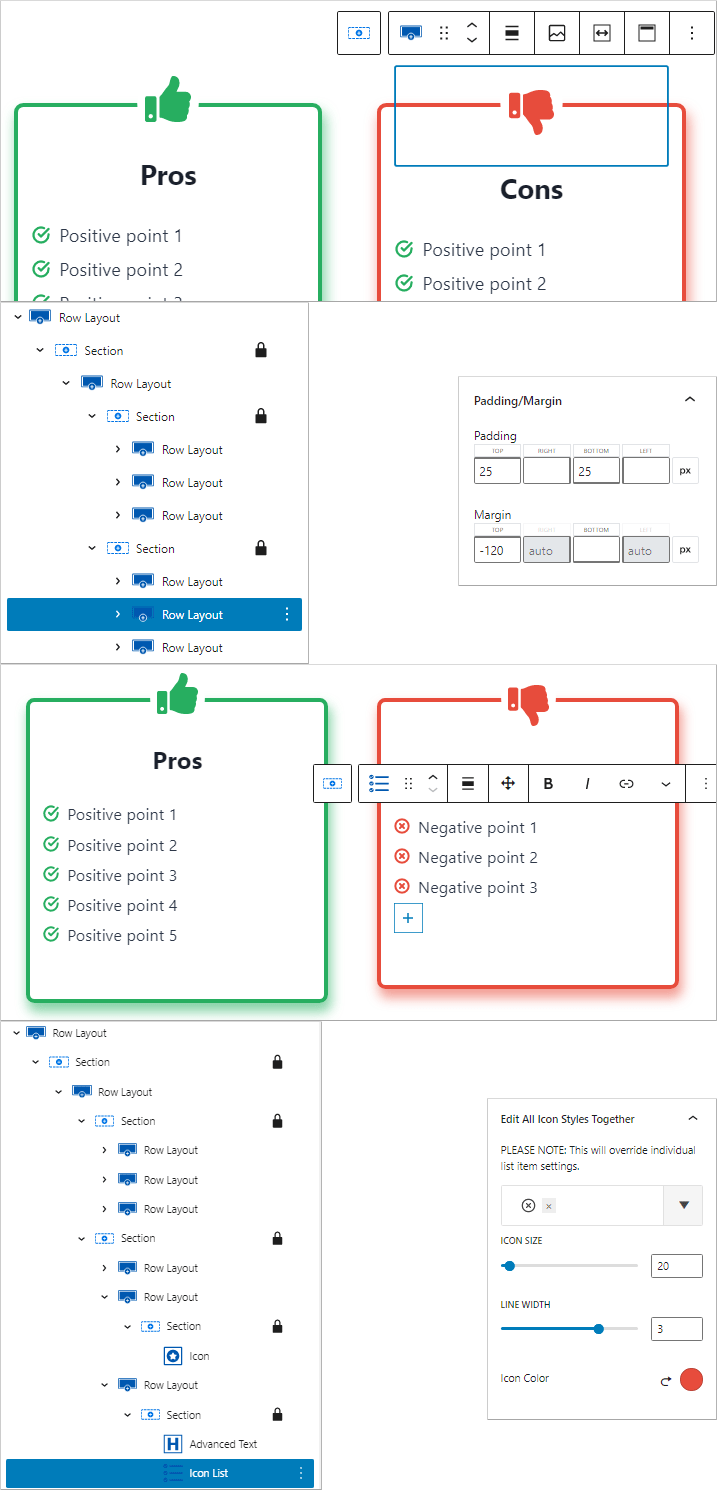
Summary – Pros and Cons Box Using Kadence Blocks
If you have followed all the steps until here, congratulations. You have successfully created a pros and cons box in WordPress theme using Kadence Blocks.
It is easy and does give a richer text look to your reader, making them focus on the most crucial positive and negative points before buying a product.
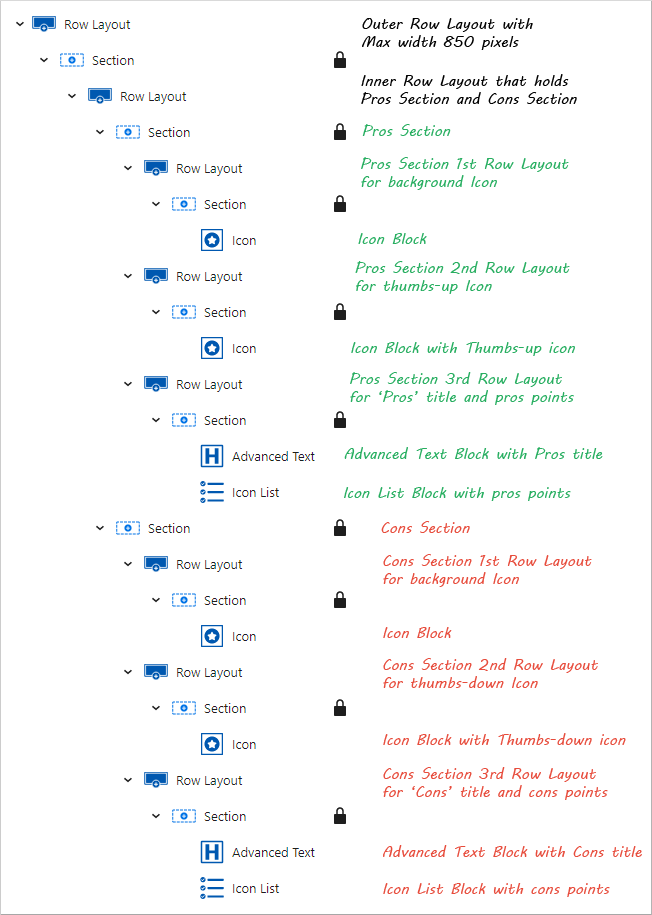
For your reference, I’d like to show you an image of the entire list view created for making this pros and cons section at my side.
Conclusion
I hope you’ve learnt how to create a beautiful looking pros and cons box using Kadence blocks.
With the help of Kadence blocks you can also create things like
Make sure to check them out and try them on your website.