
In this Blocksy theme tutorial, we will look at how to create a complex header with Blocksy Header Builder.
For doing so, I will first show an image of an eCommerce header that contains three-rows.
Later, we will try to imitate that header. By creating a same header using the Blocksy header builder and various other header elements.
Since, eCommerce websites have a lot of links (navigation) and other header elements, it will be the best challenge by choice. Plus, the header should also be mobile responsive.
Blocksy Header Elements Overview
You can build a beautiful website header using Blocksy free or pro. The header builder is available with the free version of the theme as well.
To put it briefly, Blocksy free version comes with fewer header elements. Therefore, it might require you to add HTML shortcodes here and there to create a complex header.
To learn everything about this theme, have a look at my Blocksy theme review
Have a look at the chart below and analyze for yourself.
| Blocksy Header Elements | Blocksy Free | Blocksy Pro |
|---|---|---|
| Account | ✓ | ✓ |
| Button | ✓ | ✓ |
| Cart | ✓ | ✓ |
| HTML | ✓ | ✓ |
| Menus 1 & 2 | ✓ | ✓ |
| Mobile Menu 1 | ✓ | ✓ |
| Logo | ✓ | ✓ |
| Off-Canvas Logo | ✓ | ✓ |
| Socials | ✓ | ✓ |
| Search | ✓ | ✓ |
| Contacts | ⨉ | ✓ |
| Divider | ⨉ | ✓ |
| Language Switching | ⨉ | ✓ |
| Mobile Menu 2 | ⨉ | ✓ |
| Menu 3 | ⨉ | ✓ |
| Search Box | ⨉ | ✓ |
| Trigger | ⨉ | ✓ |
| Wishlist | ⨉ | ✓ |
| Widget Area | ⨉ | ✓ |
From the chart above, I’d say the following are crucial for any eCommerce or B2B service business;
- Contacts, for calling product owner/service technician before buying or booking
- Search Box, for category-based product searching
- Trigger, to give your visitors an impression that there is a mobile menu
- Widget Area, to show main categories vertically, from the header bottom bar
- Wishlist, to help visitors with their favorite products
These are one of those header elements that add up to a greater UX (user experience) for your site visitors, and are available with Blocksy Pro only.
Certainly, blogs and personal portfolio sites do not really need so many header elements, at least not in the beginning.
See what else is packed into Blocksy Pro, take a quick peek at
Sample Complex Header For Insipiration
Let us look at our sample header, the one which we will use for inspiration.
This is a Flatsome theme eCommerce header. It has three rows; top row, middle row and a bottom row.
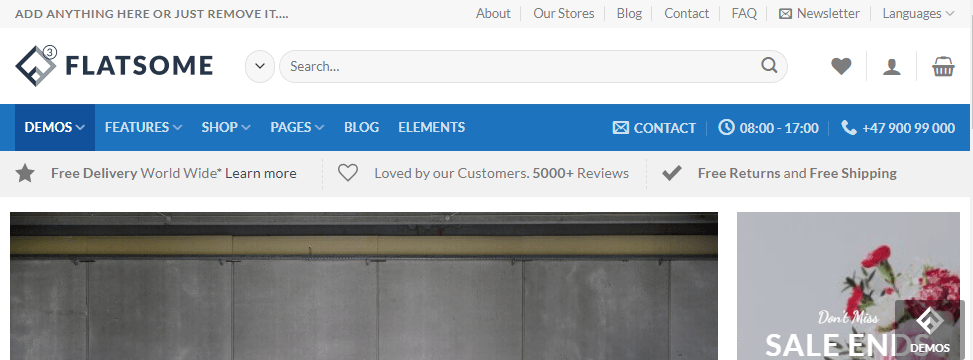
The following header elements are used in Flatsome header builder.
- Welcome Message
- Website Menu 1
- HTML element that opens email optin modal
- Language Switcher
- Site Logo
- Search Box
- Wishlist Element
- Account Element
- Add To Cart Header Element
- Website Menu 2
- Contact Element with Email, Working Hours & Phone
Create The Header Using Blocksy Header Builder
Without any further delays let us start our Blocksy WordPress theme tutorial of creating a header.
On my Blocksy theme demo site, I have already installed the Blocksy Companion Pro plugin to avail all the benefits of the premium theme.
Step 1: Go To Blocksy Header Builder
From your WordPress Dashboard, hover your mouse on Appearance, and thene click on Customize.
You will see the Blocky Theme Customizer.
Click on Header and the Blocksy Header Builder will open.
Following is the image of how Blocksy header builder looks like, when you are customizing your website.
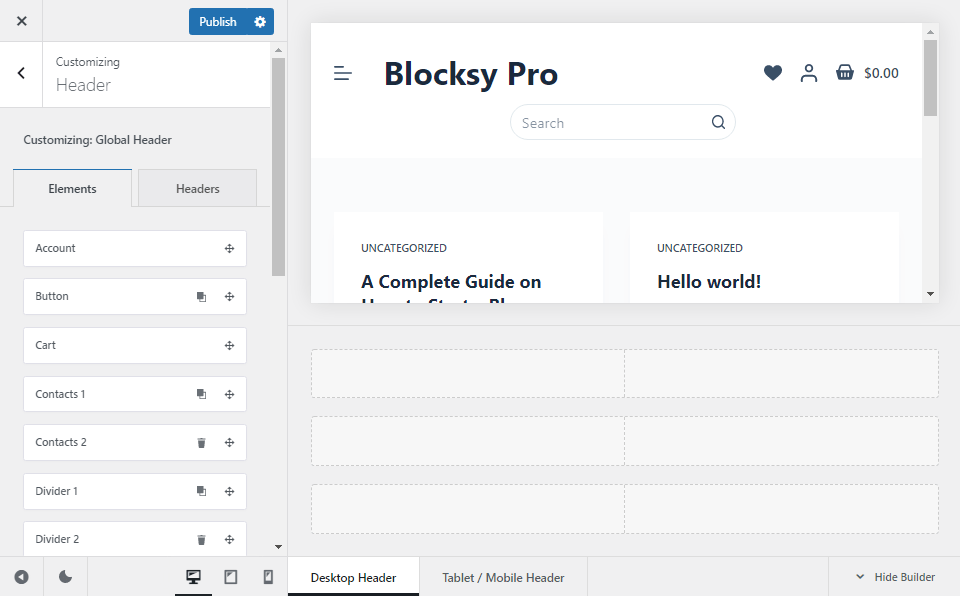
All the header elements are available on the left-hand side and the header builder on the right.
Above the header builder, you can see live changes on your site.
Make sure you’ve Desktop Header is enabled.
Step 2: Customize All The Header Rows
Hover your mouse on the Top Row and click on the gear icon.
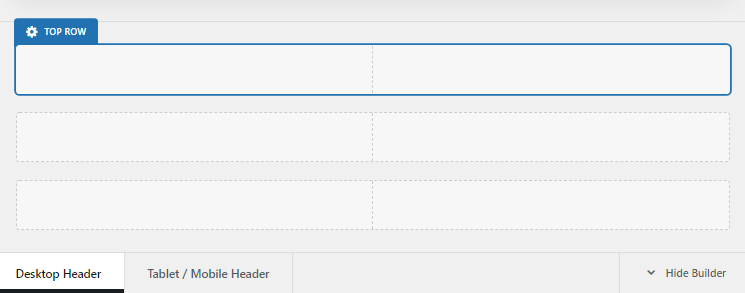
Once you’ve selected the top row, customize it according to our sample header’s top row.
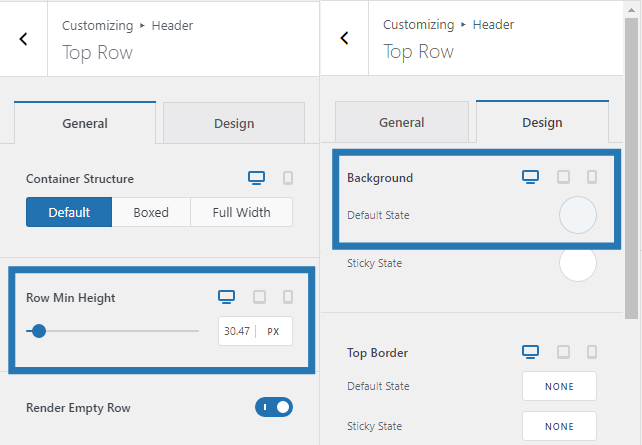
I set the Row Height to 30.47 pixels under the General Tab and changed the color under the Design Tab.
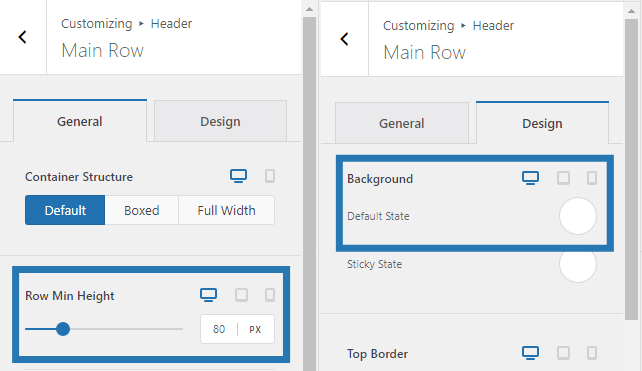
Similarly, adjust and set the Blocksy header height of other two rows.
Note:- In the image you can see that the Blocksy header background color for Sticky State has been set. That is because, earlier I had created a Blocksy sticky header for desktop and mobile.

All the header rows are customized and ready on the front-end.
Now, we just need to add different header elements to make it operational.
Step 3: Add Header Elements To Top Row
Let us look at the header elements once again in all the three rows of our sample header.
Go to the header builder and click on Top Row. Now from the header elements drag the HTML element to the top row of the header.
Click on the HTML Header element and start customizing it.

Under the General Tab, write down the message in paragraph format and under the Design Tab, adjust the fonts, font size, font style, and color.
Similarly add the Menu Header element and customize it.
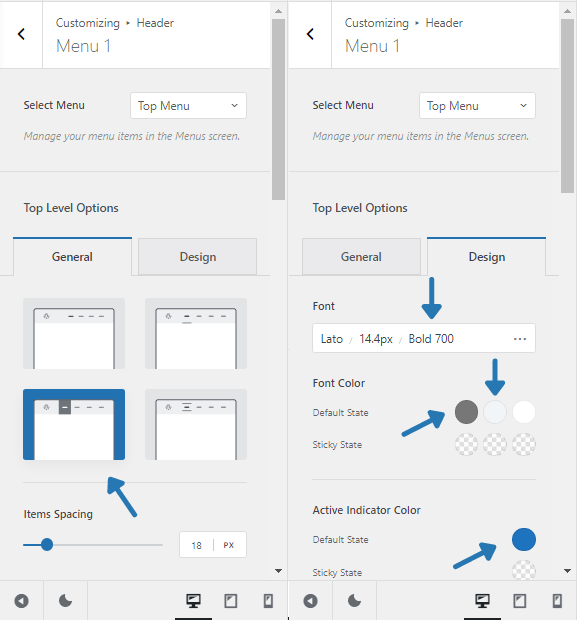
Note:- You need to manage Menus from WordPress Dashboard >> Appearance >> Menus.
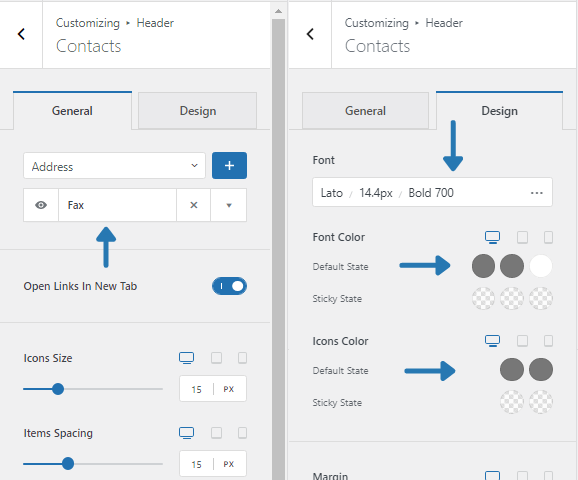
Next header element is the Newsletter with a Link. Since, Blocksy does not have an element and an Icon for that. I’ve used the Contact Header Element and customized accordingly.
For your information, the Typography and Colors used in the Top Row are as follows;
- Background Color: #f2f5f7
- Font Color: #777777
- Font: Lato
- Size: 14.4px
- Font Style: Bold 700
Finally, this is how the Top Row looks like;

Step 4: Add Header Elements To Main Row
In the Main Row we’ll need to add Logo, Search Box, Wishlist, Account, and Add to Cart header elements.
Drag the Logo header element and customize accordingly.
Notice that I do not have a logo, that is the reason I have enabled Site Title and adjusted the Logo Height.
Under the Design Tab, I have chosen separate fonts, font size, and applied left margin for the Site Title to pop up.
Next, added the Search Box element, customized the search box width, Input Font Color, Icon Color, Border Color, and enabled live results feature.

Followed by that, I’ve added Wishlist, Account, and Add to Cart elements and customized them accordingly.
Note:- From the Label Text field, I have removed the labels of Wishlist and Account element.
For your information, the Typography and Colors used in the Main Row are as follows;
- Background Color: #ffffff
- Font/Icon Color : #3A4F66
- Hover Color: #1559ed
- Font: Algereya Sans SC
- Size: 30px (Site Title)
- Font Style: Bold 700

Finally, this is how the Blocksy header main row looks like.
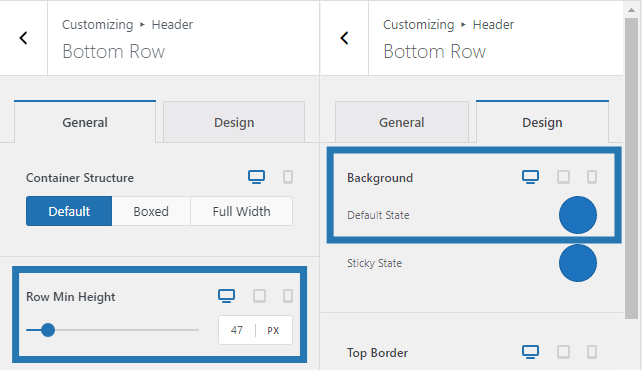
Step 5: Add Header Elements To Bottom Row
This is the last row to add header elements and customize. As per the sample header image, this row contains only header elements; a Site Menu and Contacts element.
The Typography and Colors used in the Bottom Row are as follows;
- Background Color: #1e73be
- Menu Active Indicator Color: #19519b
- Font/Icon Color : #e1e8ed
- Hover Color: #ffffff
- Active Color: #ffffff
- Font: Lato
- Size: 14.4 pixels
- Font Style: Bold 700

That’s it. All the rows are created and now the header looks very much like our sample WooCommerce header image.
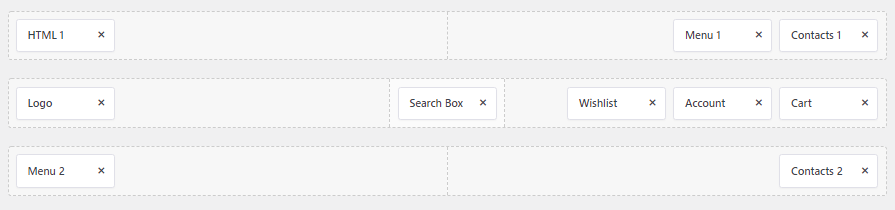
Just so that you have an idea, these are all the header elements used in the builder.
Step 6: Verify The Site Header In The Front End
Finally, let us check our header on the front end of the website.
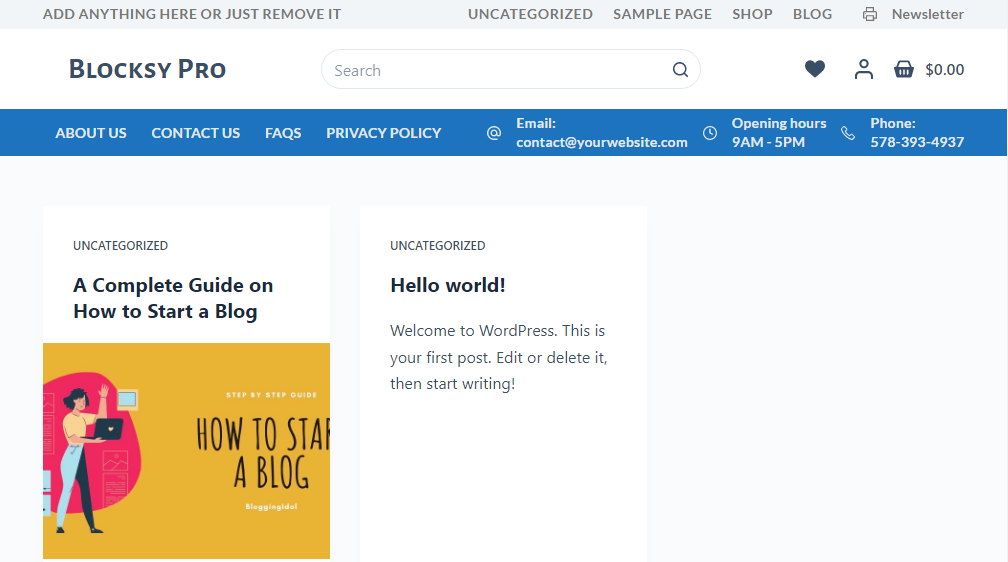
Doesn’t it look nice and beautiful on the front end of a website. It sure does.
Note:- You also get a dedicated mobile header builder to create Blocksy mobile menu
Blocksy Promo Code

BloggingIdol.com Special Offer
Use bloggingidol10 as Blocksy Coupon Code
Click on Coupon to get 10% Discount on all Blocksy Pro Plans
Blocksy Pro comes with lots of Header Elements, that will ease your process of creating headers and header templates.
If in case you want the menu header to showcase engaging content, then you will need to create a mega menu by using WordPress menu settings and Blocksy content blocks.
FAQs – Blocksy Header Builder
Blocksy is a WordPress theme that is available in free and premium version. The premium version is called Blocksy Pro and it has all the modern features to create a professional WordPress website.
Nope, Blocksy is not a page builder, it is a multipurpose WordPress theme, that tightly integrates with Gutenberg. It offers header builder with 21 header elements and footer builder with 24 footer elements, mega menu, content blocks, white label, etc.
I am using the Blocksy theme on few of my clients websites. We have not faced any major problems from the last 2 years. Plus, Blocksy support and documentation is as good as one experiences with GeneratePress.
Yes it is possible. You just need to create a Blocksy transparent header, where the hero image merges with header and looks like one single portion above the fold.
Blocksy comes with an amazing three row customizable header builder. Plus, Blocksy pro offers 21 header elements. So, with Blocksy header builder you can easily design headers for WooCommerce websites.
You can increase or decrease the Blocksy theme’s header height by clicking on the settings icon of the particular header. That will open row settings in the theme customizer. From there, you can increase or decrease the header row’s minimum height.
Conclusion
I hope this tutorial on Blocksy header builder helps you to easily create complex headers with the Blocksy WP theme.
In order to take the full advantage of the header builder, I recommend Blocksy Pro version.
The premium version makes it very easy for you to create headers with more than one row.
Plus, if you ever want to create a Blocksy transparent header for an eCommerce site, with multiple header elements; the premium version is your go to option.
Give it a go, customize the header rows according to your niche and/or brand and do let me know your valuable feedback.