
Just like every modern and responsive WordPress theme, Blocksy also has the Sticky Header functionality. In fact, you can implement the Blocksy sticky header for one or more rows together.
The sticky header is a feature where the top bar, menu bar, and/or bottom bar do not move, even when you scroll through the site up or down.
Making your website look trendy, while giving an enhanced user experience to your visitors.
In this article you will learn what a sticky header is, how to create a sticky header with Blocksy for all devices, sticky state for each header row, and sticky options for Blocksy header builder elements.
Blocksy is a WordPress theme with sticky header option, unlike other themes.
In Blocksy theme changelog version 1.7.25 sticky header was introduced on August 20, 2020 in the free version.
Along with that, Blocksy transparent header was also introduced.
These headers got integrated within Blocksy customizer.
How To Create Blocksy Sticky Header?
Before we continue with our post, I would like to mention that you can create a sticky header with Blocksy free as well as premium version.
The only difficulty you face will be a limited set of header builder elements with Blocksy free theme.
That too, for an eCommerce site only. But, for the rest of the elements, an HTML element can easily display the desired output via a simple shortcode.
Blocksy Header Builder Elements Overview
| Header Elements | Blocksy Free | Blocksy Pro |
|---|---|---|
| Account | ✓ | ✓ |
| Button | ✓ | ✓ |
| Cart | ✓ | ✓ |
| HTML | ✓ | ✓ |
| Logo | ✓ | ✓ |
| Off Canvas Logo | ✓ | ✓ |
| Menus 1 & 2 | ✓ | ✓ |
| Mobile Menu 1 | ✓ | ✓ |
| Search | ✓ | ✓ |
| Socials | ✓ | ✓ |
| Contacts | ⨉ | ✓ |
| Divider | ⨉ | ✓ |
| Language Switching | ⨉ | ✓ |
| Menu 3 | ⨉ | ✓ |
| Mobile Menu 2 | ⨉ | ✓ |
| Search Box | ⨉ | ✓ |
| Trigger | ⨉ | ✓ |
| Widget Area | ⨉ | ✓ |
| Wishlist | ⨉ | ✓ |
From the table above, we can easily create a normal single row header website with a few service pages. But, for creating company sites with lots of data or an eCommerce site, you will need Blocksy Pro.
To understand what else is packed into Blocksy Pro, have a look at
Let us begin by taking inspiration from a sample website’s header.
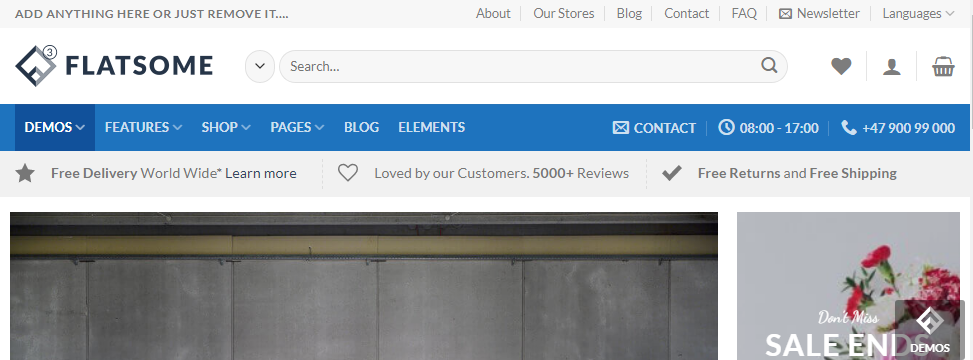
As you can see, the header has three rows.
- Top row with store information and a menu
- Middle row with logo, search box, wishlist, account avatar, and a shopping cart
- Bottom row starting with another menu and contact header elements
Now, let us look at header sticky state.
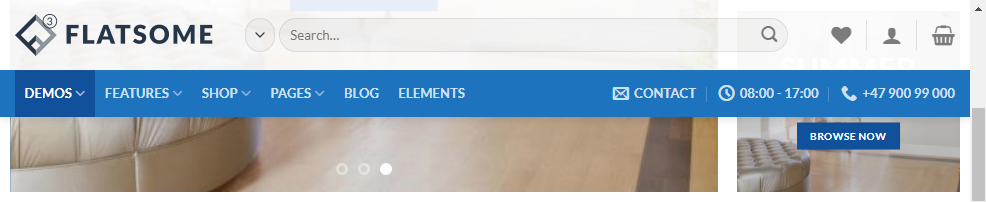
Scrolling down, I don’t see the top row, which means they’ve set only the middle and bottom row as sticky.
Now, this is what we will try to achieve from Blocksy’s sticky state.
Create A Blocksy Sticky Header For Desktop
Here is a three-row header created in Blocksy, from scratch.
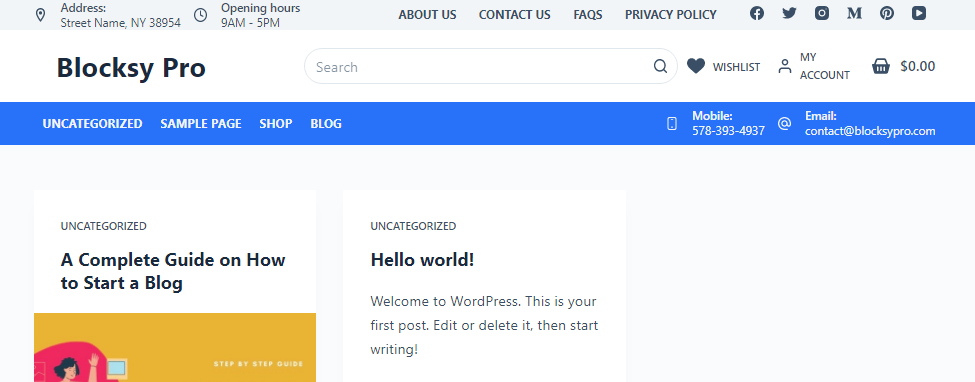
Having Blocksy Pro at my disposal, I used the liberty of creating a proper three-row eCommerce website header, using most of the header elements from the Blocksy theme customizer.
If you’d like to learn how to create a complex three-row header like the one shown above, visit my Blocksy header builder post.
As per the sample website’s sticky header image, we need to make the middle and bottom row sticky for desktop devices.
Step 1: Go to the Blocksy Theme Customizer and click on Header. From there, again click on the Header Tab.
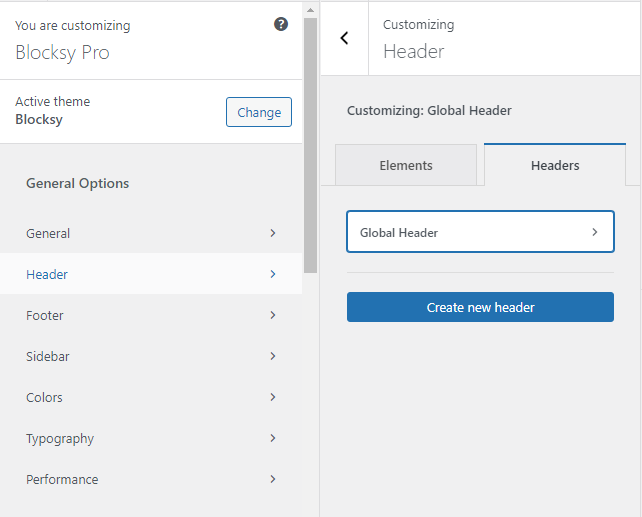
The header tab shows you all the available headers. In our case, I have customized the Blocksy Global Header.
Step 2: Now click on the Global Header and toggle the switch of Sticky Functionality and enable sticky header feature.
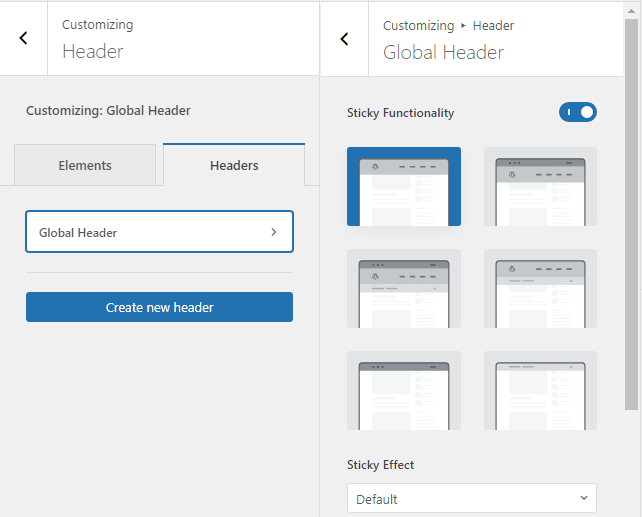
By default, the main row is selected in the sticky state. Blocksy offers sticky states for all the rows in the following sequence;
- Only Main row
- Top & Main row
- All rows
- Main & Bottom row
- Only Top row
- Only Bottom row
Step 3: To accomplish sticky state for Main and Bottom rows, click on main and bottom row option and leave the sticky animation to default.
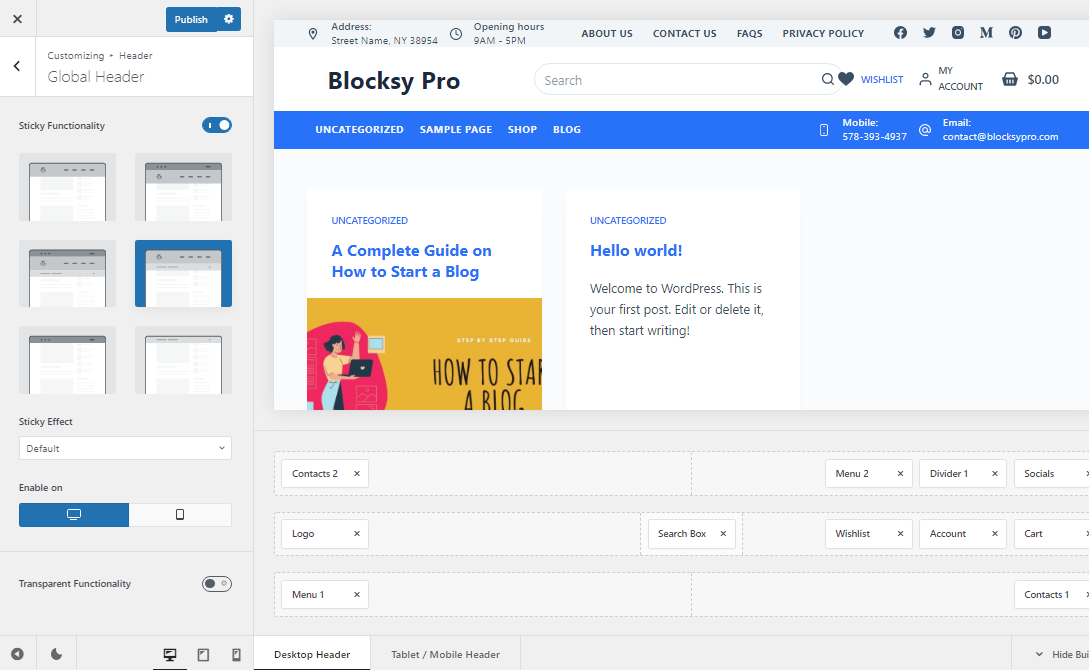
Also verify that sticky option is enabled on desktop devices. From the Blocksy header builder, we can make sure that we perfectly positioned all the header elements on the site.
Step 4: Verify Sticky Header
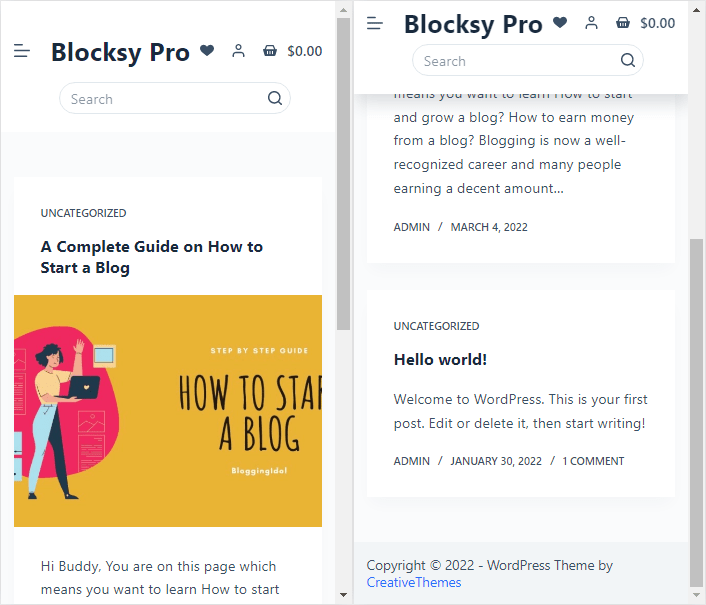
Open the site front-end in another tab and scroll up and down to see Blocksy sticky header has taken effect on desktop devices.
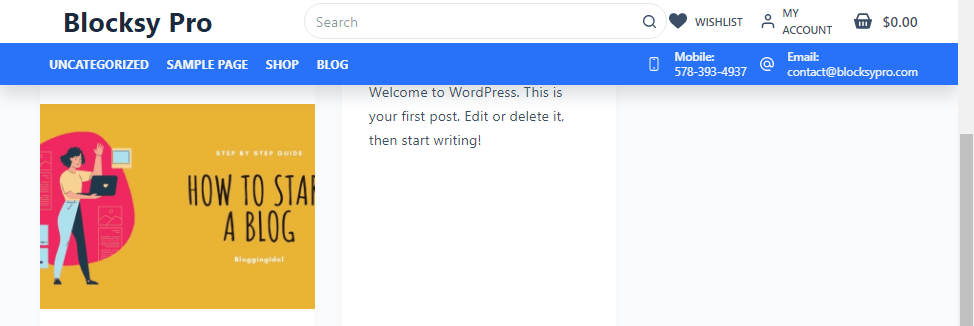
That’s it, we have finished creating sticky header in Blocksy theme.
Note:- If you want to use a hero section on the homepage, you can also enable Blocksy transparent header and still keep the header as sticky.
Customizing Sticky State
Before, we customize sticky header for tablet and mobile devices, there are two important things I want you to make a note of.
First, using sticky state row shrink in Blocksy theme. What this does is that it allows you to shrink sticky header on scroll. Giving your visitors more page view area.
Second, enabling shadow for the bottom row that helps your visitors to distinguish between header and content area.
Both these features are very useful to enable for tablet and mobile devices.
Enable Sticky State Row Shrink In Blocksy
To enable sticky state row shrink, you need to go to the Blocksy header builder. Make sure Desktop Header is selected, and click on Main Row settings.
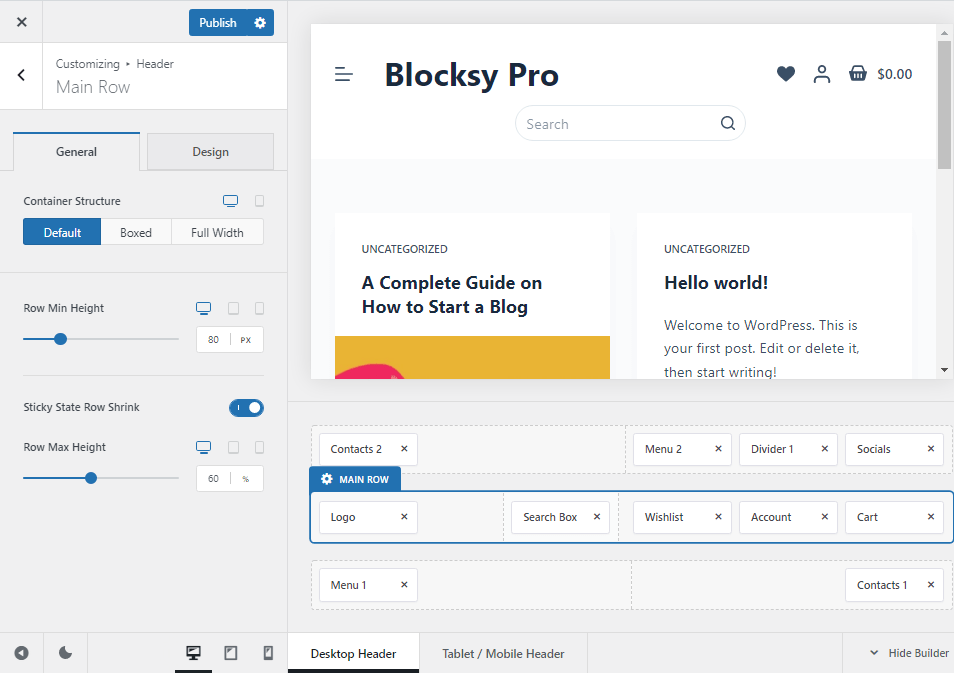
From there, enable Sticky State Row Shrink and adjust the percentage accordingly.
In my case, the ‘main row’ is 80 pixels tall, considering the font size of site text, search box height, and other header elements, 60% is fine for desktop view.
See how the main row has shrunk its size, giving more page view area to your visitors, while scrolling up and down.
Note:- Just like the Kadence Sticky Header shrink state feature, this setting is only available for Blocksy’s main row header. For other rows, you might need to apply additional CSS.
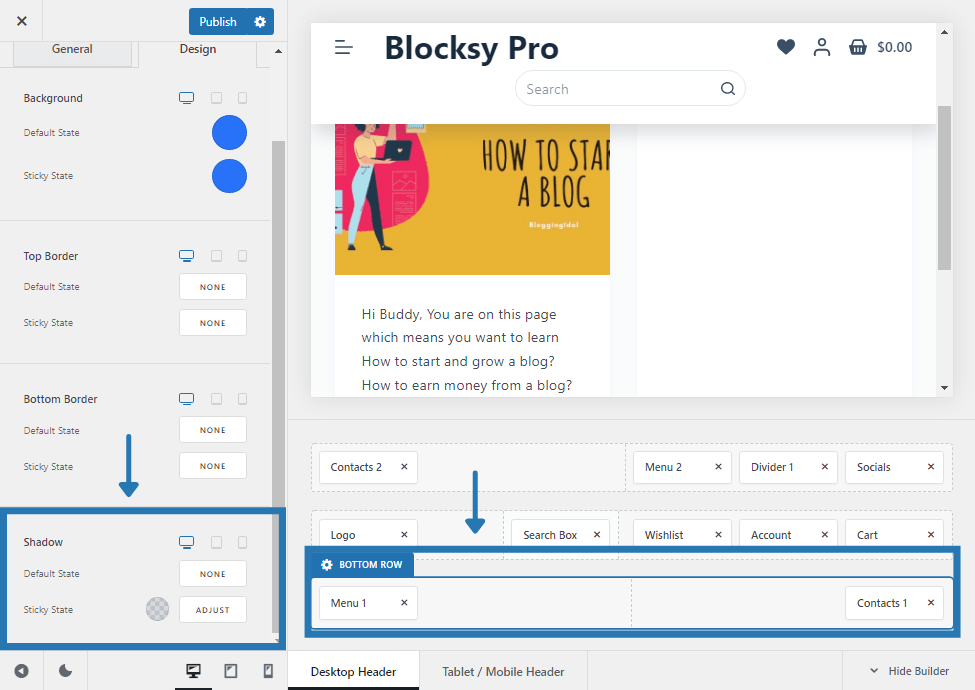
Enable Sticky State Shadow For Bottom Row
This feature is necessary when the background color of sticky row is very much similar to the entire site’s background color.
In most cases, it is white, and that makes it difficult for your website visitors to distinguish between the header and content area.
Making it extremely difficult for the eyes to adjust while using tablet and mobile devices.
Creative Themes have taken care of this problem by offering a feature called as sticky state shadow.
To enable sticky state shadow, go to the header builder and click on your last sticky row.
In my case, it is the bottom row on desktop and mobile devices.
Similarly, adjust the sticky state shadow settings for mobile header, by clicking on Tablet/Mobile Header, from the Blocksy header builder.
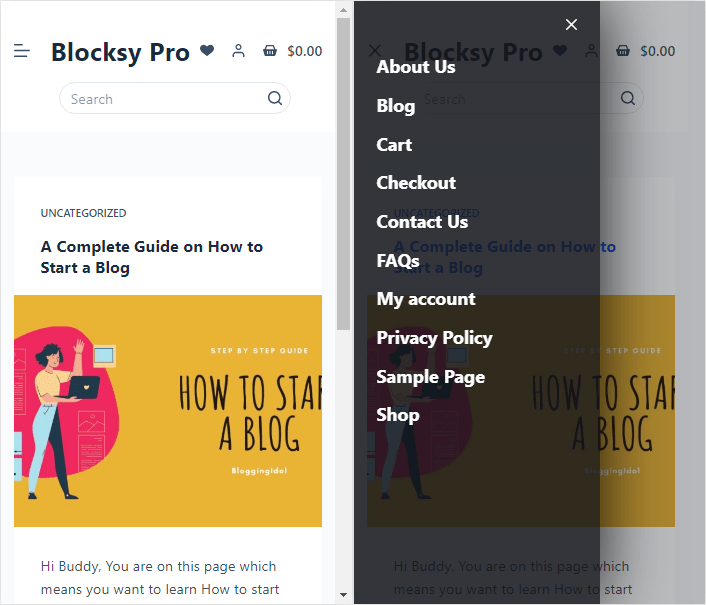
Create Sticky Header With Blocksy For Mobile
While creating mobile headers, you must understand that the space given to you is very less.
Therefore, analyze and select the most important elements that make perfect business sense to you.
For example, Trigger element for mobile menu, logo for branding, search box, account, wishlist, and cart element for eCommerce sites.
These are crucial for any eCommerce site and should not be placed anywhere else.
For this reason, I have displayed both the menus within one single Blocksy mobile menu that opens by pressing the Blocksy Trigger Header element.
Step 1: Go to Blocksy Theme Customizer and click on Header. This will open the Blocksy Header Builder.
Step 2: From there, click on Tablet/Mobile Header.
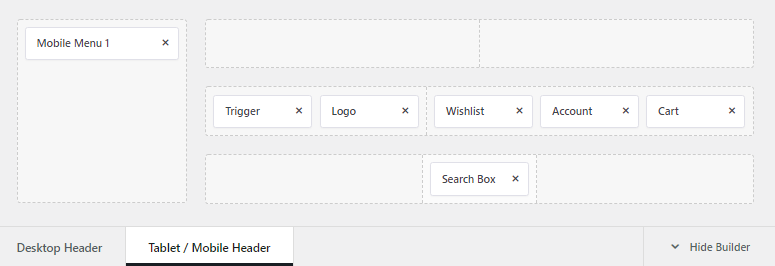
From the image above, you can see that there isn’t a single header element in the top row. If you leave a row empty, it does not show on the front end.
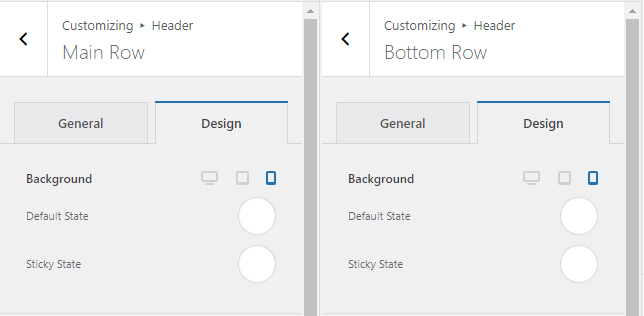
For the middle row and bottom row, I have customized the header elements and changed sticky state colors.
Step 3: Click on Main Row (from the header builder), and then click on the design tab to change sticky state color. Repeat the process for Bottom Row and change its color as well.
Step 4: Optional step
For sticky state row shrink in mobile, click on Main Row, and then on the left side, under General Tab adjust it.
Step 5: Next, apply shadow to bottom row so that users can easily distinguish between header and content area.
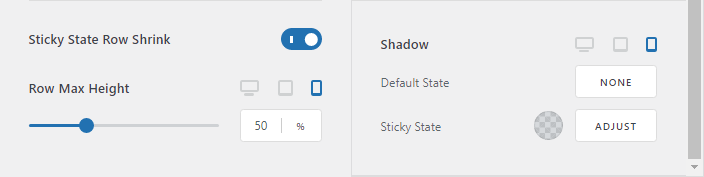
Go to mobile header builder, click on Bottom Row, then from the left-hand side click on Design Tab and go all the way down to customize sticky state shadow.
Blocksy Sticky Header Examples
Some real world Blocksy websites that have sticky header and transparent header enabled are as follows
FAQs
Sticky header is special functionality on a website, where the site header sticks to the top of the site, even when you keep scrolling the viewport down to explore other content.
To make a sticky header in WordPress use My Sticky Menu WordPress plugin, use CSS, or in the case of Blocksy theme, simply go to Blocksy theme customizer >> header builder >> turn on sticky header functionality.
1. Go to Blocksy theme customizer
2. Click on Header
3. Under customizing global header, click on Blocksy global header
4. Enable sticky functionality and choose which Blocksy header rows you want to make sticky
Sticky header is not a blocksypro feature, but it requires you to download and install Blocksy Companion plugin.
Conclusion
That is all there is to Blocksy sticky header for desktop and mobile devices.
Isn’t it easy?
That is because Blocksy theme comes with a powerful header builder that supports customizing complex headers for both desktop and mobile devices.
You can customize colors, transparency, size of fonts, etc. as per your preference. This guide only helps you in achieving the desired results.
Always verify whether your sticky headers are working on all devices and multiple browsers before completing your design activities.