
If you are looking to display related posts in the GeneratePress theme, then you are at the right place.
In this article, we will see how to display related posts in GeneratePress with and without plugins.
If you still doubt about using premium generatepress theme then please read this generatepress review that will help to make a decision.
On BloggingIdol, we are using GeneratePress WordPress premium version and are highly satisfied with the theme. If you are using the GeneratePress free theme, you will manually need to add Related Posts code into the WordPress single.php file.
Having said that, I understand not everyone is code savvy, and beginners might not even know how to get around the WordPress PHP files.
Therefore, it is best advised to get GeneratePress premium plugin. Moreover, you will be amazed looking at all the possibilities you can achieve using the GENERATEPRESS ELEMENTS module, in GeneratePress theme.
Note: GeneratePress Premium is also called as GP Premium.
How to display Related Posts in GeneratePress Theme?
Best way to display related posts in GeneratePress theme, is to use Block Element from GP Premium, and design the related posts section using GenerateBlocks.
To make sure you get to know all the differences between both the versions of GeneratePress, I have created GeneratePress free vs premium article.
Related Posts are a great way to keep your visitors engaged, get more attention from them, and promote fresh content. Having related posts in WordPress website gives a boost to your ad earnings as well.
They help in decreasing your website’s bounce rate and also increase your pageviews or income from ads.
3 Ways To Display GeneratePress Related Posts
- Directly use Plugins from WordPress Repository
- Manually add Related Posts Code into WordPress PHP files [Can be used on GeneratePress Free version]
- Use Plugin and Code for best results
UPDATE To Point 3: Use GenerateBlocks Query Loop Block with very little CSS.
On BloggingIdol, I have used the 3rd method to display related posts, right after the main content, on every single blog posts.
Following is the update made to this article and the recent method used on my site.
Method 3 – Old Methodology, Before GenerateBlocks Version 1.5
A step-by-step demonstration to display related posts in GeneratePress using WP Show Posts Plugin, PHP Code for creating a Hook, and CSS Code for Styling Related Posts.
For Your Information;
WP Show Posts has merged into GenerateBlocks. The feature that we required the most from WP Show Posts is QUERY LOOP.
In GenerateBlocks version 1.5, you get Query Loop as a dedicated block with lots of other settings and customization options.
Then why to take the hassle of installing a plugin, writing PHP code for hook, and styling via CSS?
Have a look at the steps of using the new method, after updating to GenerateBlocks 1.5.
Method 3 – New Methodology, After GenerateBlocks 1.5
You need GeneratePress Premium theme for using GeneratePress Elements Block Hook, free version of GenerateBlocks 1.5. Plus, some CSS code to style the Related Posts section.
That’s it!
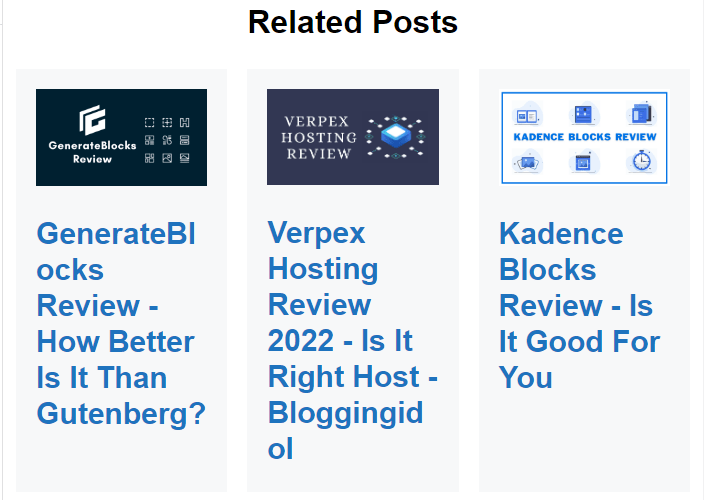
We need the final result to look something like this;

A 3-column grid displaying 6 posts at one time.
Before we start our step-by-step guide, if you are looking for how to insert inline related posts in GeneratePress, then you should check the below article.
The concept of an inline related post is entirely different from the concept of creating a related posts section.
How To Display GeneratePress Related Posts?
The GenerateBlocks WordPress plugin can easily solve this problem.
It is very similar to creating the latest posts in GeneratePress by using GenerateBlocks query loop block. The only difference is that you display the latest post section on a Homepage, while Related Posts sections are displayed on a single blog post. Right after the main content.
To perform this activity you will first need to install and activate GenerateBlocks.
Followed by creating a Query Loop with some settings, and finally applying CSS code for styling related posts section.
Step 1: Install and Activate GenerateBlocks Plugin
There was a big update to GenerateBlocks plugin somewhere in June 2022, with new components, 2 additional blocks and dynamic data feature, giving us GenerateBlocks 1.5.
GenerateBlocks is a freemium plugin. The free version is available in the WordPress repository.
The same developer (Tom Usborne) and his team, who has created the GeneratePress theme, have created the plugin.
- Go to your WordPress Dashboard, look for Plugins, and select Add New.
- Type GenerateBlocks in the Search Bar
- Install and Activate it
Once activated, on your WordPress Dashboard, look for GenerateBlocks, and click on Dashboard.
We are mainly going to use the Query Loop Block and other blocks to compliment the entire Post Template.
See what else is packed into GenerateBlocks Pro, take a quick peek at
Step 2: Related Post GeneratePress Elements Block
You will need you to create GeneratePress Elements Block.
Under your WordPress Dashboard, hover your mouse on Appearance, and click on Elements.
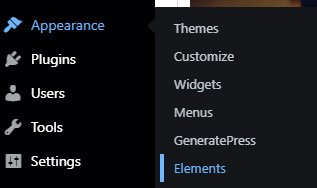
This will open the GeneratePress Elements page for you.
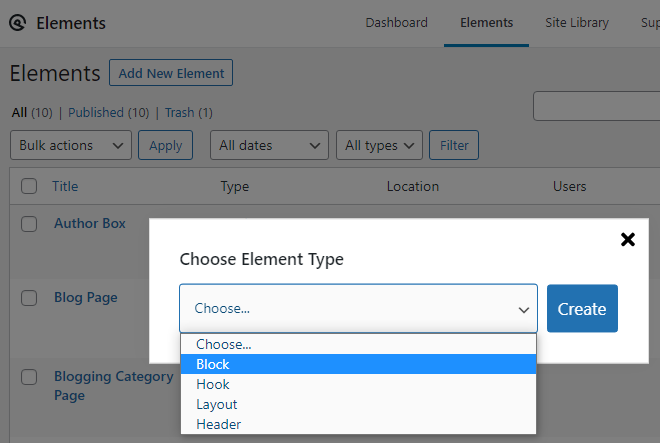
Over there, click on Add New, and select a Block.
Note:- The only difference between a GeneratePress Hook Element and a Block Element is that, in a block element, you can use Gutenberg’s block editor and other blocks required to style your section. Whereas hook elements only allow you to add PHP, JavaScript, and CSS codes.
This will open a fresh Block Element. Give it a name. The name is not visible on the front-end.

In my case, I have two main categories on BloggingIdol; WordPress and Blogging. GeneratePress is a sub-category under the WordPress main (parent) category.
This is important to understand for choosing the right location and excluding the ones that are not relevant. Since, we are going to display related posts based on categories.
Select the Element Type as Hook.
Apply Hook Name as ‘after_content’
Set the Priority as 20.
Note:- We will set the display rules after creating the Related Posts Query Loop section.
Step 3: Select Container Block To Contain Query Loop Block
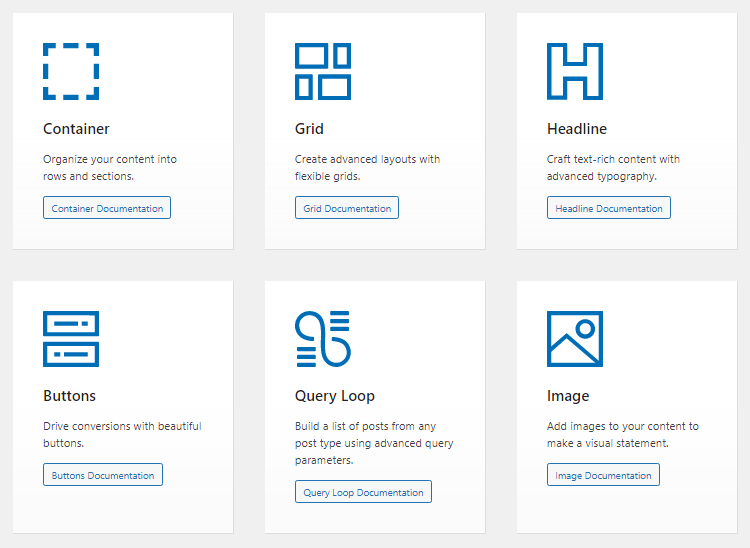
Click on Add Block and select GenerateBlocks Container Block.
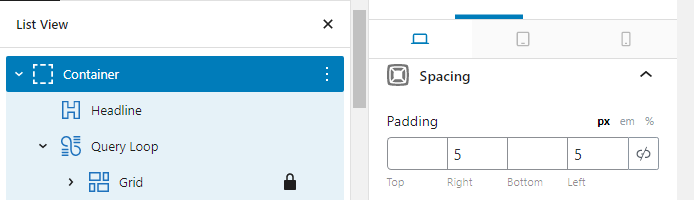
Add a GenerateBlocks Headline Block for your Related Posts section. This is visible on the front-end.
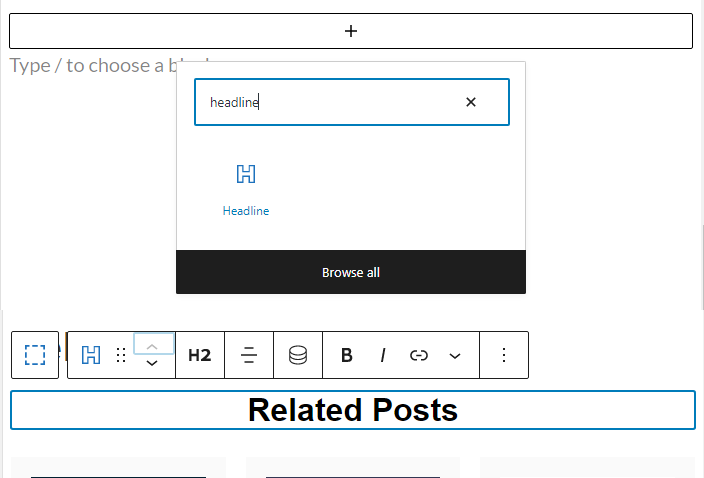
Adjust the entire container’s padding. Click on Container Block, under spacing input 5 px padding for right and left side.
Now, we need to add a Query Loop Block into this container.
Step 4: Choose Query Loop Block To Create Related Posts
After naming the element, click on Add Block and add GenerateBlocks Query Loop Block.
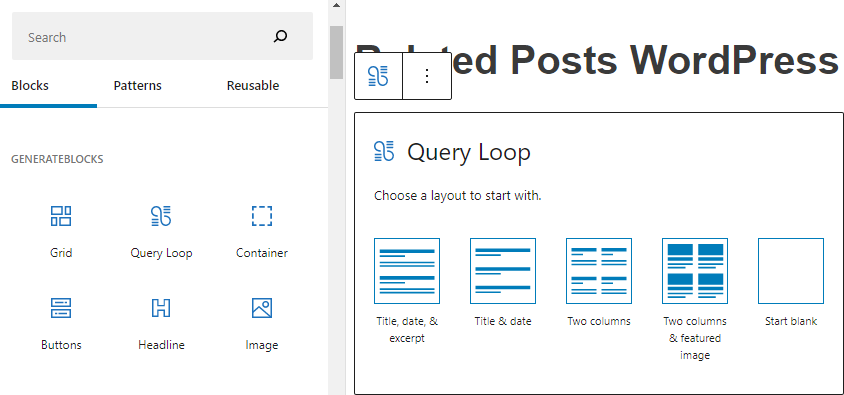
The best template that not only bring up things on the editor, but also lets you customize the section quickly is Two Columns & Featured Image.
Click on Two Columns & Featured Image and this is how your post template will look like.
But, we need a 3 column grid, showing 6 posts at once.
So, let us start making our adjustments.
Click on Post Template, on the left-hand side of the editor, and then set container width to 33.33%. This will give you a 3 column grid.
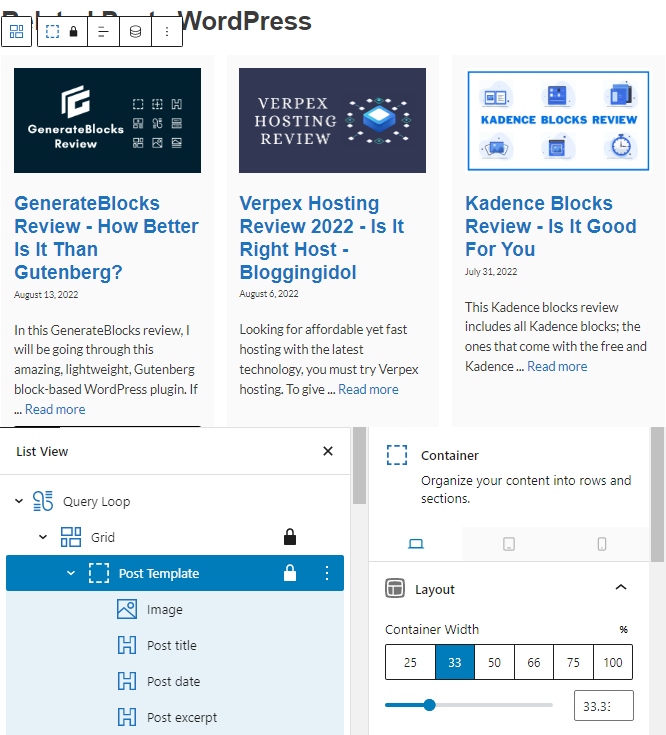
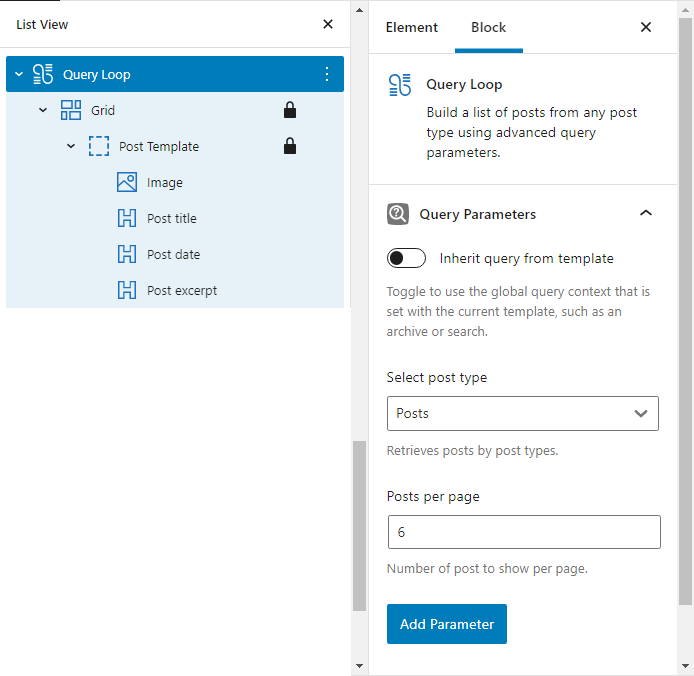
Now we need to change the posts display from 10 posts (default) to 6 posts.
For that, you will need to click Query Loop Block, and adjust the Posts per Page to 6.
Most of the difficult part is done. Now, you only need to make some customization changes.
Step 5: Customize Related Posts Section
I have not displayed Post Date and Post Excerpt. As, it looks cluttered on the front-end.
For that, click on Post Template and from there remove Post Date & Post Excerpt Blocks.
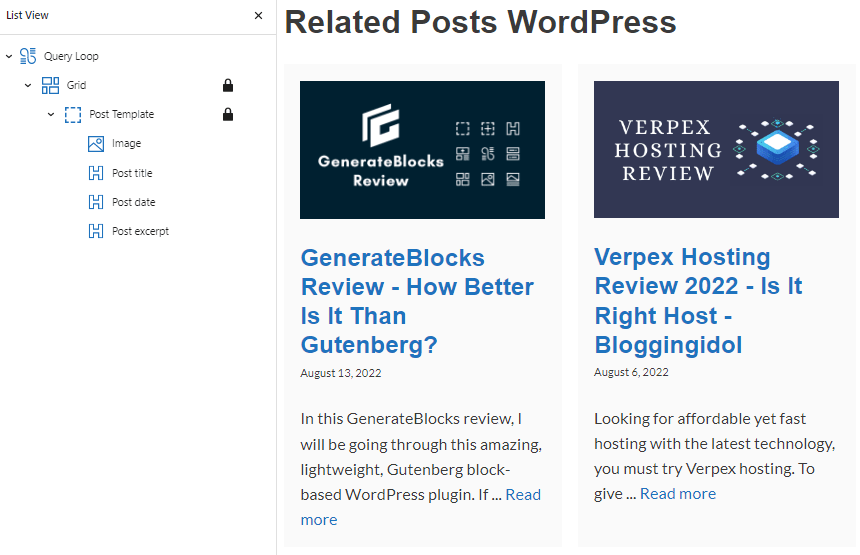
By now, this is how your related posts section will look like;
I know the title text looks wierd and there shouldn’t be any background begind every post. We will get to that as well.
Click on Post Title from the List View (left-hand side) selection, adjust heading Tag Name to H3. Since, Related Posts Heading is H2.
Now, change Typography font-weight to 600, font-size to 20 px, and line height to 1.2 em.
Note:- Optionally, you can also change the fonts as well.
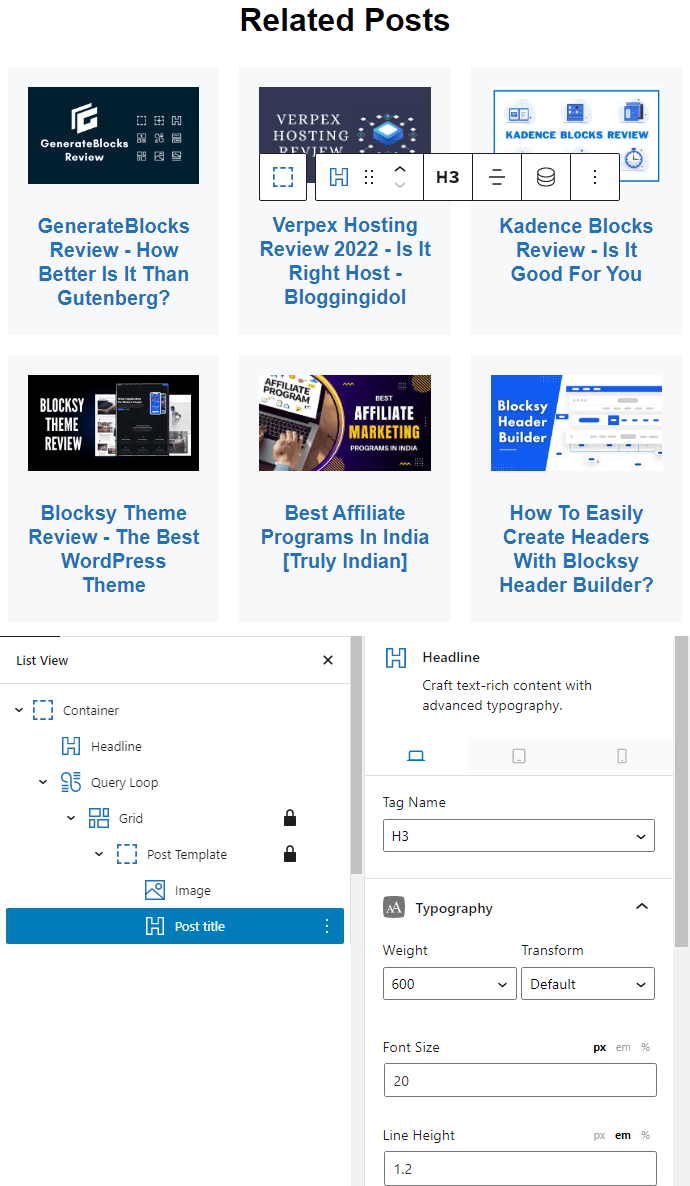
Plus, change Post Title alignment to Center. That way the title text will automatically set inline-width with the featured image (Post Image).
Let us now remove the background behind every post. We want to make the background blend with our website’s background, i.e., white.
Under the List View of Query Loop Block, click on Post Template. Now go to the right-hand side block settings, look for Colors, and clear the Background Color.
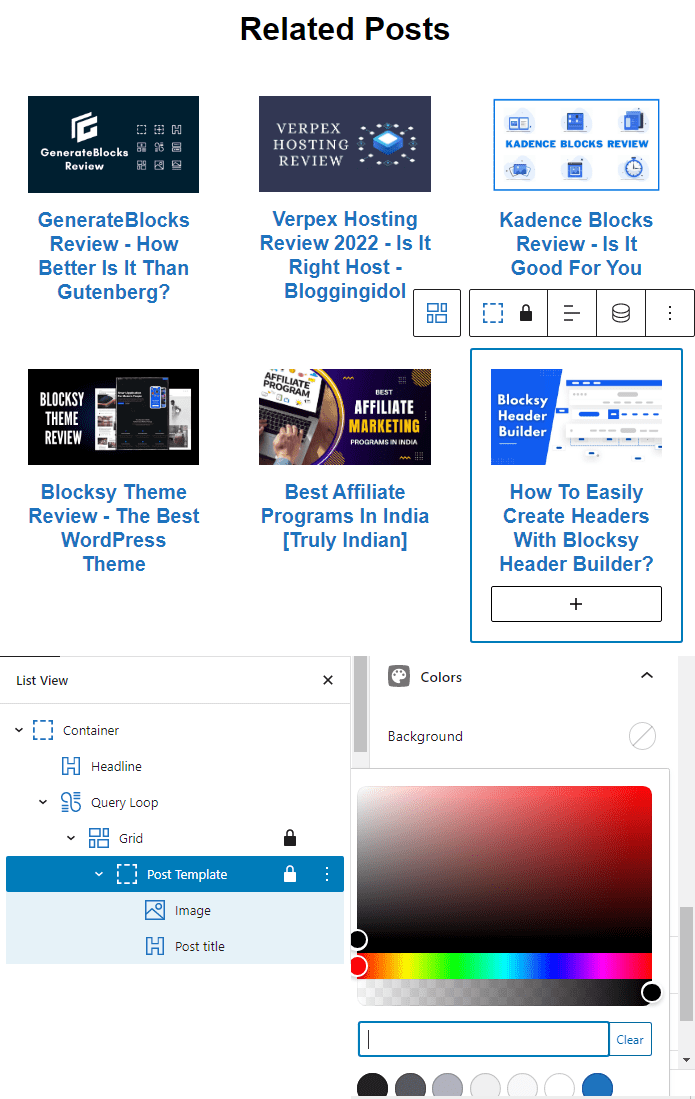
Well, now it looks like our section is getting closer to the result that we need.
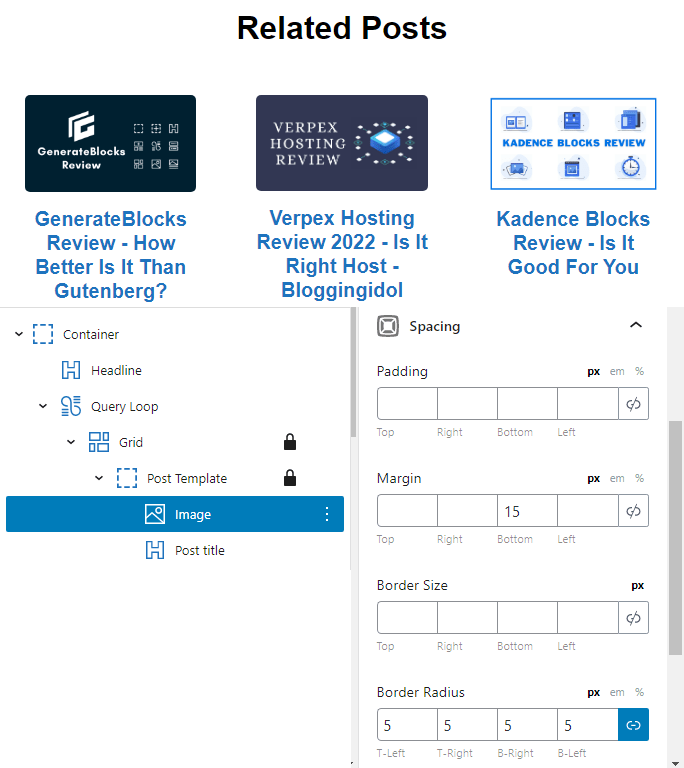
Just one last thing to do is to give border radius to the Post Images in our GeneratePress related posts section.
Under Post Template, click on Image, go to Spacing section and apply your preferred Border Radius. I have given 5 pixels throughout, to give a slight curve feel to the post images.
Note:- Whatever you do under Post Template, applies to all posts within that Query Loop Block.
Now, all the designing and customization adjustments are done.
It is time to apply dynaic data to blocks under Post Template. We have two blocks under Post Template of every post; Post Image and Post Title.
Therefore, apply accurate dynamic data to both of them
Step 6: Applying Dynamic Data To Related Posts In GeneratePress
Under Post Template, click on Post Image, go to Dynamic Data section and do the following
- Enable Dynamic Data
- Data Source – Current Post
- Image Source – Feaured Image
- Link Source – Single Post
For Post Title;
- Enable Dyanmic Data
- Data Source – Current Post
- Content Source – Title
- Link Source – Single Post
Step 7: Exclude Latest Post From Related Post Section
If you have followed all the steps until here, I’m sure your related posts in GeneratePress is almost completed on your site.
Just one final setting to perform on the Query Loop block, is to exclude the latest post (latest published post) from appearing in the related post section.
For that, you need to select GenerateBlocks Query Loop Block, add a parameter (on the right-side) called Offset and set it to 1.

This will tell the Query Loop to jump one post while querying.
Sadly, there isn’t a way to exclude current post (the post a visitor reads) from relatd posts section. This is noted by the GenerateBlocks team, to release this fix in their next update.
With GenerateBlocks free version you can more or less customize most of your custom created sections and blocks.
But, if you wanted to save time and incorporate ready-to-use 230 pre-made templates, add effects like box shadows, text shadows, and zoom transitions to image thumbnails, you need to check out GenerateBlocks Pro.
It has myriad of customization options for you.
Step 8: Allocating Display Rules To Related Posts (Hook Location)
I have two main categories; WordPress & Blogging, and a sub category of WordPress, GeneratePress.
Single Posts that fall under WordPress and/or GeneratePress category should display related posts from WordPress and GeneratePress category.
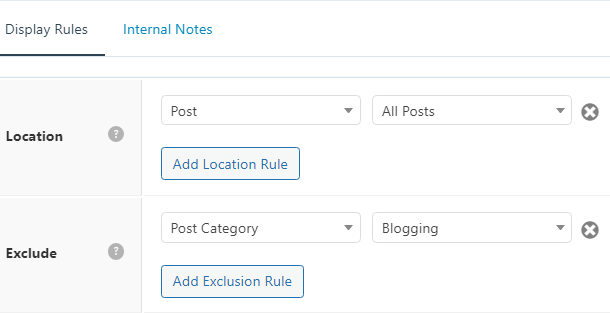
- From the Location tab, select Post and then All Posts.
- From the Exclude tab, select Post Category and then Blogging
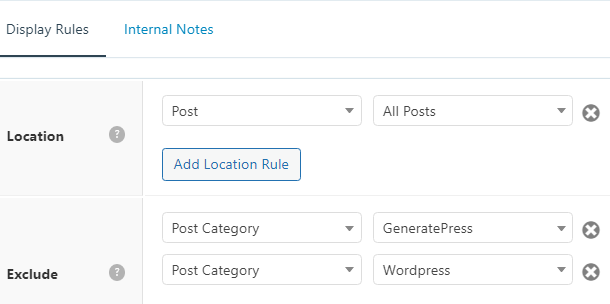
Single Posts that fall under Blogging category should display related posts from Blogging category only, excluding all posts from WordPress and GeneratePress categories.
- From the Location tab, select Post and then All Posts.
- From the Exclude tab, select Post Category and then GeneratePress
- Another Exclude rule, select Post Category and exclude WordPress
Note:- You have to make the Related Post section for all your main categories, if you are going to display related posts according to categories.
Step 9: GeneratePress Custom CSS To Style Related Posts
This brings us to the last part of this demonstration. By now you have made related post by category to appear on all single article blog posts.
This part is for styling purposes only. You wouldn’t need to do any of the CSS coding if you have GenerateBlocks Pro.
For doing so, go to your WordPress dashboard, locate Appearance, and click on Customize.
It will open the GeneratePress theme customizer. From there, go down and click on Additional CSS.
.wp-related-posts{
-webkit-box-sizing: border-box;   box-sizing: border-box;
  box-shadow: rgba(23, 43, 99, .4) 0 7px 28px!important;
	padding-top: 20px;
	padding-right: 15px;
	padding-bottom: 20px;
	padding-left: 15px;
	border-radius: 8px;
	text-align: center;
	margin-top: 50px;
}
Click on the main Container Block, which has Query Loop Block into it, and drop down the Advanced tab to input the CSS class wp-related-posts.
Do this for both the Related Post Block Elements.
After completing all the steps and the procedures, it is now time to go to one of your single blog posts and look below your content, in my case it is below the Author Box in Generatepress.
Summary of Related Posts In GeneratePress
Summarizing everything that we’ve done so far.
- Installed & Activated GenerateBlocks plugin
- Created an Elements Block for applying Hook to related posts
- Selected Container Block fitting every other block used to create related post section
- Added Query Loop Block
- Customized related posts section
- Applied Dynamic Data to related posts in GeneratePress
- Excluding Latest Post
- Allocated Display Rules showing category-based related posts
- Using Custom CSS to style related posts
After performing all these steps meticulously, we got the following result.
Totally worth the effort, isn’t it?
If you are a currently using GeneratePress free then you’d probably want to make use of the related posts method shown below.
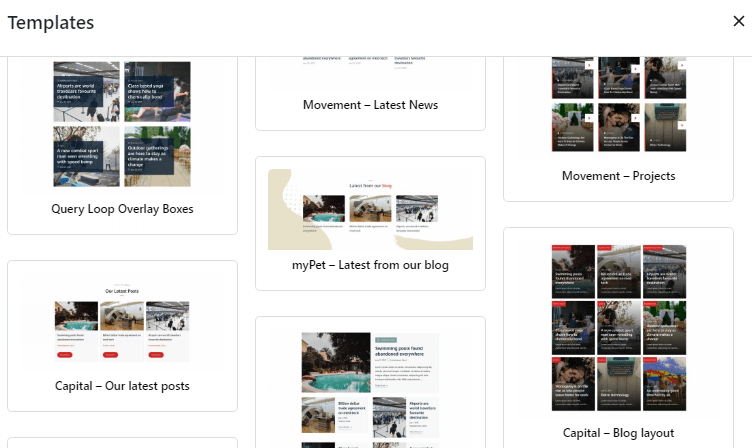
Let me show you some of the GenerateBlocks templates of query loop available under GenerateBlocks pattern library.
Show Related Posts In WordPress Single.PHP File (Without Plugin)
If you wanted to manually code for including related posts in each of your blog posts, you’d have to do it under your WordPress single.php file.
Add this following code anywhere in the single.php file, wherever you want the related posts section to show up.
<?php
$tags = wp_get_post_tags($post->ID);
if ($tags) {
$tag_ids = array();
foreach($tags as $individual_tag) $tag_ids[] = $individual_tag->term_id;

$args=array(
'tag__in' => $tag_ids,
'post__not_in' => array($post->ID),
'showposts'=>3,  // Number of related posts that will be shown.
'caller_get_posts'=>1
);

$my_query = new wp_query($args);
if( $my_query->have_posts() ) {
echo '<div id="relatedposts"><h2>Related Posts</h2><ul>';
while ($my_query->have_posts()) {
$my_query->the_post();
?>

<?php
if ( has_post_thumbnail() ) { ?>
<li><div class="relatedthumb"><a href="<?php the_permalink() ?>" rel="bookmark" title="<?php the_title_attribute(); ?>"><?php the_post_thumbnail(); ?><?php the_title(); ?></a></div></li>
<?php } else { ?>
<li><div class="relatedthumb"><a href="<?php the_permalink() ?>" rel="bookmark" title="<?php the_title_attribute(); ?>"><img src="<?php echo get_post_meta($post->ID, 'Image',true) ?>" width="350" height="169" alt="<?php the_title_attribute(); ?>" /><?php the_title(); ?></a></div></li>
<?php }
?>

<?php
}
echo '</ul>';
}
}
$post = $backup;
wp_reset_query();
?>
The class used above is “relatedposts”. Use this class for any type of CSS coding required. An example CSS code is given below.
#relatedposts h2 { font-size: 28px; margin: 10px 0px 20px 0px; font-weight: normal; }
#relatedposts ul { list-style: none; }
#relatedposts ul li { float: left; margin-right: 15px; width: 206px; }
#relatedposts img { border: 1px solid #DDD; background: #F8F8F8; padding: 5px; margin-bottom: 5px; }
#relatedposts a:hover { color: #51B1D3; }
This way you can bring in related posts into any theme weather free or premium version.
FAQs – Related Posts In GeneratePress Theme
Related Posts can be displayed using plugins or without plugins. In this article I have shown a method where we can display related posts using Elements Module and a plugin called GenerateBlocks. Followed by applying Custom CSS to style related posts in GeneratePress.
For displaying GeneratePress related posts, you will need to either perform it by installing a plugin called GenerateBlocks or add PHP code to single.php WordPress file. If you want to apply PHP code to single.php file, consider using a GeneratePress child theme.
The best related posts plugin for GeneratePress is Related Posts Thumbnails Plugin for WordPress, created by WPBrigade.
The best and most popular related posts plugins for WordPress are GenerateBlocks, Yet Another Related Posts Plugin (YARPP), and Contextual Related Posts Plugin.
If you have made a Block Element module for related post, simply thrash that hook. If you have manually coded for related posts into Single.php WordPress file, then simply remove that section of code.
Conclusion
I feel this article has given you an insightful information on how to display related posts in GeneratePress theme.
If you still have questions about this GeneratePress theme tutorial, or want to know different ways of achieving this, then do let me know in the comments section.
I will go through other demonstrations similarly to show you the best results.
Thanks for this detailed guide, however, WP Show Posts has been replaced by Generate Blocks? Can you show the steps to add related posts to Generate Press (I have GP Premium) using Generate Blocks?
I am glad you liked it, Coralie. WP Show Posts is getting discontinued was news to me, thanks for the info. Although, they haven’t come up with a full proof process of displaying related posts in GeneratePress theme using GP premium and GenerateBlocks.
I also checked their latest update on WordPress – it states ‘version 1.4.4’ and QUERY LOOPS (the feature that we need) is still in its beta stage. As per thier official announcement; Dynamic Data, Query Loops, and Image Blocks will be seen in GB version 1.5. Once we get that feature in the plugin, I will surely display the process of creating related posts using GP Premium and GB only.
I have updated the content of creating related post in GeneratePress.
WP Show Posts has merged with GenerateBlocks. The new content shows a methodology where you will need GeneratePress Elements Block and GenerateBlocks Query Loop Block.
Go through it and do let me know if you have any problems in implementing it on your site.
Thank you.
Yes it’s correct that WPSP has been replaced by Generate Blocks but WPSP will be working after the replacement also as confirmed by their customer support. I have integrated related posts with WPSP as explained by the author of this post & it’s working fine.
WPSP will work until one more year. But there won’t be any support or new updates from their team. This is merely to let the WPSP paid users carry forward their subscription with GenerateBlocks Pro, until that year is over.
In the meanwhile, have a look at the new content updated in this article.
The method used now requires GeneratePress Elements Block and GenerateBlocks Query Loop Block.
Give it a go, and do let me know if you face any issues.
Thank you.
Hi there! Do you know how to exclude the current post?
Cheers
Hello Dan,
For now, you can only exclude latest post, not current post.
Select Query Loop Block, add a parameter called ‘Offset’ and set it to 1. Thanks for reminding me, I will update that in the article.
Note:- In my case (6 posts in related post section), I can set offset to 7 and I will never see the current (viewing) post, but it is not advised.
The GB team is aware of this, and will surely come up with a fix in their next update.
In other words, the current post can be avoided by setting the offset to either 2 or 4, right?
Yep 2 and 4 will surely work. Especially 4 will work for 3 posts in related content.
I tested the method, but it is not related posts, it is lasted posts.
I mean this posts after the content in your example. They are not from same category or tag.
You are supposed to use Inclusion/Exclusion rules under Display Rules. I have two main categories Blogging and WordPress. Thus, I’ve made two Block Elements (one for each). Under each block element, I have included all posts and excluded the other category.
You can straightaway include the particular category or tag by using Post Category location rule, this way you won’t need to exclude other categories/tags.
If you only keep the location rule for all posts and not exclude out anything else, it turns out to become Latest Posts concept.
For a clearer understanding have a look at Latest Posts using GenerateBlocks.
Thank you very much for this detailed and updated guide. I was searching this solution for a long time. You really explained in detail and only written the useful information. Keep writing more articles like this for Generatepress premium version. I have applied this on my blog.
Glad to hear the article helped. I have other tutorial based articles based on GP premium and GenerateBlocks. Have a look at those if you find them useful. Plus, if you specifically need any tutorial do let me know – I will try to implement the activity and create a post out of it.
Hello Ankur, thank you very much for this great guide! I actually managed to set up the block. But one thing doesn’t work: On the PC, the entire block has moved to the left. How do I get the block in the middle? I’ve tried everything, but the block remains on the left.
Hey Florian,
I have kept Block Element as 100% width on my content section. This excludes the sidebar section.
If you do not have a sidebar this will either be on the left or in the center depending on your entire website layout.
You can either try the “Change content position” button from the top toolbar or flexbox feature. There could be some options that might help you in aligning the block to the center.
I had created this block when GenerateBlocks didn’t have flexbox feature. Since, it is working fine, I haven’t changed it yet.
Finally, if nothing works out for you, CSS is your last resort.
Hope this helps.
Thank you.
Hello, thanks for shared. I have a question
How can I show related posts with others have same tags automatically?
Hey Jacob, just like categories, you can select taxonomies for tags; multiple tags.
Then, display for all posts and exclude one or more post tags.