In this Kadence Blocks tutorial we will learn how to create a pricing table in WordPress using Kadence Blocks.
The methodology shown in this article can be applied to any WordPress theme. This pricing table will involve 2 pricing charts with a toggle that shows monthly and yearly billing.
I am going to create this pricing table on the free version of Kadence WordPress theme, and use the free Kadence Blocks plugin.
To create a pricing table in WordPress using Kadence Blocks
- Start with 3 Kadence Advanced Text Blocks for title, subtitle, and description
- Add a Kadence Tabs block and customize the tab title
- Insert a Kadence Row Layout of 2 columns (2 sections) to Tab 1
- Customize padding, margin, border
- Add Kadence Advanced Text blocks for product title and price
- Insert Kadence Icon List block and write product features
- Add the Kadence Button block for CTA
- Copy styles and blocks from section 1 to section 2
- Customize colors in Section block 2
- Add more product features to Kadence Icon List block in section 2
- Copy Kadence Row Layout block from Tab 1 and paste it to Tab 2
- Update content under Tab 2
In the article, we are further going to break down a few steps and see a step-by-step approach of creating a monthly/yearly pricing table using Kadence Blocks.
For more information about the number of blocks, features, and the Kadence design library, check out my Kadence Blocks review post.
WordPress Pricing Table Design Used For Inspiration
We are going to use the following design for creating our pricing table.
This image is taken from the free version of Kadence Blocks design library.
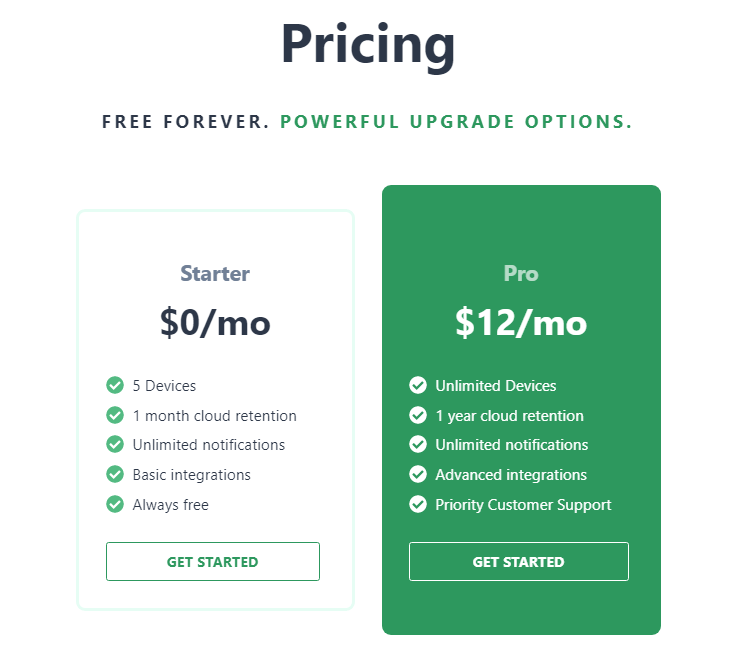
Our pricing table will be similar, yet slightly different from the image shown above.
In our pricing table below, we will add a Kadence blocks tab block to display ‘Monthly’ and ‘Yearly’ tabs that differentiates the pricing plan.
Plus, add box shadow to both the sections of Kadence row layout block.
How To Create Pricing Table in WordPress Using Kadence Blocks?
Time needed: 20 minutes
Kadence blocks comes with a very useful block called Tabs Block.
With the help of this block we are going to create a toggle like effect that displays separate billing information for monthly and yearly plans.
- Start with Kadence Advanced Text Block
Start the procedure of creating the pricing table by first inserting a Kadence Advanced Text block.
We will write the text as ‘Pricing Plans’
Change it to H1 tag, align the text to center, and change the font size to 54 pixels.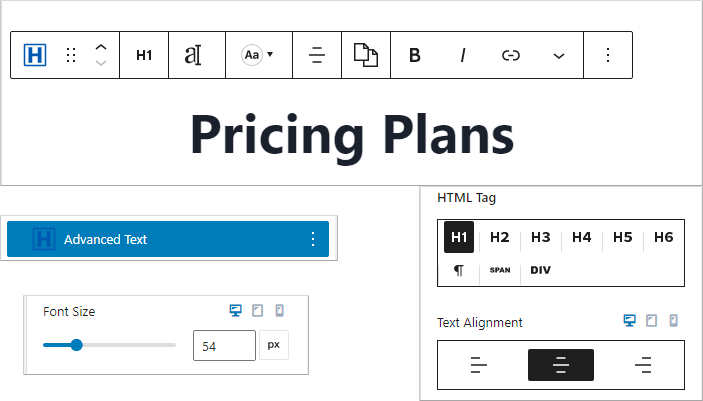
- Add another Advanced Text Block for subtitle
After adding the title, add another Kadence Advanced block to create a subtitle or sub heading that comes right after the title.
We will add ‘Powerful Upgrade Options’ text to this block.
Following changes are made to this text block;
Tag of H2
Align to center
Font size – 22 pixels
Letter spacing – 5 pixels
Text transform – Uppercase
Font weight – Extra Bold 800
Text Color – 2D985E
Top Padding – 5 pixels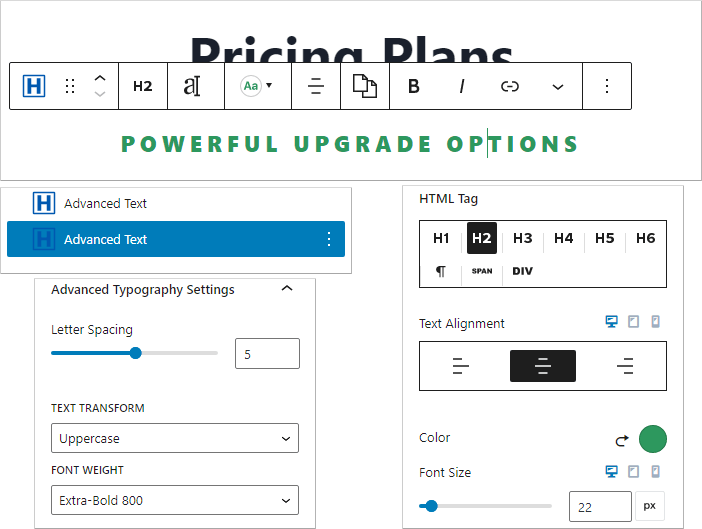
- Insert the 3rd Advanced Text block
We are going to add one more Kadence Advanced Text block to mention pricing description.
The text written is ‘Billing: Save 18% on yearly plans.’
This has to be a paragraph block with more emphasis on ‘Save 18%’. Therefore, we need to bold the text, increase its font size, give a highlighting background color, and change the highlighted text color.
Settings done on this block;
Advanced text block – Changed to paragraph tag
Text alignment – center
Font size – 22 pixels
Highlight Settings;
Background color – 2D985E
Border width – 1 pixel
Text font size – 24 pixels
Text color – FFFFFF
Padding – top: 1 px, right: 2 px, bottom: 4 px, left: 2px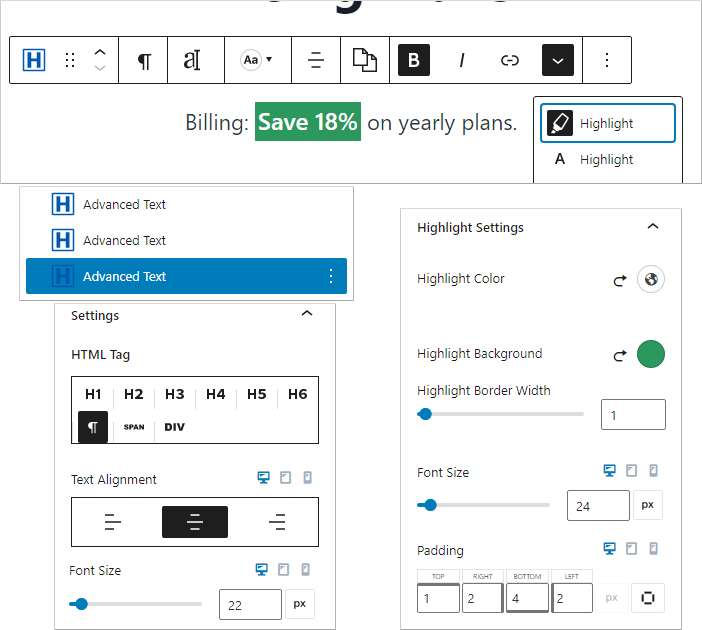
- Add a Kadence Blocks Tabs Block
After the three Advanced text block, it is time to create the actual pricing table.
Since, we want to make a pricing table that displays monthly and yearly pricing plan, add a Kadence Blocks Tabs block.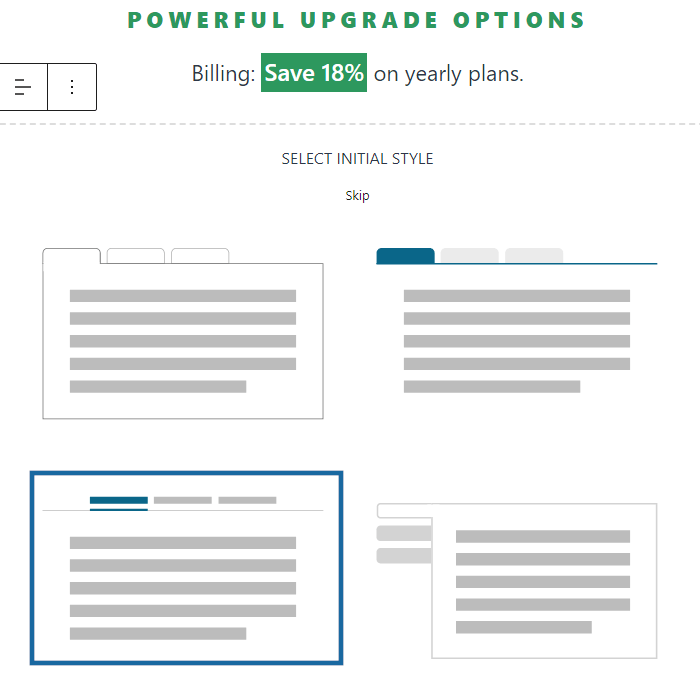
I have chosen the 3rd style in this activity.
Following that, remove the third tab. Since, we are only going to add data to monthly and yearly tabs. - Customize the Tabs Title Color
Start with changing the labels of the tabs to ‘Monthly’ and ‘Yearly’.
Change Tab title color, background color, and border color for normal, hover, and active conditions.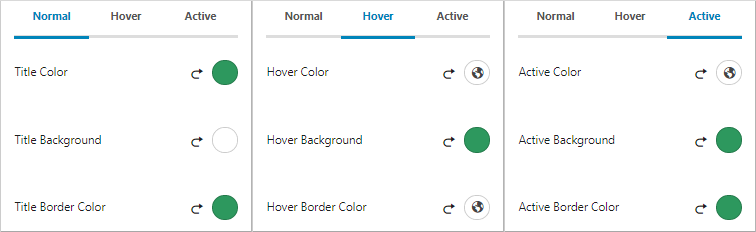
Colors used for Tab in normal condition;
Title color – 2D985E
Background color – FFFFFF
Border color – 2D985E
Colors used for Tab in hover condition;
Title color – FFFFFF
Background color – 2D985E
Border color – FFFFFF
Colors used for Tab in active condition
Title color – FFFFFF
Background color – 2D985E
Border color – 2D985E - Further Customizing Tabs Title
Under Tab title width/spacing/border settings change to %Width tab and customize the following;
Columns – 4
Gutter width – 10 pixels
Top padding – 8 pixels
Right padding – 20 pixels
Bottom padding – 8 pixels
Left padding – 20 pixels
Top margin – 20 pixels
Border width – Overall 2 pixels
Border radius – Overall 5 pixels
Increase the Tabs title font size to 18 pixels and under Tabs structure settings, set max width to 800 pixels.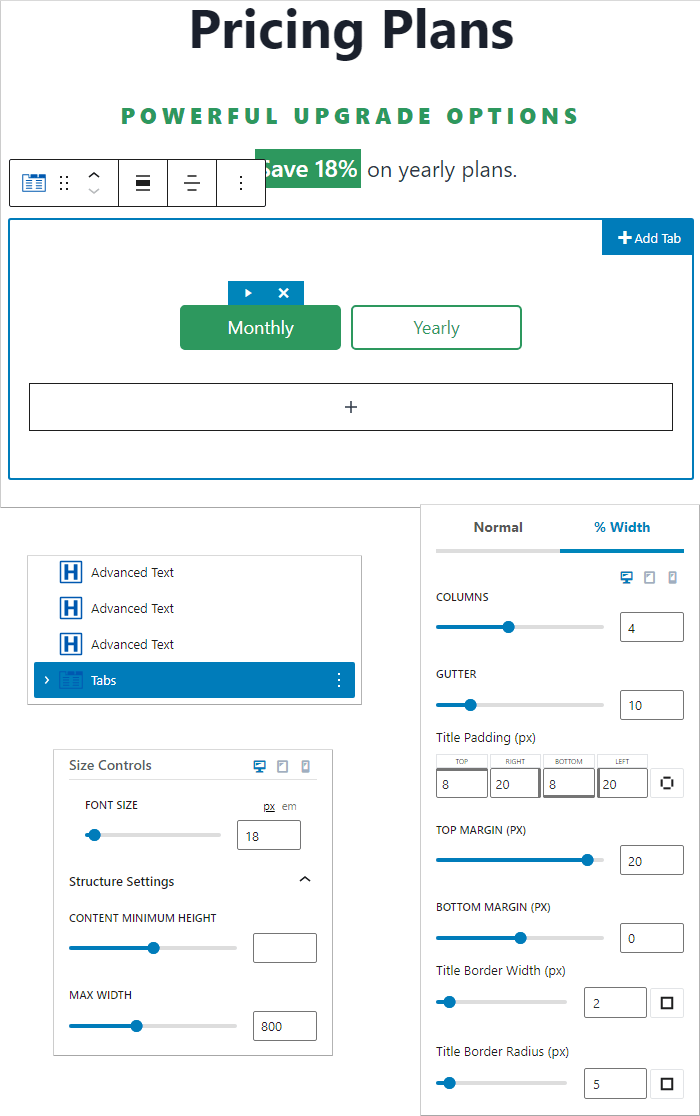
- Insert Kadence Row Layout Block to Tab 1
It is time to add a Kadence Row Layout block to the first tab (Monthly Tab).
It will be a two-column Row Layout block holding features and pricing information of two products.
Do the following changes;
Column gutter width – 40 pixels
Top padding – 25 pixels
Right padding – 20 pixels
Bottom padding – 25 pixels
Left padding – 20 pixels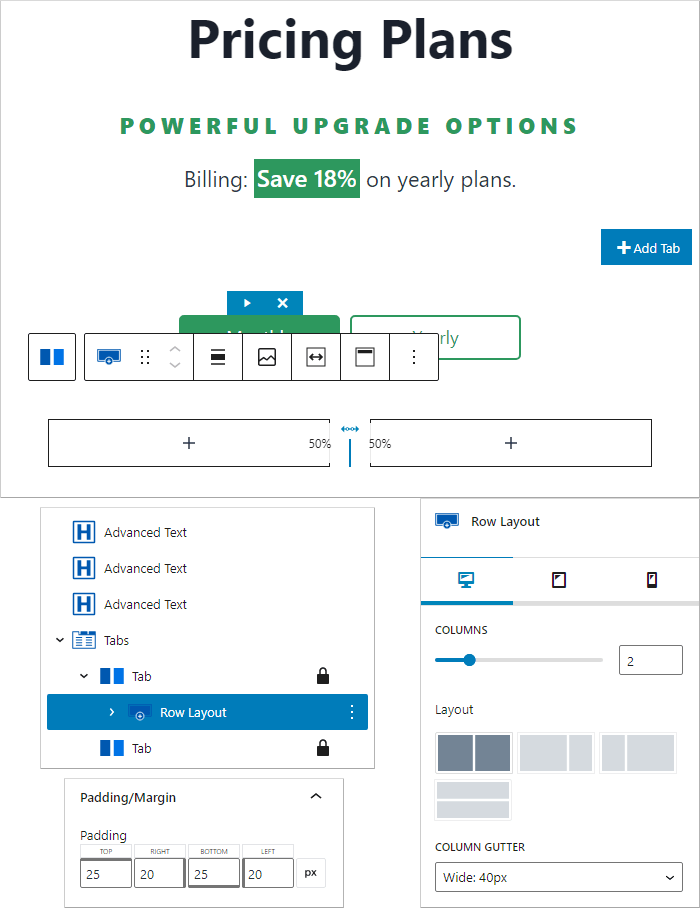
- Add Padding, Margin, and Border
Since, we have selected a 2 column Row Layout block, Kadence blocks gives 2 sections in the block.
You need to add appropriate padding, margin, and border to the first section, before adding text to it.
Optionally, you can also apply box shadow effect to your section, making it pop out.
The settings done at my end are as follows;
Top padding – 30 pixels
Right padding – 30 pixels
Bottom padding – 30 pixels
Left padding – 30 pixels
Top margin – 40 pixels
Border color – E6FDF4
Border width and radius – 4 pixels overall and 10 pixels overall respectively
Box shadow – Color: 000000 with alpha: 0.2; X: 0, Y:14, Blur: 25, Spread: -10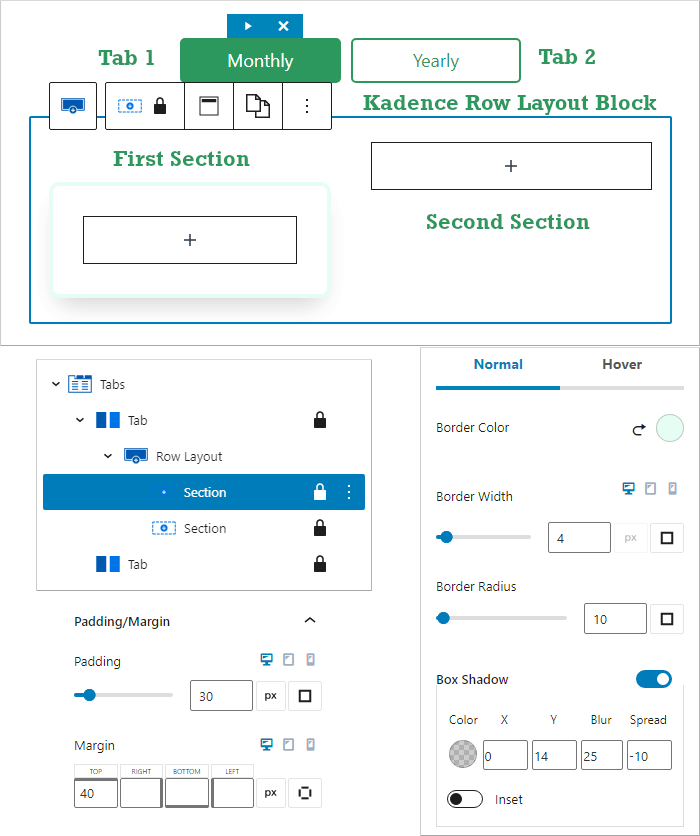
- Insert Kadence Advanced Text Block for product title
After styling the section, add an Advanced Text block for title of product 1.
Add text, change the tag to paragraph, and align to center.
I have used;
Text color – 718096
Font size – 24
Apply colors according to your brand. In this article, we are just trying to create the pricing table according to sample design.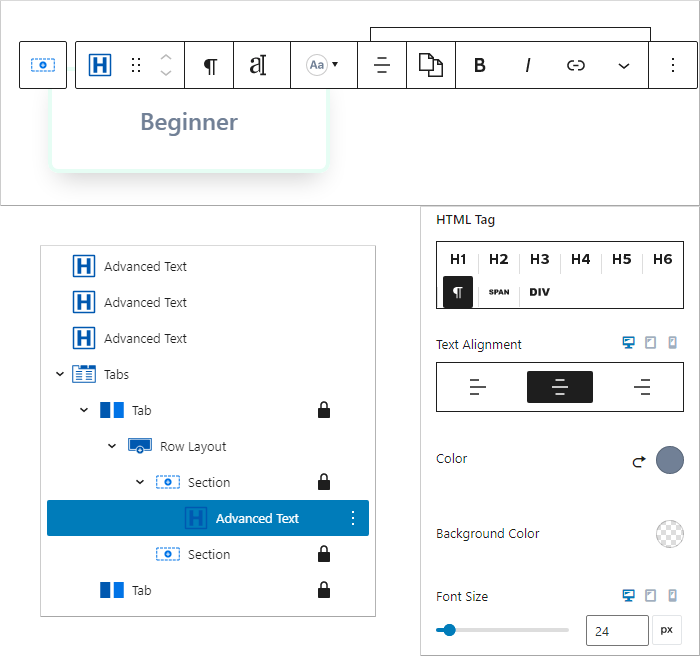
- Add another Advanced Text Block for price value
You can either duplicate the previous Advanced text block or add a new one.
In this Kadence Advanced Text block, we will add product’s price.
Just make sure to keep the tag as paragraph, align to center, change the text color, font size, and give additional font weight.
Our customization;
Text color – 2D3748
Font size – 40
Font weight – Bold 700
Top Margin – -20 pixels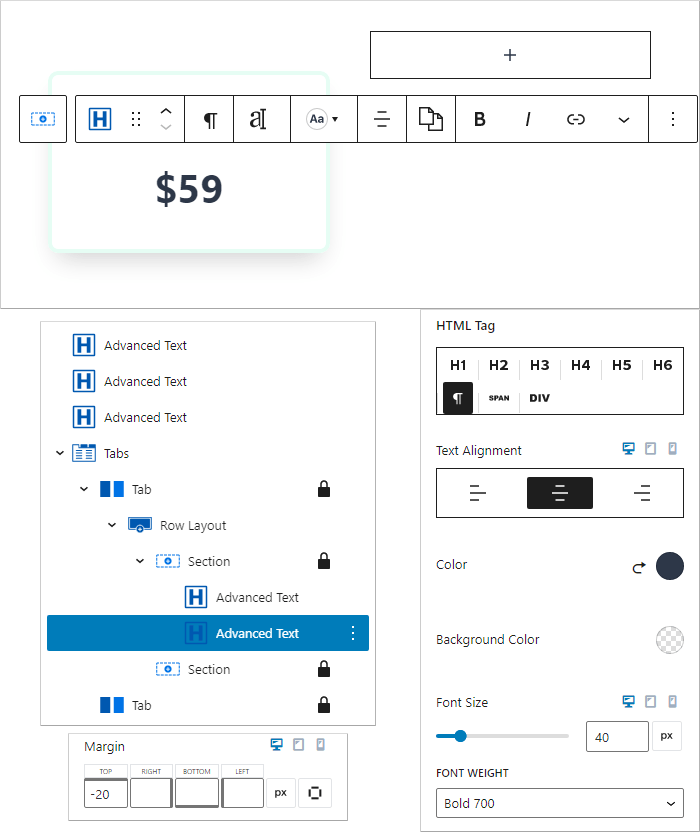
- Insert Kadence Icon List Block
Next, you’ve got to insert a Kadence Icon List block for writing product features.
Add your product features, search check from the default set of Kadence icons, and change icon color.
Leave everything else to default, change Kadence icon color to 2D985E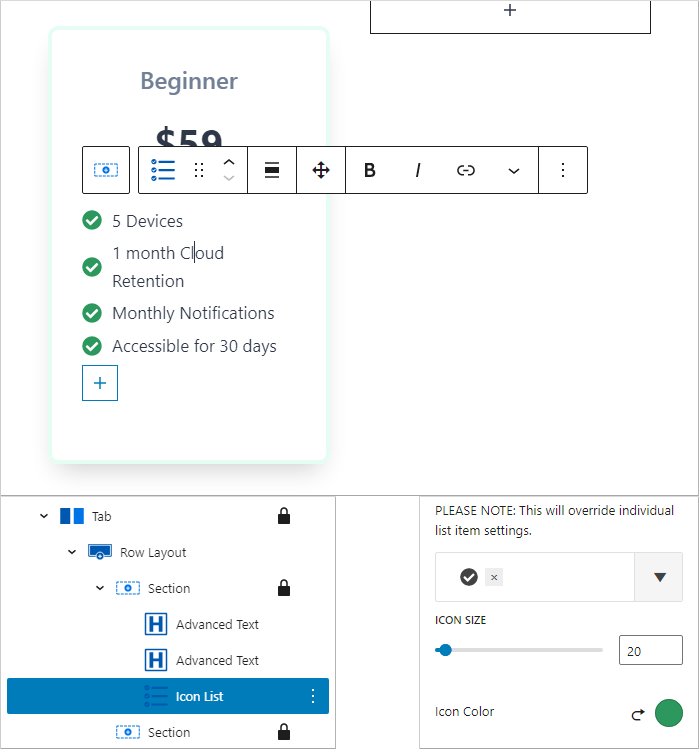
- Add the Kadence Advanced Button Block
After completing the product features, it is now time to add a call to action.
For this, we are going to insert a button with the text ‘Buy Now’
Align the Kadence Advanced Button block to the center, increase the text font size, button size, and overall button width.
Plus, also change the button’s color according to the color palette you’ve been using, for normal and hover conditions.
Optionally, you can also change the button text transform to uppercase.
1st Section Button 1 settings done at my end are as follows;
Font size – 18 pixels
Button size – Medium
Button width – Full
Normal Color Settings
Text color – 2D985E
Border color – 2D985E
Hover Color Settings
Text color – FFFFFF
Background color – 2D985E
Border color – 2D985E
Text transform – Uppercase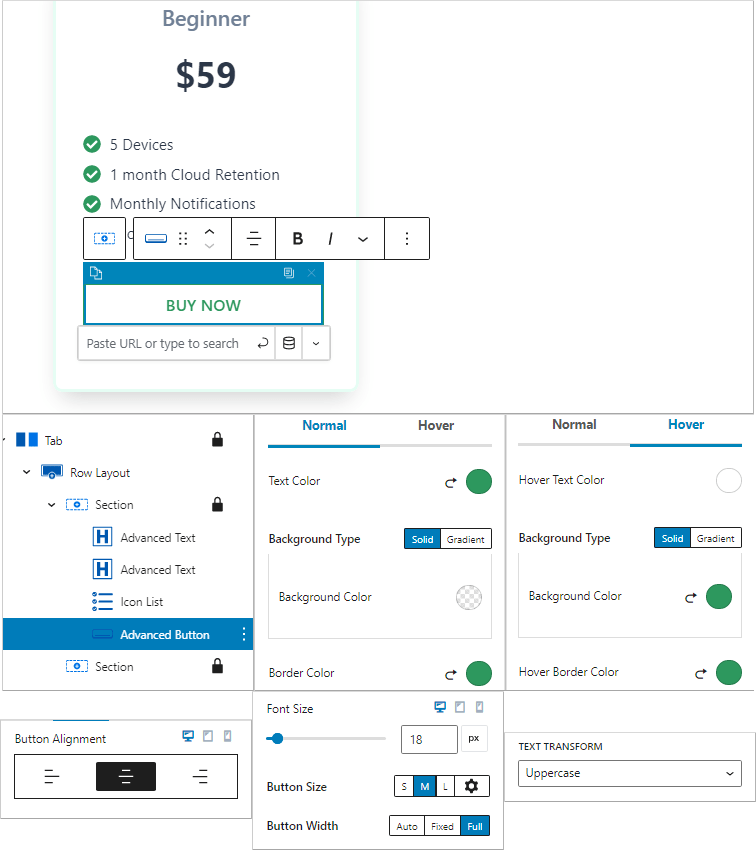
This completes customizing Section 1 of the Row Layout block.
Now, we will work on Section 2. - Copy and Paste Styles from Section 1 to Section 2
Before adding text to this section, first lets copy and paste styles from section 1 to section 2.
To do that, click on the 1st section of the Row Layout block and then click on Copy/Paste Styles option and copy styles
Now, the styles are copied. After that, from the list view, click on the 2nd section and paste styles.
This will paste all the styles like padding, margin, border, border radius, background colors, etc. Apart from the top margin, we will leave all the other padding and margin styles and only customize border color and background color.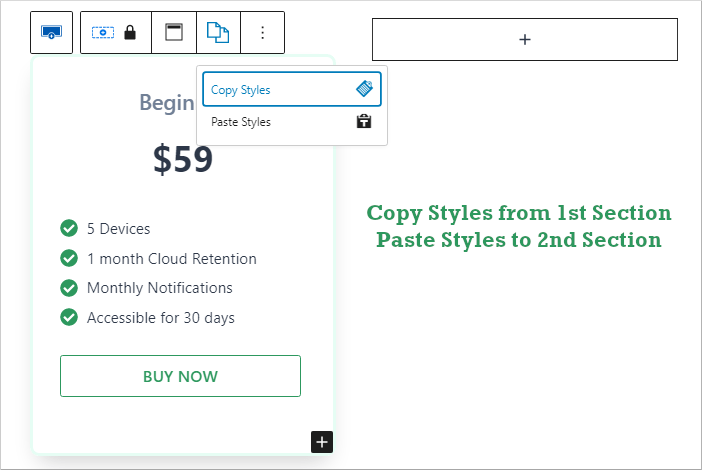
- Customize Section Background, Border, and Box Shadow Color
Since, we have copied styles from the 1st Section, you need to change the background color, remove border color, and add a different box shadow color that contrasts well with the 2nd Section’s background color.
Plus, you need to also change the top margin of the section from 40 pixels to 0.
The settings are as follows;
Section background color – 2D985E
Border color – none
Box shadow color
Leave the box shadow values as it is.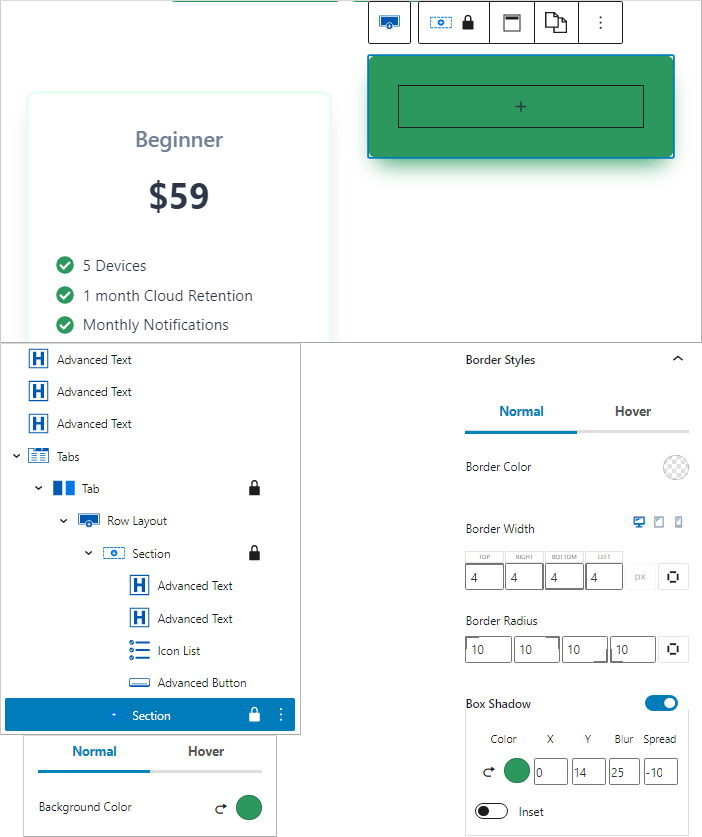
- Add Content to 2nd Section
For doing this, simply copy all the blocks from Kadence Row Layout’s 1st Section, insert a Gutenberg paragraph block to the 2nd section, and paste all the blocks.
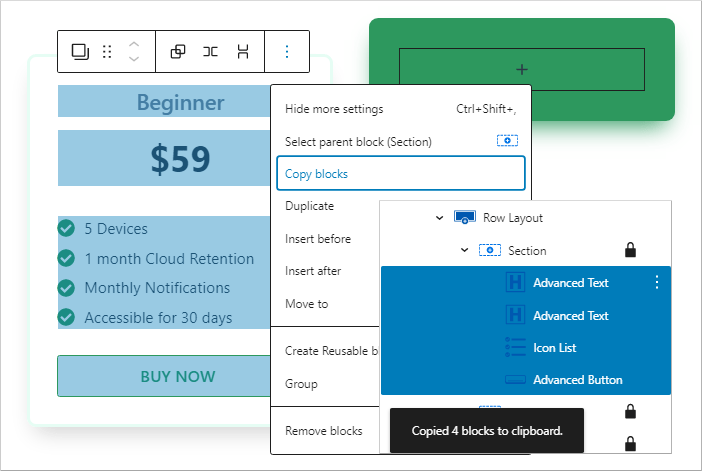
- Customize Colors in 2nd Section
Directly copying the blocks will paste similar colors. Whereas, our 2nd Section is in contrast from the first one.
The advantage of copying blocks is that your design gets free from human error and you also save a lot of time. Customizing fonts or colors do not take a lot of time.
Section 2 content customization settings;
Product title text color – FFFFFF
Price text color – FFFFFF
Icon list text color – FFFFFF
Icon color – FFFFFF
2nd Section Button 1 Settings
Font size – 18 pixels
Button size – Medium
Button width – Full
Normal Color Settings
Text color – FFFFFF
Border color – FFFFFF
Hover Color Settings
Text color – 2D985E
Background color – FFFFFF
Border color – FFFFFF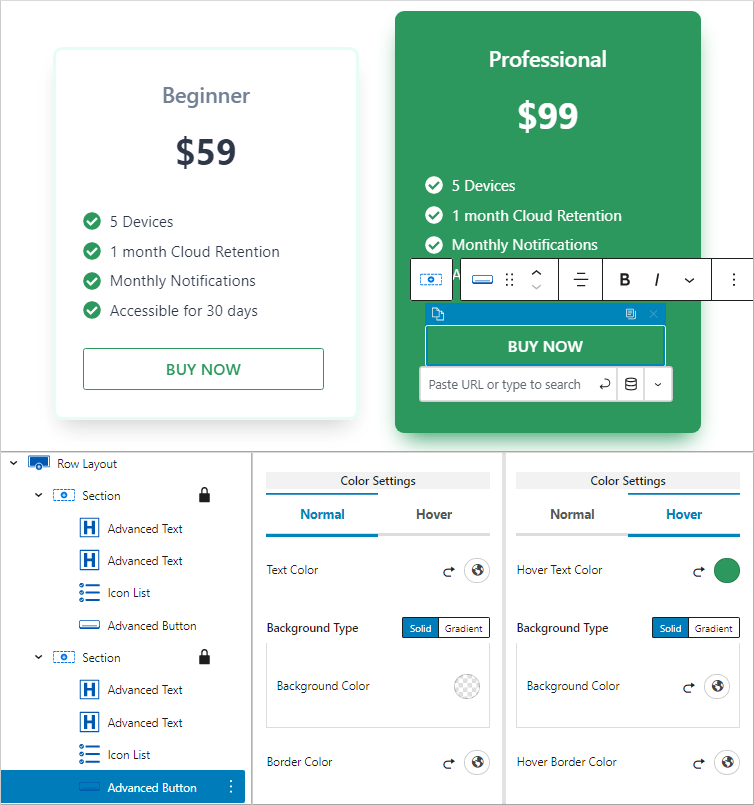
- Add more product features
Since, this section is for the flagship product, add more product features in the 2nd Section of the Kadence Row Layout block.
Click on the icon list and then click the plus icon to add more features.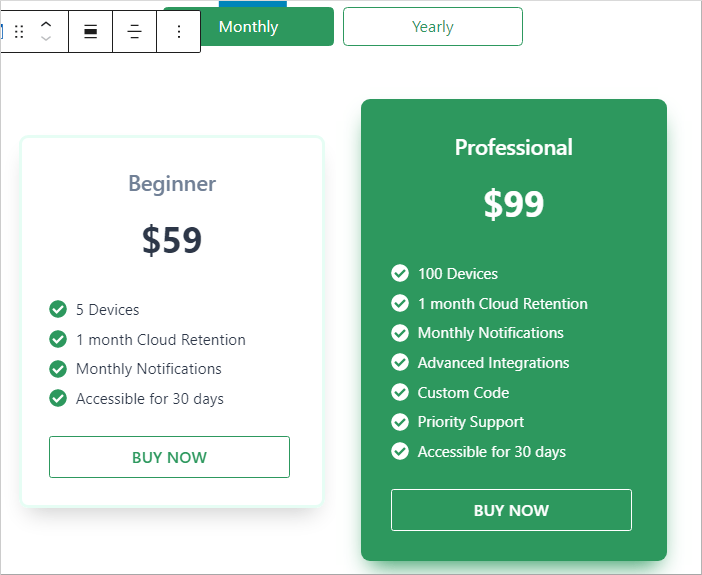
By now, you’ve completed the monthly Tab block pricing table.
It is time to add content to the yearly Tab block. - Add content to Kadence Blocks Tab 2
We have already labelled Tab 2 as ‘Yearly’ and completed its basic design.
Now, you just need to copy all the blocks. But, it has to be done carefully.
From the list view, locate and click the Kadence Row Layout block under Tab 1.
Then click on the three dots and select Copy Block.
Now, go to the Kadence Tab 2 block, and add a paragraph block.
Paste the copied Row Layout block to that paragraph block.
You will see an identical pricing table design. - Update Content under Tab 2
You will need to update the price value and some content under product features.
Apart from that, your pricing table in WordPress using Kadence blocks is completely ready.
Have a look at the image below.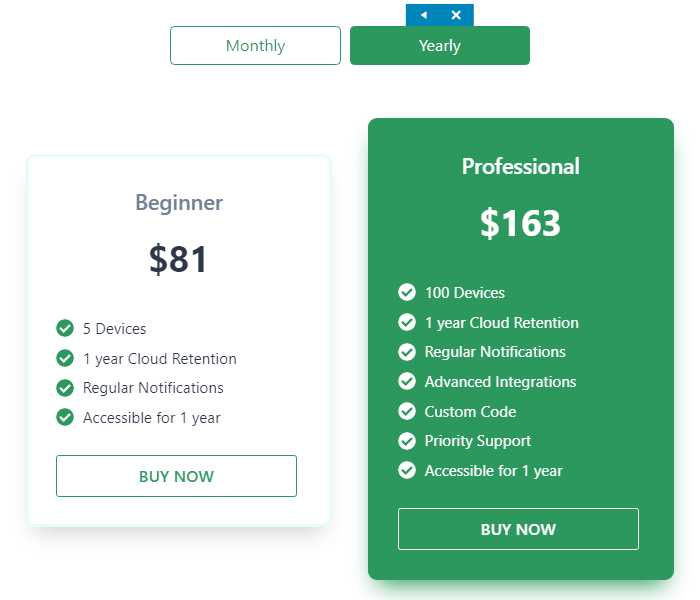
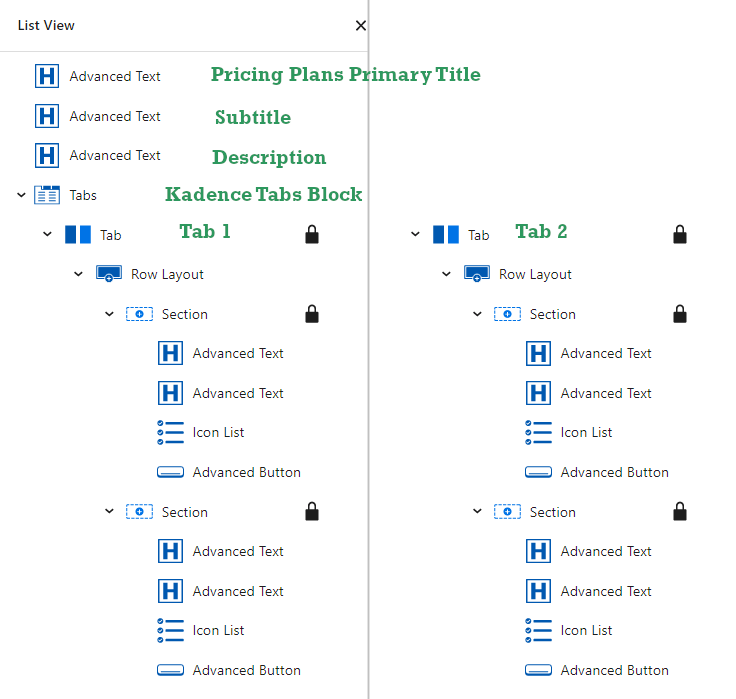
List View of the Kadence Blocks Pricing Table
For your reference I am adding the list view showing all the blocks used one after another.
The best part about Kadence WP is that they offer enough blocks with their Kadence block free version, that you can easily create a pricing table in any WordPress theme.
Plus, the Kadence Tabs block really does the job of a toggle switch over pricing tables.
Let me show you the front end look of our completed pricing table.
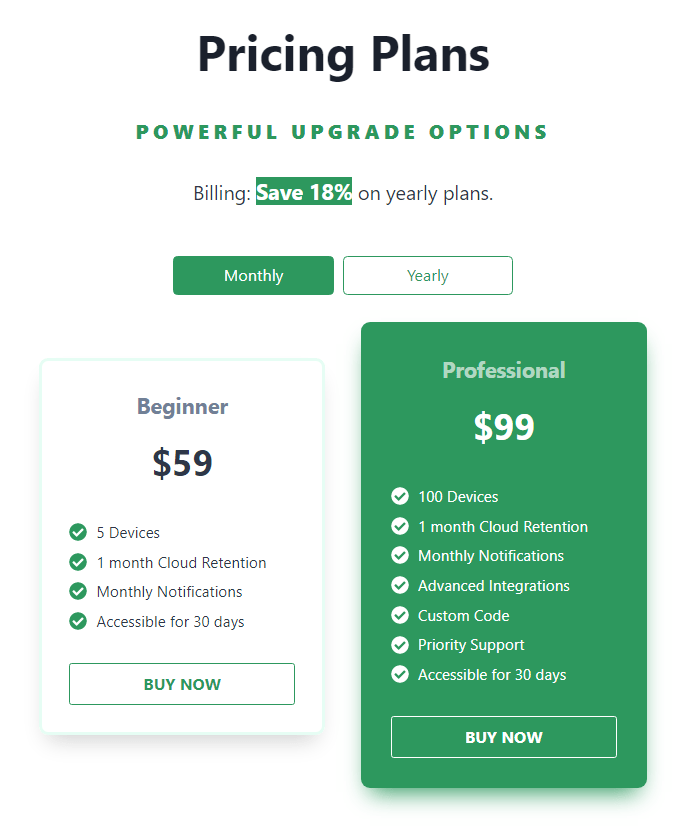
In some cases both the tables have equal amount of features and you’d want the sections to be of equal height.
In that case, click on the Row Layout block, go to Kadence Structure settings, and enable Inner Column Height to 100%
If you haven’t checked out Kadence Blocks yet, have a look at all the blocks and features available.
Conclusion
I hope now you can easily create a Kadence blocks pricing table in any WordPress theme.
The process is a little long but once created, you can convert it into reusable blocks and use the pricing table later as well.
In the end, if you have any questions, feel free to ask them in the comments section below.