In this Kadence Blocks tutorial, I will explain how to use Kadence Table of Contents block. The Kadence Table of Contents block is a block from the Kadence Blocks plugin.
After completing this article, you will be able to effortlessly create a simple table of contents block anywhere on your website.
We will go through each one of them step-by-step.
How to use Kadence Table of Contents block? – Quick Answer
- Install & activate Kadence blocks plugin
- Open any post or page where you intend to use Kadence Table of Contents block
- Click on “Add Block” button and select Kadence Table of Contents block
- Once added, customize the appearance and behavior according to your need
- Preview the page or post and see how the Kadence Table of Contents block looks
- Hit publish when you are satisfied
Quick Overview of Kadence Blocks Free
The Kadence Blocks WordPress plugin is a freely available on the WordPress repository.
Just so that you know, the following are the blocks available within the free Kadence Blocks plugin;
- Accordion
- Advanced Heading
- Kadence Row Layout Block
- Kadence Tabs
- Info Box
- Countdown (Simple- without matching of IP Address/Cookie)
- Posts
- Advanced Gallery
- Table of Contents
- Advanced Buttons
- Form
- Testimonials
- Icon List
- Spacer Divider
- Icon
To learn more about all Kadence Blocks (Free & Pro), have a look at
Step 1: Install Kadence Blocks Plugin
The first step is to install the Kadence Blocks plugin to your WordPress website.
Kadence free blocks is one of the most popular Gutenberg Block-Based plugins that extend Gutenberg’s functionality to give you more options while designing your site.
Just like Kadence theme, Kadence blocks also follows a freemium model. Meaning, there are a bunch of blocks that come with the free version of the plugin.
But, if you want to take your website to the next level, I’d suggest you go with Kadence Blocks Pro. It gives so much more than just a plain simple bunch of blocks.
Kadence Blocks Pro comes with all free blocks plus;
- Image Overlay with image link, overlay title and subtitle
- Kadence Video Block displaying a thumbnail with overlay and hover effects
- Modals to create actionable Call-To-Action Buttons
- Post Grid Carousel
- Portfolio Grid Carousel
- Product Carousel
- Split Content for image, video and/or text
- Kadence Advanced Slider
- User Info to showcase logged in user’s information
- Pro Gallery Addons like thumbnail sliders
- Professional Countdown Addons to perfectly showcase a sense of urgency
- Pro Form Addons to send automated responses to your lists
If you want to switch to Kadence and simultaneously get your hands on the Kadence Blocks Pro, then Kadence WP has bundled both of them together and offers at $129, called the Kadence Essential Bundle.
The deal is perfect, I would say.
Okay, let us get back to our installation of Kadence Blocks plugin.
Once the plugin is installed, you will need to activate it.
Step 2: Use Kadence Table of Contents Block
After installing the Kadence Blocks, let us now add the Table of Contents block to a WordPress page or post.
But, before that we will take a look at how Kadence Blocks looks on a default WordPress post.
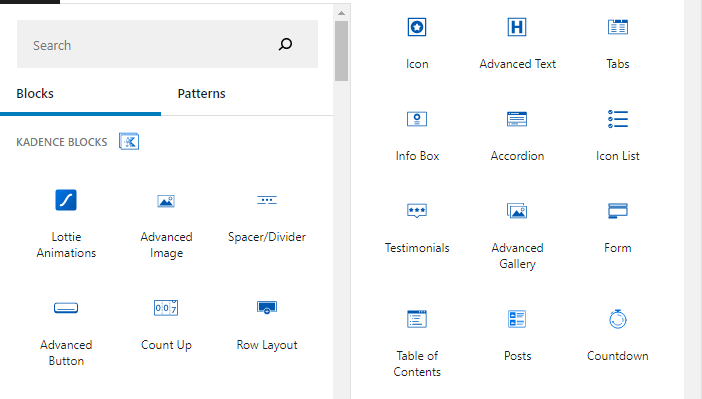
Now, there are two ways to use the Kadence Table of Contents Blocks so;
The first way is to press the + button (Add Block) that appears after every line you’ve entered.
Second way is to press / and type in ‘table of contents‘.

Once you’ve added the Table of Contents block, you will see a section with the Title “Table of Contents“ with a small message stating;
“Start adding Heading Blocks to create table of contents“

The best part of Kadence Table of Contents Block is that it can automatically read your Post Headings and add them to the Table of Contents section.
Step 3: Configuring Kadence Blocks Table of Contents
For configuring the Kadence Table of Contents Blocks we will go through each and every following settings;
- General Settings
- Allowed Headers
- Title Settings
- Collapsible Settings
- List Settings
- Container Settings
- Scroll Settings
Eventually, you will gain total knowledge of how to use and configure Table of Contents from the Kadence Blocks plugin.
Before we begin, all the settings are displayed on the right-hand side of your post/page editor.
General Settings
General settings are the ones that will displayed on the top of the block as soon as you use the Table of Contents block.
These settings are not displayed on the sidebar of your WordPress post/page.

By default, it is set to single column with unordered bullet list.
Mostly, you will always end up using a single column Table of Contents section. Only when your posts are long and they are kind of taking up the whole viewport area, you can manually change the Table of Contents column from one to two or three.
Note: If your headings already have a number, avoid using an ordered list. Because, that will just confuse your readers.
Allowed Headers
This is the first and foremost settings you will see on the right-hand sidebar in your WordPress Post Editor.
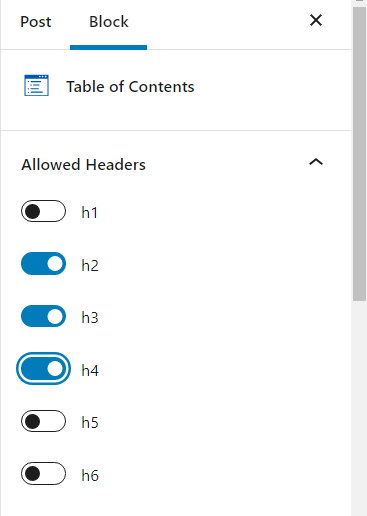
The best thing to do here is start the H2, H3, and H4 toggle switches.
The reason we do not switch on H1 is that the title of a blog post will always come before the table of contents section.
I also keep H5 and H6 off for improving my SEO.
Headings H2, H3 and H4 always help massively in SEO.
Title Settings
After the Allowed Headers settings, now it’s time to understand Title Settings.
You need to start with enabling the title.
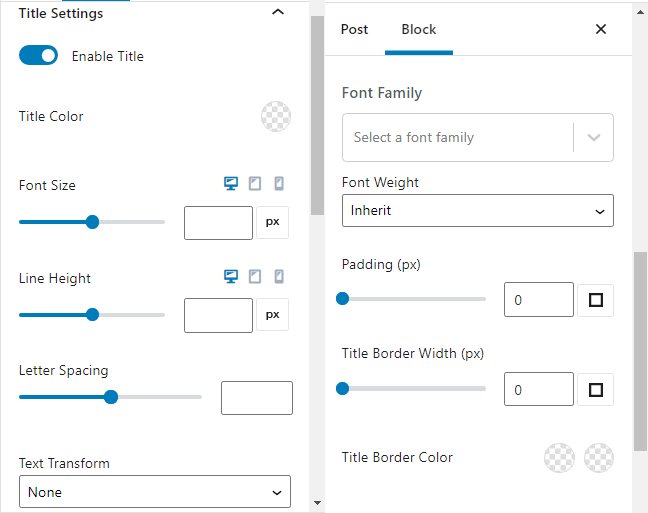
You get various other options to change the Title fonts, font-family, color, size, and other settings.
Plus, it also offers you Text Transform settings to change title from camel case to uppercase.
Collapsible Settings
Collapsible Settings are worth using if and only if you are going to use a Collapsible Table of Contents section in your WordPress posts.
For doing that, you will need to Enable Collapsible Content by switching on the toggle switch.
Note: If in-case you need to showcase your table of contents section as already collapsed, please switch on the Start Collapsed toggle switch.
List Settings
The next section is about List Settings.
List Settings help you customize the entire look and feel of all the list items under the Table of Contents block.
Things like List Item Gap, List Item Color, and List Item Style fall under these settings.
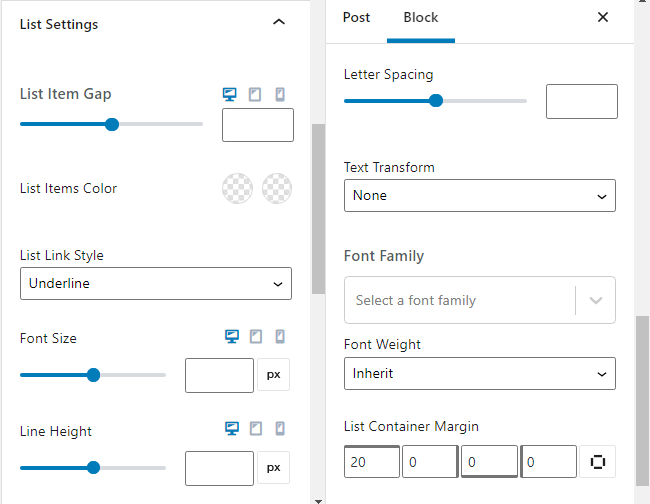
You can mostly leave all the above settings to default and select your font family, if intended and/or apply a particular List Item Gap as required for the font.
Moreover, Kadence also offers you to control the entire List Container Margin border.
Container Settings
Container Background allows for you to change the background of the section. By default, they set it to white.
Likewise, Container Padding default settings are 20 px.
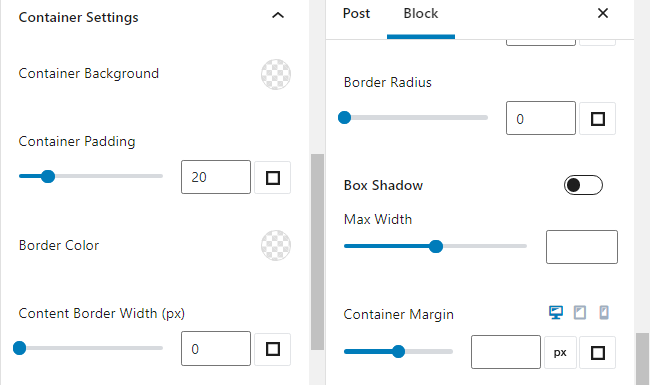
You can also change the Max Width with the Container Margin, as per your page design.
The Kadence Table of Contents Container Settings also lets you change the Border Radius, depending upon the layout of the section.
Scroll Settings
Scroll Settings are required if you already have an offset set for the top bar of your website.
For example, a site displaying a promotional offer on the top part of its page.

Here the top bar is taking up 50 px offset value.
When you use such an offset area at the beginning of a page, you will need to enable Smooth Scroll To ID toggle switch.
Step 4: View Kadence Table of Contents Block
This is the final step of action.
After completing all the steps from above, you can publish your post and view how your the new Table of Contents block appears on the front end of the blog post.
FAQ – Kadence Table of Contents Block
Kadence has released its incredible Gutenberg Block Based plugin, called Kadence Blocks. It is a free plugin providing multiple customization options.
The pro version is an extension with multiple powerful options that are not seen in the free version.
The Kadence Table of Contents block is a block offered by Kadence blocks plugin. It helps to create Table of Contents on your website’ blog posts or pages.
On your WordPress dashboard, go to Add New Plugin, find Kadence Blocks, install and activate the plugin. Following that, use any block according to the need of your web page.
For example, you can easily use the Kadence Table of Contents block for your blog post, or even an Accordion for the FAQ section.
For installing Kadence Blocks Pro, you will first need to buy Kadence Blocks Pro or the Kadence Essential bundle.
Kadence Blocks Pro will cost you $69 and the Kadence Essential Bundle is priced at $129
Unlike other Table of Contents WordPress plugin, the Kadence Table of Contents block offers lots of configuration settings like
1. General Settings
2. Allowed Headers
3. Title Settings
4. Collapsible Settings
5. List Settings
6. Container Settings
7. Scroll Settings
The Kadence Table of Contents block supports headings from H1 to H6. Just toggle the required headings switch and that heading will appear in the Table of Contents section of your published post or page.
Yes, you get 7 different configuration and customization settings to customize your Kadence Table of Contents block.
Yes, the Kadence Table of Contents block supports nesting. If you have used an H2 followed by H3 and then followed by H4 headings. The Kadence Table of Contents block will automatically identify their hierarchy and display a proper nested Table of Contents section.
Yes, you can exclude certain headings from the Kadence Table of Contents block by adding a class name “toc-ignore”. The changes will not reflect on the back-end but will surely hide that heading on the front-end.
Yes, if you are using Kadence Pro, just create a Kadence elements hook and apply it to all posts.
No, Kadence theme is not necessary. Kadence Blocks works with all popular WordPress themes.

