In this Kadence Blocks tutorial, you will learn how to easily create an affiliate box using Kadence blocks.
Plus, you won’t even need to purchase the premium version of Kadence plugin. This is totally free.
Kadence blocks is one the most popular WordPress plugin, and you may be surprised to see what all you can create with this lightweight plugin.
Following are the steps to create an affiliate box using Kadence blocks.
- Create an outer container holding the entire affiliate box
- Add Headline for product title
- Insert Row Layout block with 2 columns for product description
- Add product features
- Insert product images
- Add ‘Check on Amazon’ button and give affiliate link
- Add ‘Check on Walmart’ button and apply affiliate link
- Insert ‘Check on eBay’ button, plus apply product affiliate link to it
Affiliate boxes within the content or a small vertical style affiliate widget on sidebar will surely increase the CTR (click through rate) of the products you are trying to promote on your affiliate website.
How To Create An Affiliate Box Using Kadence Blocks?
Unlike GenerateBlocks, Kadence blocks does not use a Container block, instead you get a Row Layout block that automatically creates a Section block within it.
So creating this affiliate box will be a little different from the one we made using GenerateBlocks.
Plus, this time I am going to show you how you can easily fit more information in a 3 column layout affiliate box.
Have a look at what we are going to create.
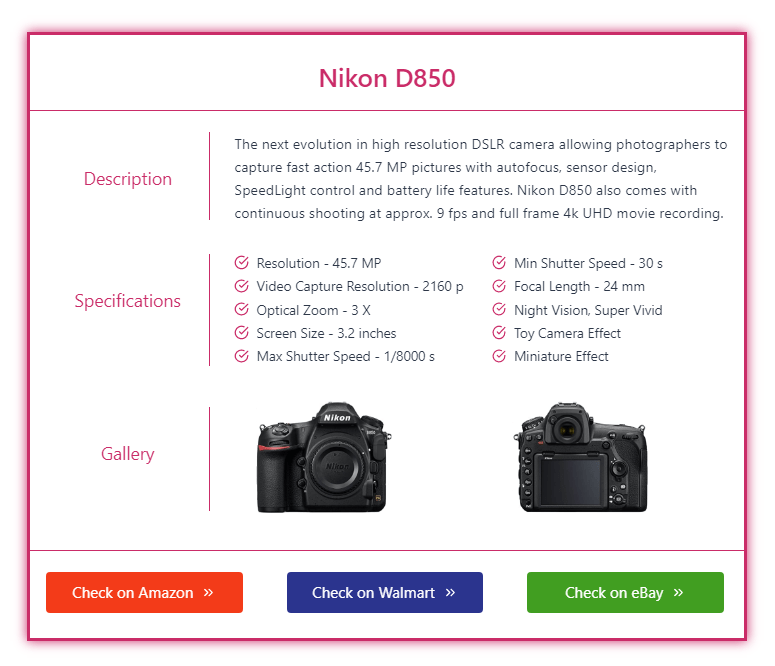
The plus point of this style is that affiliate marketers can keep this box right after the introduction of the product.
Since, the box contains product description, features, multiple images, and multiple CTA buttons. There is a high chance readers might click on the CTA buttons and get converted before reading the entire review post.
Time needed: 15 minutes
This affiliate box has been created on a site that does not have a sidebar and the post container layout is set to 1200 pixels.
If you already have a sidebar, choose a wide layout with a sidebar, from the theme customizer and reduce the font size of the text within the affiliate box. So that, you can accommodate everything in the affiliate banner under 800 pixels.
Remember, we are going to create 3 column layout in this affiliate box, so 800 pixels is the minimum layout you will need. I will be working on 900 pixels layout.
- Add a Kadence Row Layout Block for outer container
The first block to start with is the Kadence Row Layout block. Insert this block and choose 1 column.
The entire affiliate box is going to sit within this row layout block.
By default, two things come with every Kadence block row layout block;
1. The top and bottom padding is set to 25 pixels.
2. Every row layout block comes with a Section block in it.
Under Structure Settings of Row Layout block set the Custom Content Max Width to 900 pixels.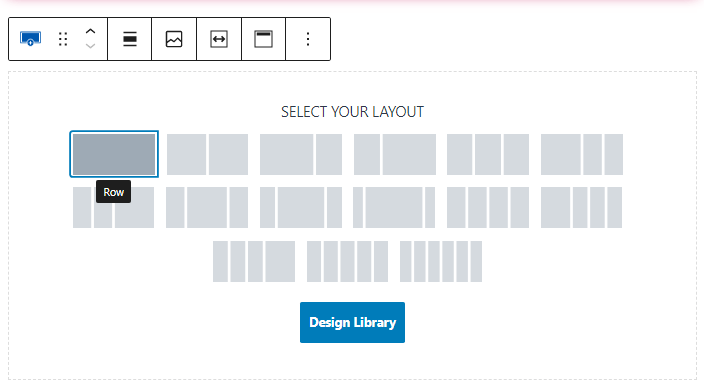
- Customize the outer Row Layout block
In the next step we are going to insert another row layout block and give a border that block.
For now, you need to customize the Content Max Width of outer row layout block and add box shadow to its section block.
To apply custom Content Max Width to a Kadence Row Layout block, go to Structure Settings and add 900 pixels Custom Content Max Width.
For giving Box Shadow to Section, click on Section block (under outer row layout block), go to Border Styles >> Box Shadow >> add color #CA2C68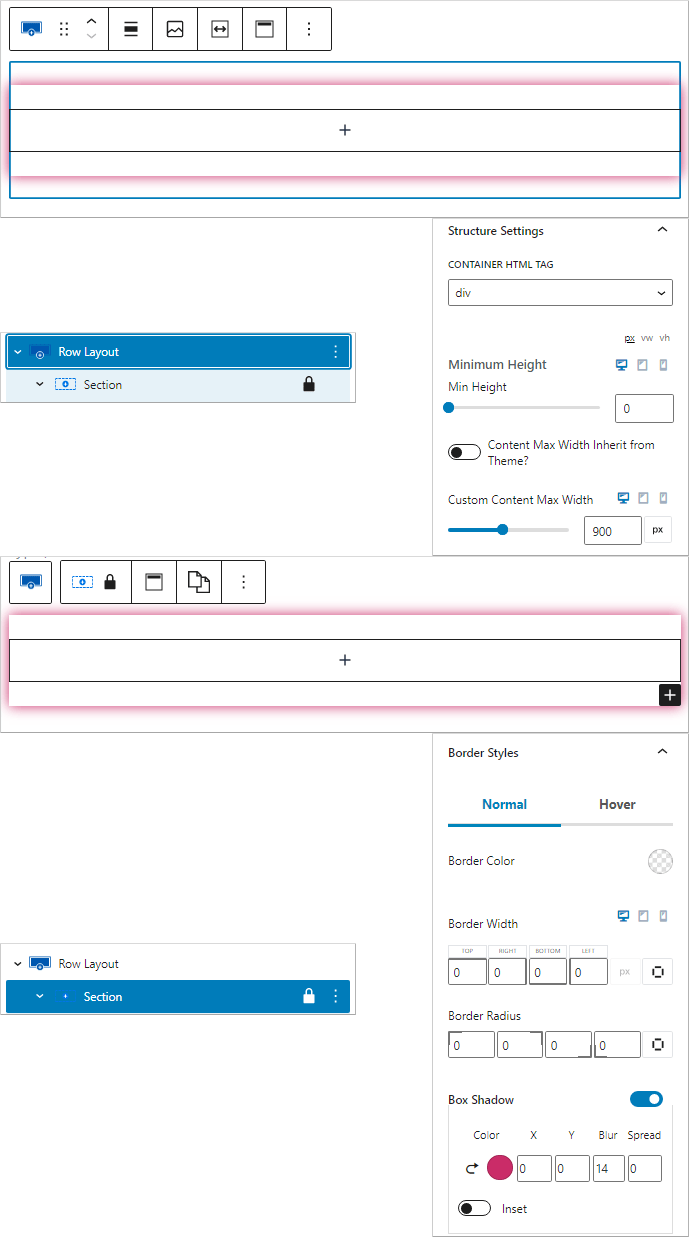
- Add another Row Layout block
Insert another Kadence row layout block under the section block of the outer row layout block.
This is not required for websites that are running with sidebars.
Actually, my post layout is 1200 pixels and I do not have a sidebar. Therefore, to give a narrower look on a normal layout, I have customized the max width of my outer layout to 900 pixels in the previous step.
This inner row layout block will include all the elements needed to build the affiliate product box.
Customization done on this row layout block are as follows;
Border width – 4 pixels overall
Border color – CA2C68
Top padding – 25 pixels
Bottom padding – 5 pixels
- Add a Row Layout block to insert product title
Click on the section block of our main inner row layout block and add another row layout block of 1 column, to place product title.
Customize the row layout block as below;
Right padding – 20 pixels
Bottom padding – 25 pixels
Left padding – 20 pixels
Bottom border width – 2 pixels
Border color – CA2C68
Then click on the section of this row layout block, add a Kadence Advanced Text Block, and change the tag to paragraph.
You do not want any headings within the affiliate box messing up your page or post’s SEO.
Also, align the text to center, make it bold, change font size, and color.
Customizing the Advanced Text block from the section;
Tag – Paragraph tag
Text align – Center
Font style – Bold
Font size – 32 pixels
Font color – CA2C68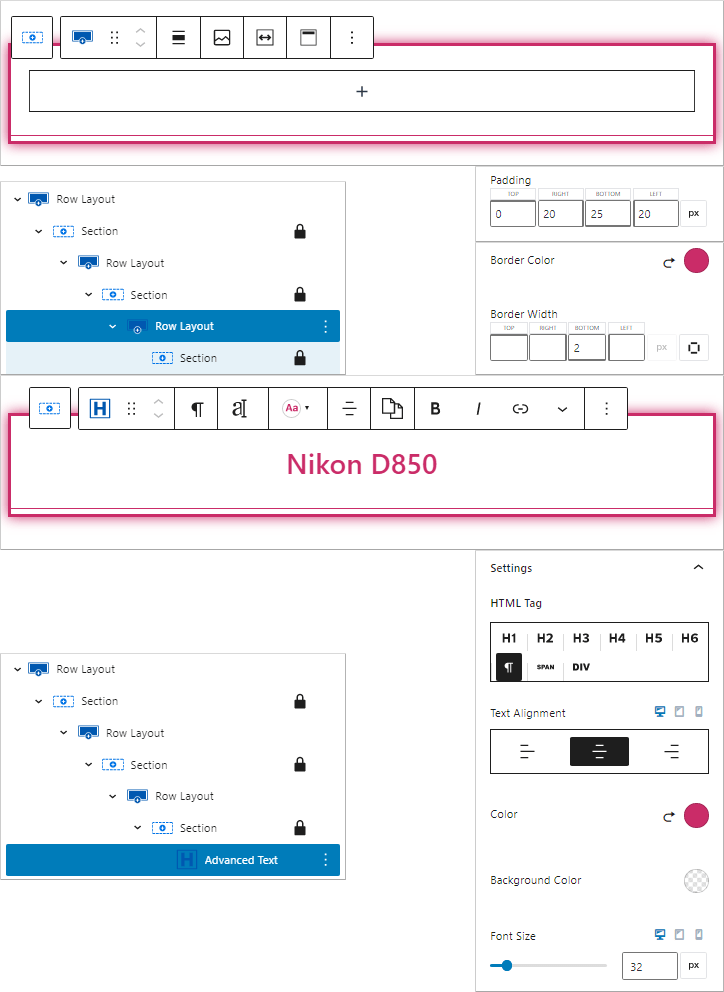
- Insert Row Layout block for product description
We need to design a two column section that holds product description.
One column will contain the label ‘Description’ and the other one will hold the actual description.
For that, you need to click on the Section block of the inner row layout block and add another row layout block of 2 columns.
We need the first section to take up 25% of layout width and the second section should be 75%
By default, you do not get that option under the right side settings.
Therefore, click on the section resizer, change it to fluid resizing and manually set it to 25/75.
Row Layout block settings;
Top padding – 25 pixels
Right padding – 20 pixels
Bottom padding – 25 pixels
Left padding – 20 pixels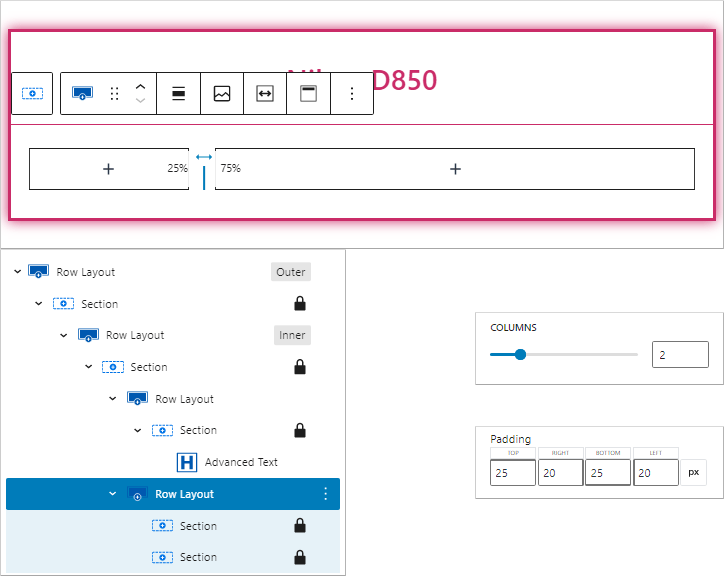
- Give Section block a product description label
As you can already see from the previous step, there are two sections.
Let us start working on both the sections one by one.
To differentiate between both the sections, I have given a right border and a minimum height.
Section customization;
Minimum height – 110 pixels
Right border – 2 pixels
Border color – CA2C68
To give ‘Description’ label, we just need an Advanced Text block. Thus, in this section add the Kadence block Advanced Text block.
Set the tag to paragraph, align the text to center, give top padding, change its font size, and color.
Customizing Advanced Text block in the section;
Tag – Paragraph tag
Text align – Center
Top padding – 40 pixels
Font size – 22 pixels
Font color – CA2C68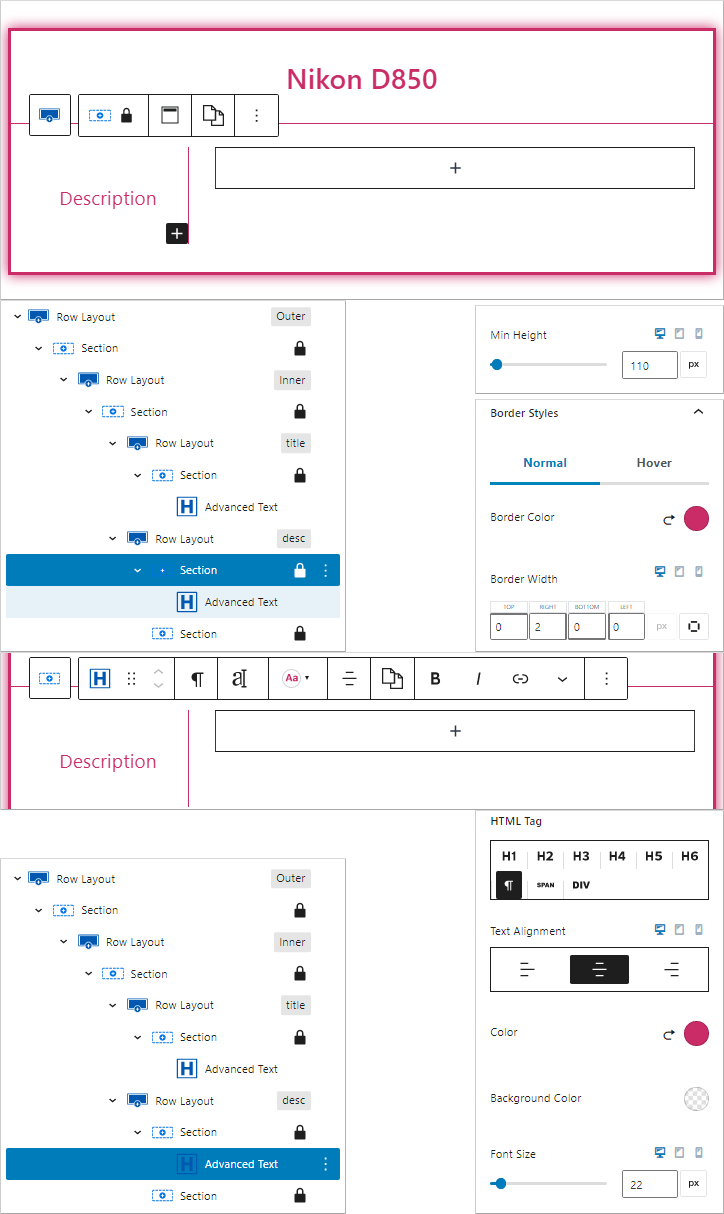
- Add actual product description in the second Section
From the list view, click on the next Section block and insert a normal Gutenberg paragraph block.
Also, reduce the font size to 18 pixels.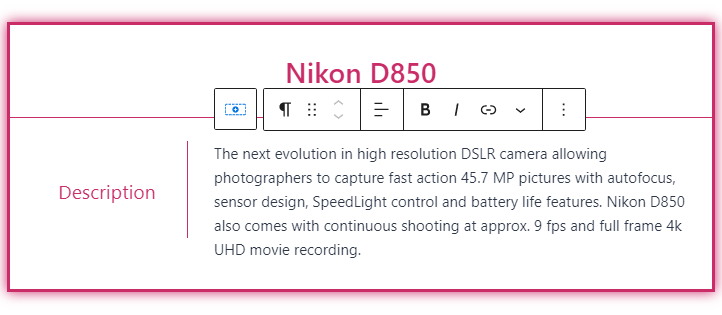
- Insert a Kadence Row Layout block for product features
From the list view, duplicate the above row layout block and increase the columns from 2 to 3.
Since, you have 3 columns, you will need to adjust the column resizer.
Adjust it in way that the right border of the first section is directly in-line with the right border of the section above.
Also change the first section’s minimum height to 140 pixels.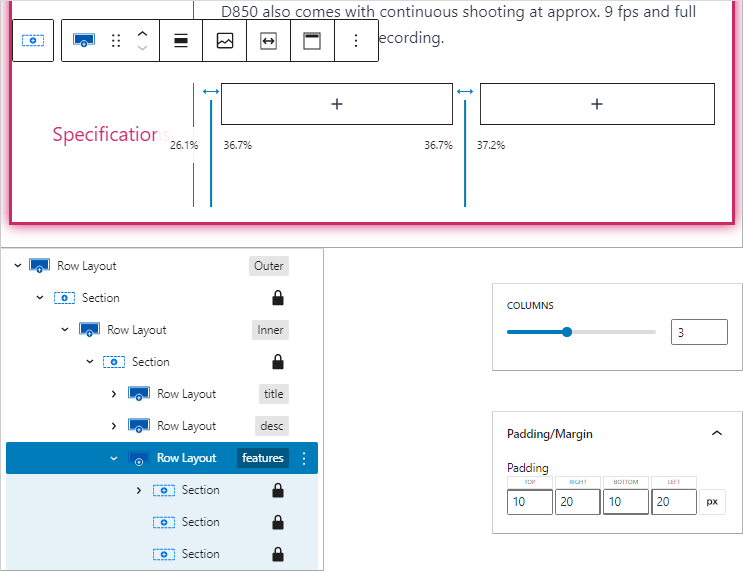
- Write product features in the other two section blocks
To write product features, use the Kadence Icon List block.
From the list view, click on the second section, and add an Icon List block. Write 3 to 4 points in each section.
Under Icon List, go to Edit All Icon Style Together and change icon size and icon color. Do this for both the Icon List blocks.
Also, align icons to top, under list controls
Icon List customization;
Icon List size – 17 pixels
Icon List color – CA2C68
Align icon – Top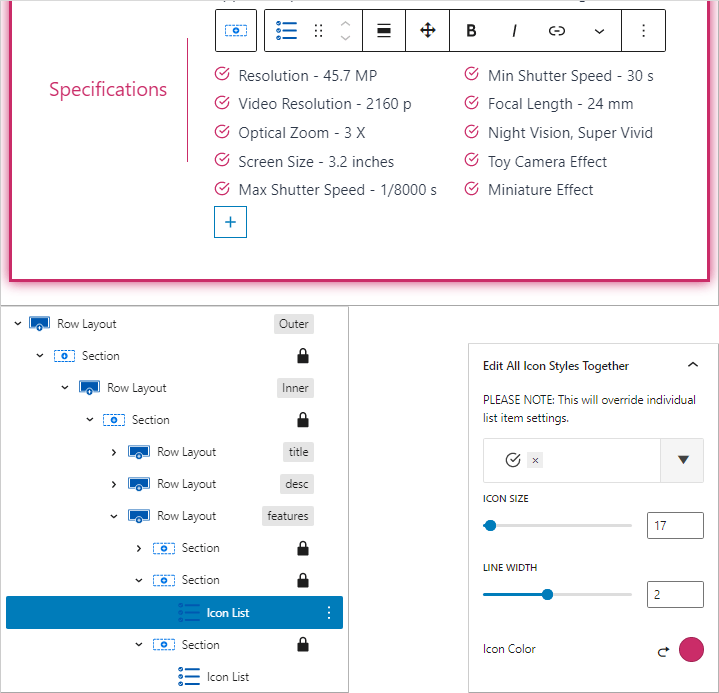
- Add Row Layout block for product gallery
Click on the above row layout block to duplicate another Kadence row layout block.
This block will also contain 3 columns (sections), with the first section displaying ‘Gallery’ label, and other two sections will show product images.
Change text in first section from ‘Specifications’ to ‘Gallery’
You will also need to modify the row layout’s padding.
Padding of Row Layout;
Top padding – 10 pixels
Right padding – 20 pixels
Bottom padding – 5 pixels
Left padding – 20 pixels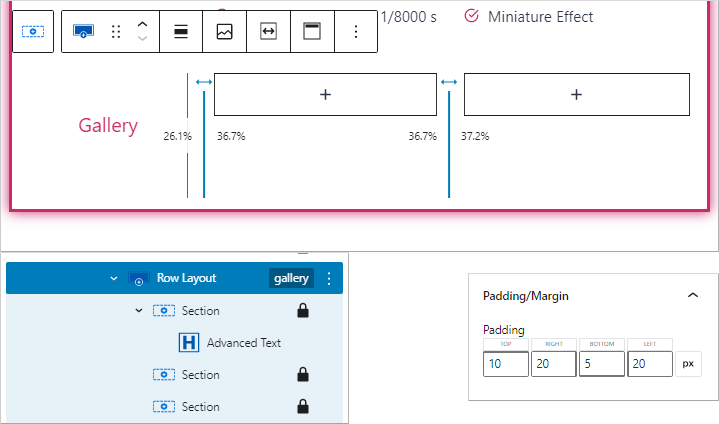
- Insert product images to the affiliate product box
Alright, in the next two sections, you will need to insert product images.
Click on the next section from the list view, and select the Kadence Advanced Image block. Further, upload the relevant product image and repeat the same for the next section.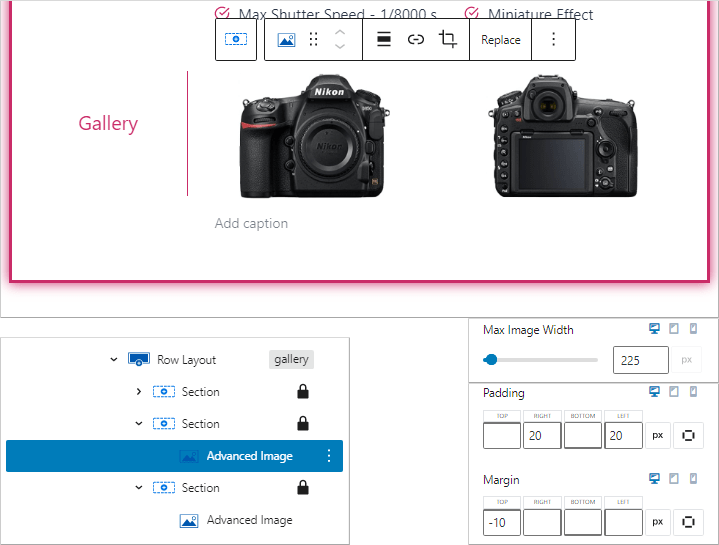
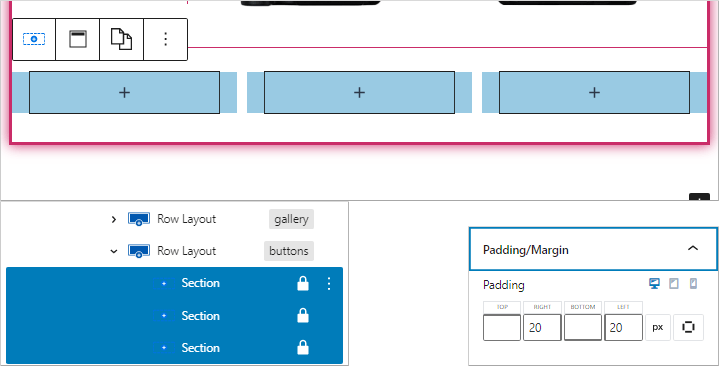
- Insert Kadence Row Layout block for affiliate buttons
Duplicate the above row layout block, but this time go to the column layout area and choose 3 equal columns.
Empty the Section blocks. Meaning remove Advanced text block from section 1 and Advanced Image block from sections 2 and 3.
Remove the minimum height and right border from section 1.
Perform the following customization on the row layout block;
Column gutter width – 10 pixels
Top padding – 25 pixels
Bottom padding – 25 pixels
Top border – 2 pixels
Border color – CA2C68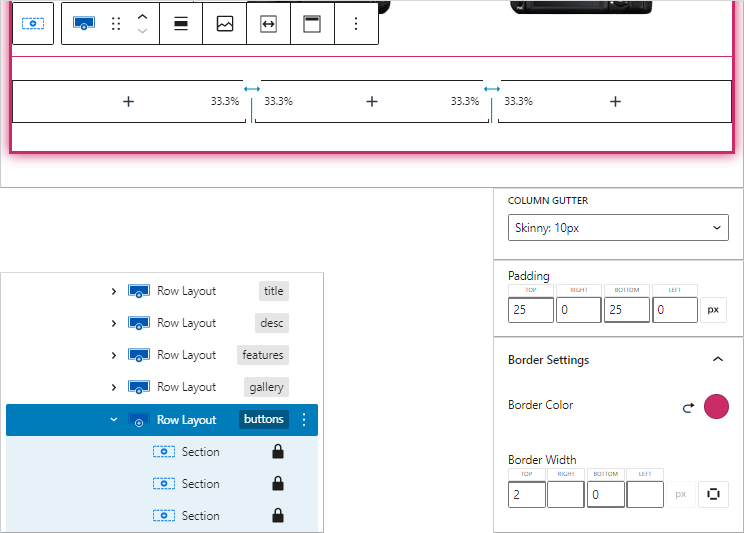
- Customize right and left padding of all three sections
Go to each section, and add a 20 pixels padding for right and left side.
- Add Amazon affiliate button in Section 1
Click on 1st section, insert a Kadence Advanced Button block and type ‘Check on Amazon’. Also apply an icon.
We will be customizing the button font size, normal colors, hover colors, border, etc;
Button settings;
Font size – 19 pixels
Button width – Full
Normal color settings
Text color – FFFFFF
Background color – F33B19
Border color – F33B19
Hover color settings
Text color – F33B19
Background color – FFFFFF
Border color – F33B19
Hover box shadow – F33B19 with 0.75 alpha | X:2, Y:2, Blur:3, Spread:0
Border width – 3 pixels
Border radius – 5 pixels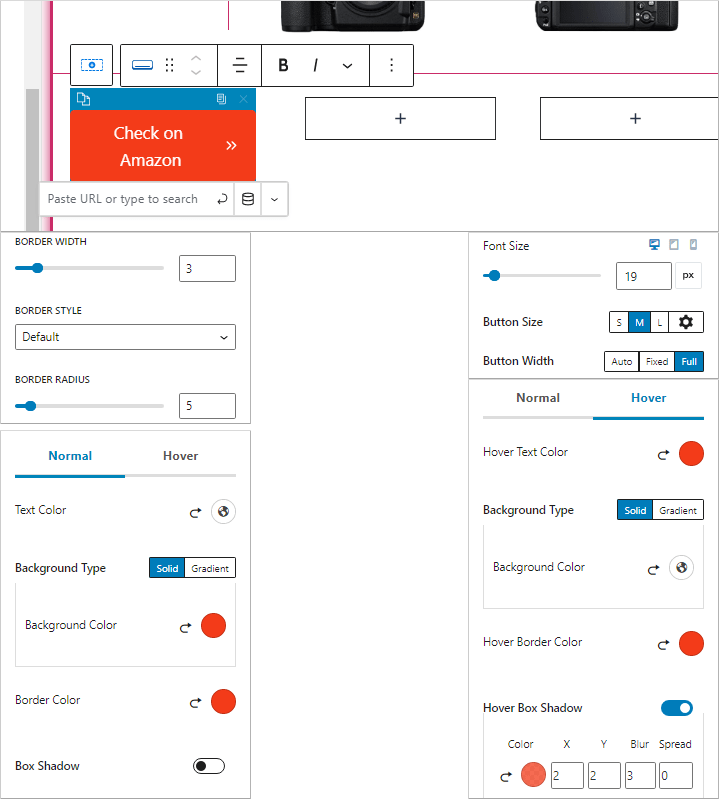
- Add Walmart affiliate button in Section 2
Click on the 2nd section, insert a Kadence Advanced Button block and type ‘Check on Walmart’. Also apply the same Kadence icon.
Copy the settings from below.
Button settings;
Font size – 19 pixels
Button width – Full
Normal color settings
Text color – FFFFFF
Background color – 2B348E
Border color – 2B348E
Hover color settings
Text color – 2B348E
Background color – FFFFFF
Border color – 2B348E
Hover box shadow – 2B348E with 0.75 alpha | X:2, Y:2, Blur:3, Spread:0
Border width – 3 pixels
Border radius – 5 pixels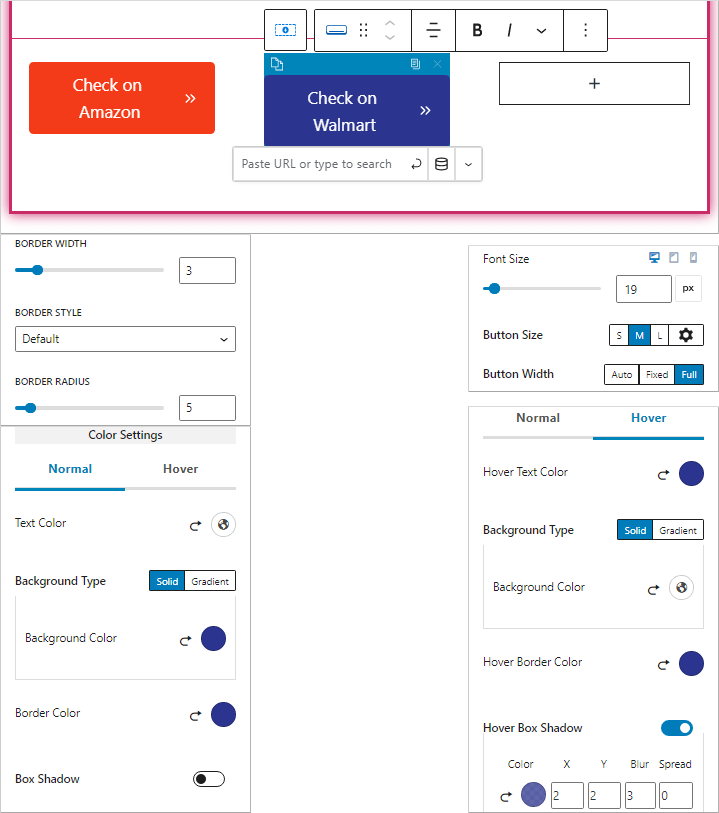
- Add eBay affiliate button in Section 3
This is the final step of creating a beautiful multi-network affiliate box using Kadence blocks with description, features and product images.
Click on the 3rd section, similarly insert a Kadence Advanced Button block and type ‘Check on eBay’. Plus, give the right icon.
Copy the settings from below.
Button settings;
Font size – 19 pixels
Button width – Full
Normal color settings
Text color – FFFFFF
Background color – 419E21
Border color – 419E21
Hover color settings
Text color – 419E21
Background color – FFFFFF
Border color – 419E21
Hover box shadow – 419E21 with 0.75 alpha | X:2, Y:2, Blur:3, Spread:0
Border width – 3 pixels
Border radius – 5 pixels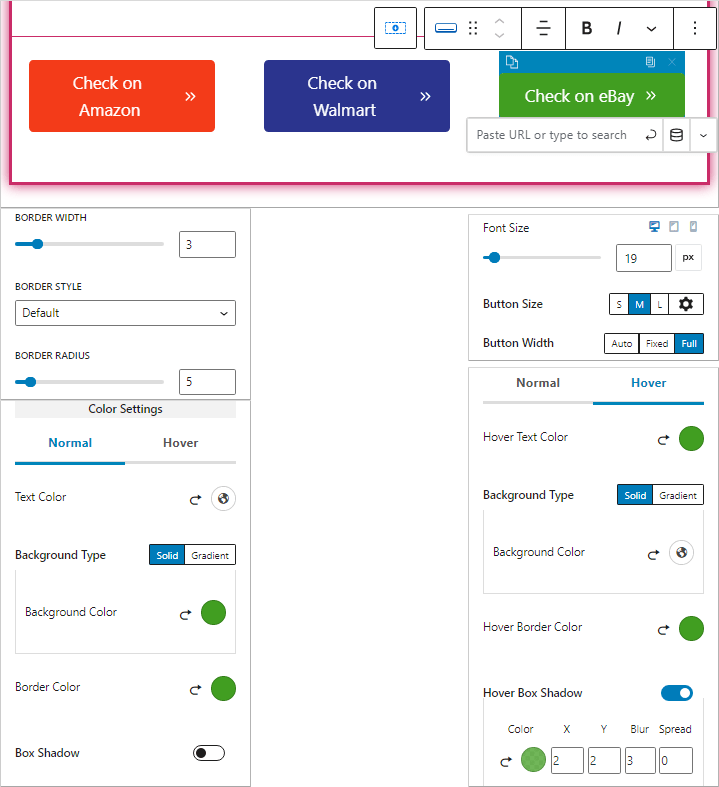
There you go, if you’ve completed all the steps, then your affiliate box should look like the on below.
Note:- Two important things to take not here are do not use any product image from the Internet without permission. Do not use Amazon, Walmart, or eBay’s logo.
Conclusion
You can create various elements with the Kadence plugin. Plus, it works with any WordPress theme and is completely free if you wanted to use the basic set of blocks.
For blocks like image overlay, modals & video popups, post carousel, portfolio carousel, advanced slider, pro addons for gallery, premium Kadence blocks templates, etc. you will need to invest in Kadence Blocks Pro.
You get multiple blocks with Kadence blocks and I’ve already created a pricing table using them. Have a look at the monthly/yearly pricing table with Kadence blocks.