In this GenerateBlocks post, we will see how you can easily create an affiliate box using GenerateBlocks free version.
With the rising trend of affiliate marketing, multiple bloggers have shifted their focus on Amazon affiliates and many other big affiliate networks.
However, writing information about products, product reviews, etc. requires content creators to add specialized affiliate boxes that pops out for readers. Eventually, converting into sales or affiliate commissions, to be precise.
Therefore, if there is a way to create these nice looking affiliate boxes for free, then that is a bonus for affiliate marketers.
Hence, I bring you a step-by-step guide on how to create an affiliate box using GenerateBlocks
- Create an outer Container block that holds the entire affiliate box
- Insert a GenerateBlocks Grid block of two columns to hold ‘Best Seller’ and ‘Sale’ labels
- Insert an inner Container block that holds product image, name, description, and affiliate buttons
- Add a Grid block of two columns
- In the first container of grid block add product image
- In the second container of grid block add Headline blocks for title and product features
- Lastly, add a GenerateBlocks button block to add affiliate button link
What is an Affiliate Product Box?
An affiliate product box is simply a content box that can be placed anywhere within your content.
It basically has 4 important elements;
- Product Name
- Product Image
- Features or short description
- CTA buy now button with an affiliate link to the product’s website
Imagine, you’ve written a great review about a hair product, and your content only has a few affiliate links within the text.
Do you think that is going to generate better CTR, compared to a specialized affiliate product box?
No.
An affiliate product box contains product name, image, some unique features and a buy now button that straight-away takes the reader to the product’s website.
Inserting a small cookie on your reader’s computer.
You can create an Amazon affiliate product box, Walmart affiliate product box, or any other major affiliate network for that matter.
The difference lies only within the design style and your affiliate link.
How To Create An Affiliate Box Using GenerateBlocks?
First you’ll need to install and activate the GenerateBlocks plugin.
It is free for download, and helps you create practically anything on your website.
Plus, its works flawlessly with any other WordPress theme, and does not even slow down your site.
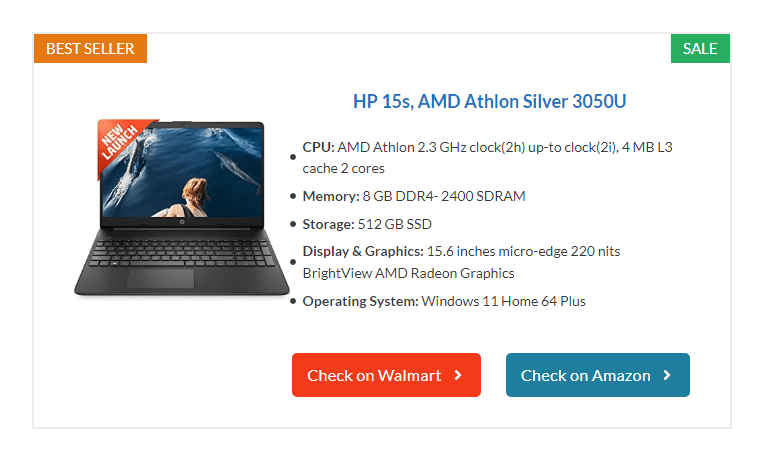
I’d also like to show you what we are trying to create before we actually start making it. So, you have an overall idea.
Time needed: 15 minutes
I am making this affiliate box using GenerateBlocks free version on GP Premium theme. However, your theme does not need to be a premium one.
Accomplishing this box has nothing to do with the theme.
- Add a GenerateBlocks Container Block
This is the outer most GenerateBlocks container block and it will hold all the contents of affiliate product box within it.
Websites with 1200 pixels to 1300 pixels site layout with or without sidebar can set the container block’s contained width to 700 pixels.
Plus, apply right and left padding, border width, and border color to your container block.
I have given;
Contained width – 700 pixels
Right padding – 10 pixels
Left Padding – 10 pixels
Border width – 2 pixels overall
Border color – ECECEC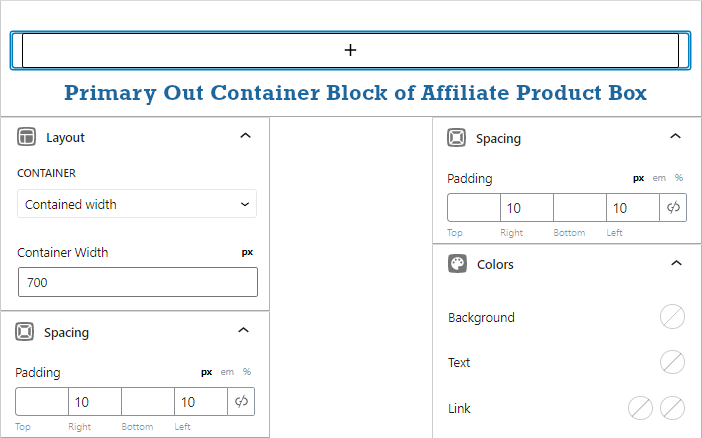
- Add an Inner Container block to hold GenerateBlocks Grid block
In this step, we need to place two labels on the top corners of the outer container block.
For that, we need to add an inner container block followed by a GenerateBlocks 2 column grid block.
If you choose a 2 column grid block, you get 2 container blocks (as 2 columns) within it.
The first container block will hold a GenerateBlocks Headline block of paragraph tag, with the text ‘Best Seller’. While the second container block will hold another GenerateBlocks Headline block of paragraph tag, with the text ‘Sale’.
In this step, I’m only going to add that inner container block and show its image.
- Insert a GenerateBlocks Grid block of 2 columns
Now, from the list view, click on the inner container block and insert a two column grid block.
Change Horizontal Gap between both the columns to 487 pixels.
Note:- The values mentioned here will only display a good design if you have followed from the beginning.
Change Vertical Alignment from default to top.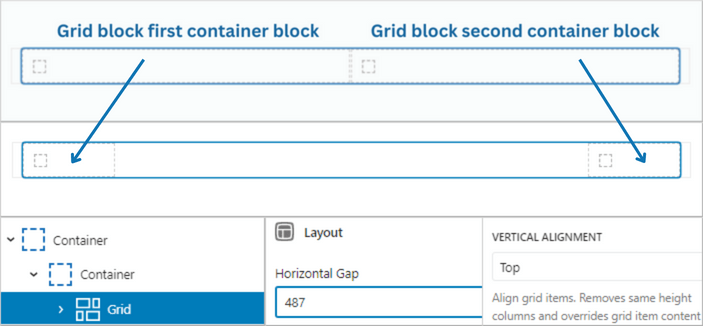
- Customize both the Container blocks of the Grid block
For the labels to stay at the top corner of the outer container block, you will need to customize padding and margin of both the containers present inside the grid block.
Plus, apply background color to make them really pop out, when your reader looks at the affiliate product box.
Customization I’ve made;
Grid block first container block
Top padding – 3 pixels
Bottom padding – 3 pixels
Right margin – -8 pixels
Left margin – -10 pixels
Background color – E47911
Text color – FFFFFF
Grid block second container block
Top padding – 3 pixels
Bottom padding – 3 pixels
Right margin – -10 pixels
Left margin – 45 pixels
Background color – 27AE60
Text color – FFFFFF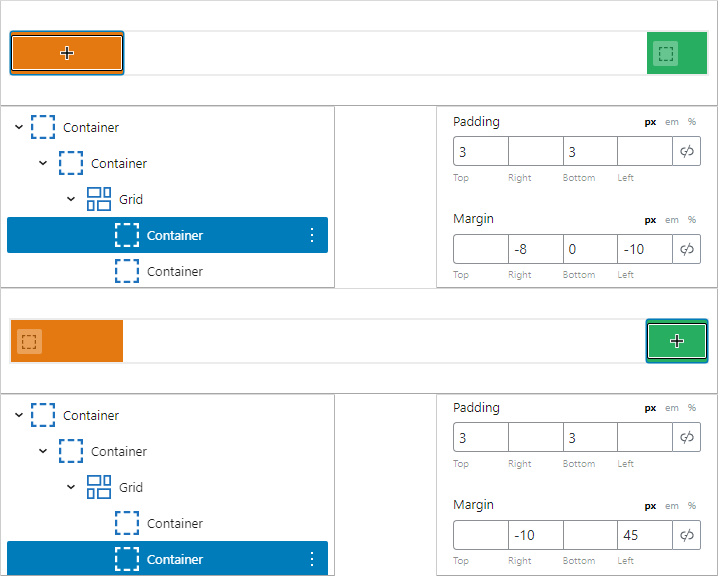
- Add a Headline block to the Grid’s first Container block
Insert a GenerateBlocks headline block to the first container block and add text ‘Best Seller’.
Change the tag to paragraph, customize font size to 15 pixels and transform text to uppercase.
Settings done are as follows;
Headline Tag – Paragraph tag
Font size – 15 pixels
Font Transform – Uppercase
Bottom margin – 0 pixels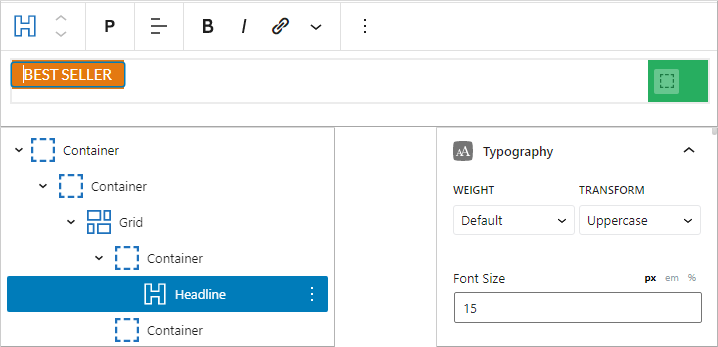
- Insert a Headline block to the Grid’s Second Container block
Insert another GenerateBlocks headline block to the second container block and add text ‘Sale’.
Change its tag to paragraph, customize font size to 15 pixels and transform its text to uppercase.
Similarly, settings are as follows;
Headline Tag – Paragraph tag
Headline align – center
Font size – 15 pixels
Font Transform – Uppercase
Bottom margin – 0 pixels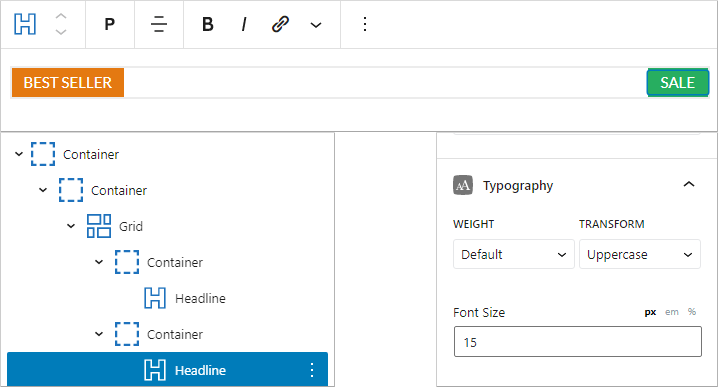
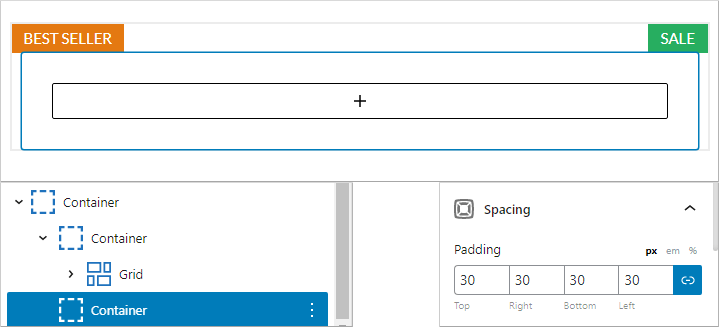
- Add a new Container block
Go to your list view, click on the outermost container block and add a new container block.
We are going to accommodate all the product information like image, name, features, etc. in this GenerateBlocks container.
Plus, give an overall padding of 30 pixels to this container block.
- Insert a Grid block in the above Container
You need to add a two column grid block to the container block.
Give a horizontal gap between both the columns of 20 pixels.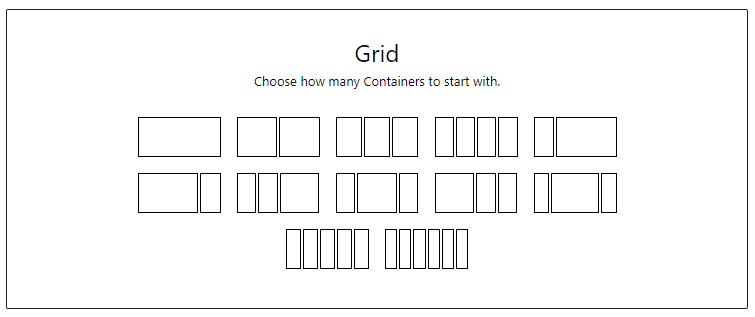
- Customize first container of grid block
From the list view, click on the first container from the grid block and reduce its layout to 35%
Next, change the vertical alignment from default to center.
Give top padding of 20 pixels and reduce the top margin to -5 pixels
Now, add a GenerateBlocks image block and upload the product image.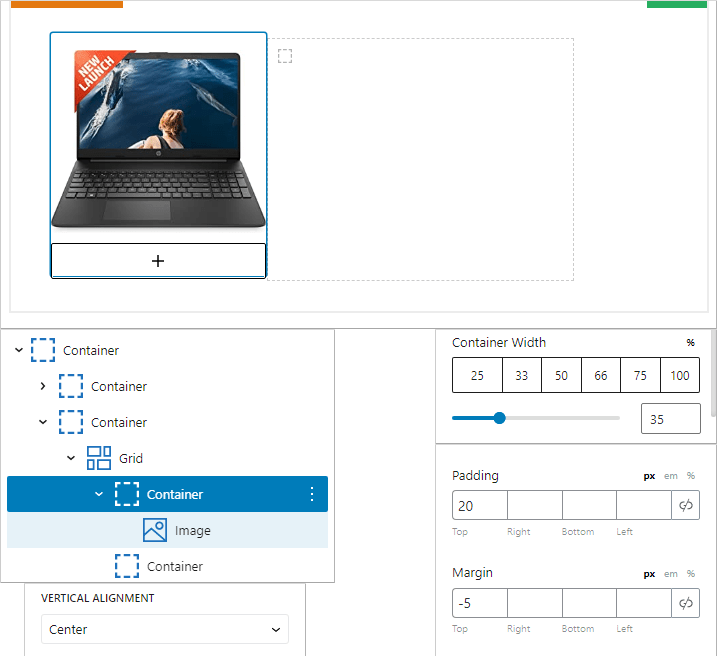
- Customize the second container block of grid block
The left hand side of our affiliate box now has a product image. It is time to customize the right hand side.
In this side, we are going to add multiple GenerateBlocks headline blocks to display product title and product features.
Increase the container block’s width to 65% and reduce its top margin by -5 pixels.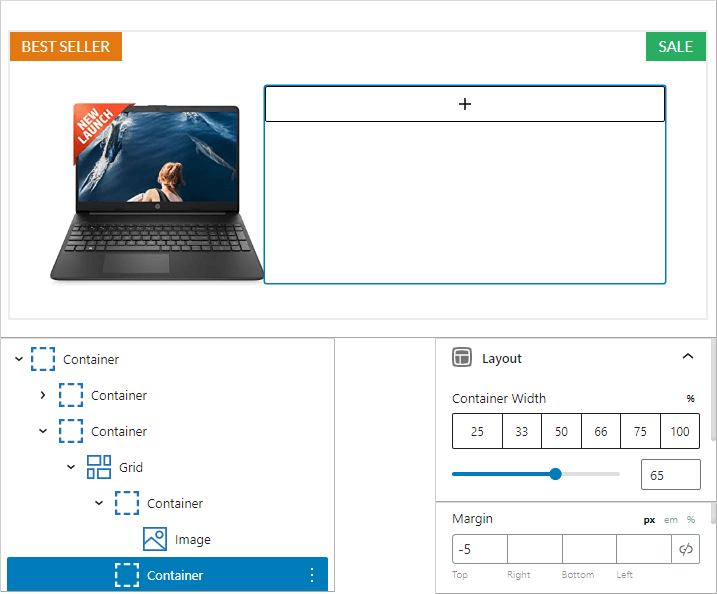
- Add GenerateBlocks Headline block for affiliate product title
From the list view, click on the second container and add a GenerateBlocks headline block.
Change the headline block tag to paragraph tag, align to center, reduce the font size to 18 pixels, and select font weight as 600.
Also, give bottom margin of 20 pixels and add the product’s affiliate link to it.
Changes done are as follows;
Align Headline – Center
Font size – 18 pixels
Font weight – 600
Bottom margin – 20 pixels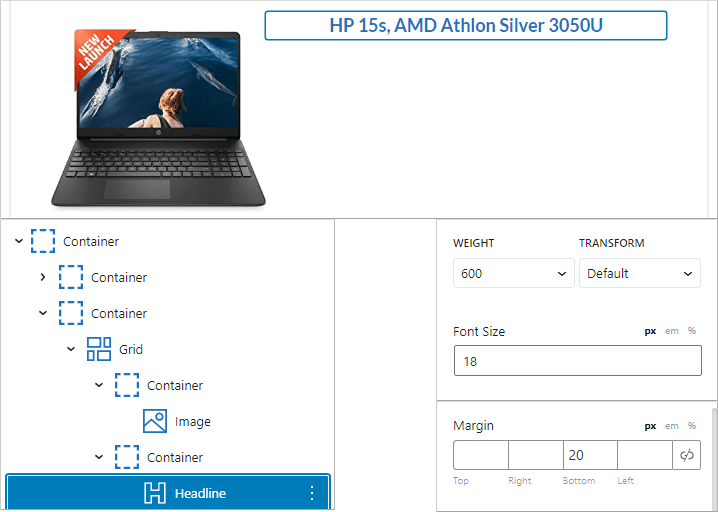
- Insert GenerateBlocks Headline block for product description
Since, products have lot of description, we are going to make an ordered list, but not using the core list block.
In fact, we will adjust the font size and margin of the first headline block and just duplicate it to make few more points that describes the product in brief.
Click on the second container block, from the grid block, and insert a headline block.
Change its tag to paragraph tag, reduce the font size to 14 pixels, and add a bottom margin of 6 pixels.
Under GenerateBlocks Icons, select an icon, and make the icon size 6 pixels.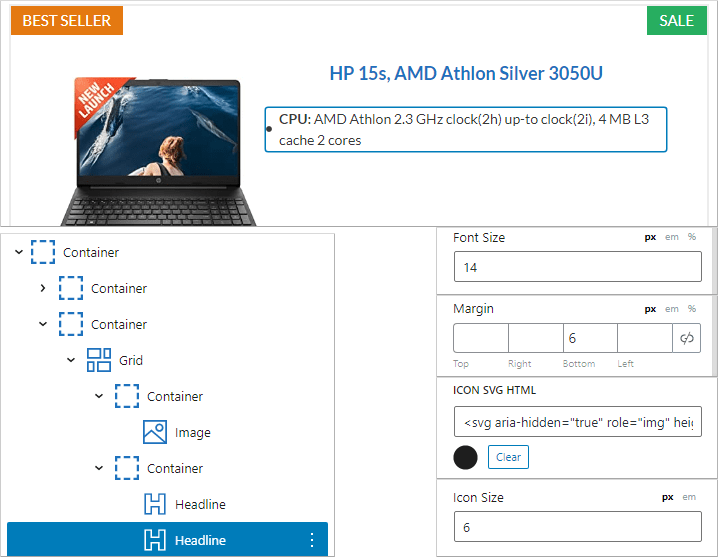
- Duplicate the Headline block for creating description points
Now that you already have a product description point ready, just duplicate that GenerateBlocks headline block to create few more points, and update the content.
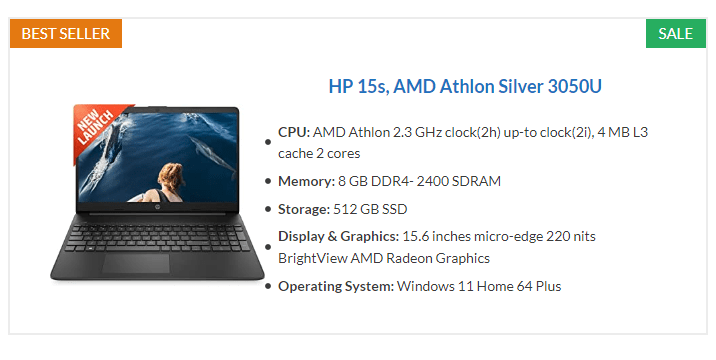
- Insert affiliate product buy now buttons
By now our affiliate product box is almost ready and it also looks very good.
The quality of our design is premium and is at par with the latest affiliate product box plugins. By using the free version of GenerateBlocks if you can achieve this level of design, imagine what you can do if you’ve got GenerateBlocks pro.
Now, click on the inner container block, that is holding the two column grid block and insert a GenerateBlocks Buttons block and increase the top margin to 25 pixels and align it to the right.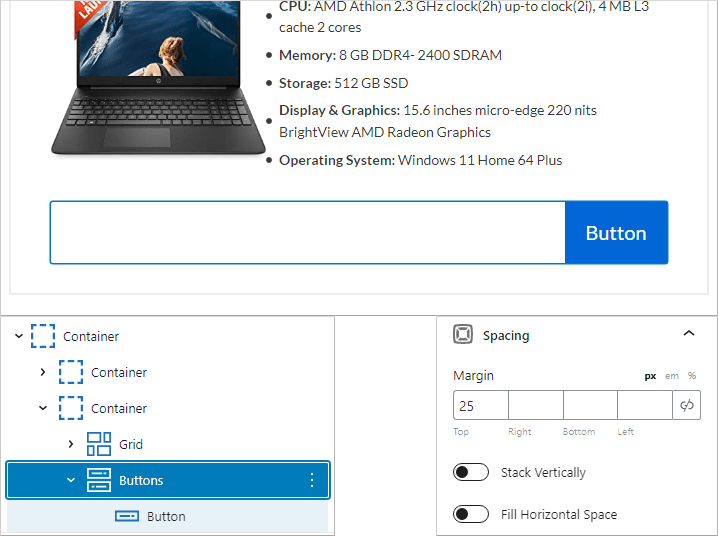
- Customize the button relevant to the product
The GenerateBlocks buttons block creates a button within the block.
You need to make that button relevant to the product. Meaning, add text like ‘Buy Now’ or ‘Check on Amazon’, add an icon, change colors, etc.
In the list view, under the main GenerateBlocks button block there will be a Button, click on that button.
Do the following changes;
Change text – Check on Amazon
Font size – 16 pixels
Letter spacing – Medium
Add icon – Right Chevron icon
Icon placement – Right
Icon size – 16 pixels
Top padding – 8 pixels
Right padding – 13 pixels
Bottom padding – 8 pixels
Left padding – 13 pixels
Right margin – 10 pixels
Border Size – 2 pixels overall
Border Radius – 5 pixels overall
Normal Button Colors
Background color – 1D7E9E
Text color – FFFFFF
Border color – 1D7E9E
Hover Button Colors
Background color – FFFFFF
Text color – 1D7E9E
Border color – 1D7E9E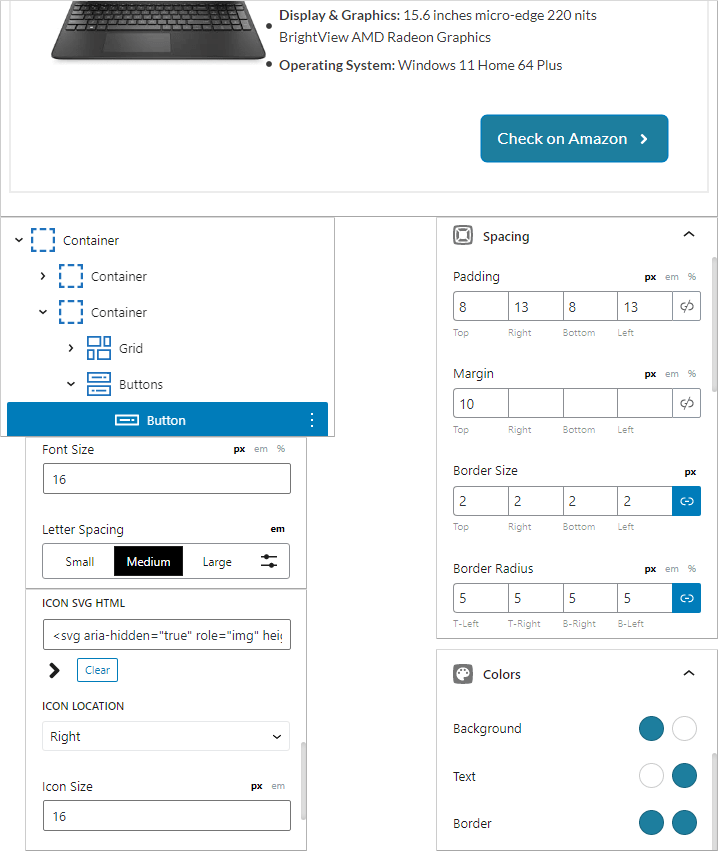
- Duplicate the button
Now that you already have a button ready, just duplicate the button, change the text from Amazon to Walmart, change the link and color settings.
For duplicating the button, you will need to click on the main buttons container and press the + icon.
Following that, adjust the spacing between the buttons accordingly.
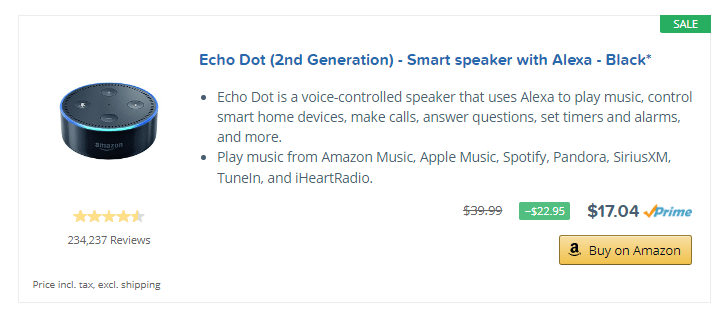
There you go, your affiliate product box is completely ready.
Creating this affiliate box was not only easy, but it also gives a similar look like the ones you see created via premium plugins.
Such affiliate boxes are independent of affiliate networks. Meaning, you can just apply the affiliate link offered by the provider and you are ready to go.
AAWP – The Premium Amazon Affiliate WordPress Plugin
In the segment of Amazon affiliate marketing, many professional marketers are already using a paid plugin called AAWP.
AAWP is nothing but an Amazon Affiliate WordPress plugin that comes with different styles of prepared templates which are not only mobile responsive, but also come with pre-set tracking ID.
Ratings, reviews, prices, etc. all fall under data fields that automatically get updated via the Amazon api. This is not possible with a free plugin.
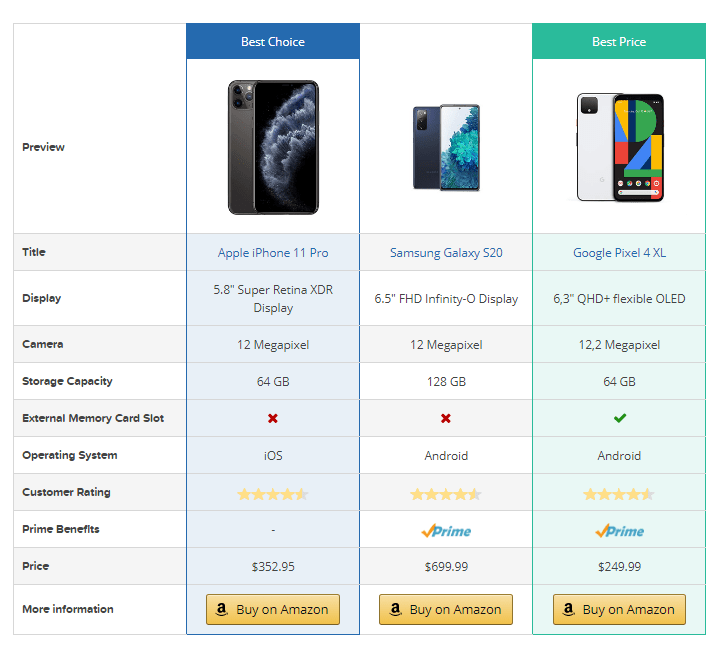
Also check out the image showing a comparison table with updated data fields from Amazon.
Think of AAWP as a paid GenerateBlocks alternative for creating affiliate boxes, pros and cons table, affiliate comparison table, summary box, versus box, etc. All with tracking ID, geotargeting and dynamic fields updates.
But, unfortunately AAWP does not have a free version.
Therefore, this post was specifically dedicated to new users or beginners who would like to create affiliate product boxes using a free plugin.
Conclusion
You can create various things using this WordPress plugin; like related posts, latest posts, custom header, custom footer, etc.
The best part is that 99% of your design requirements get fulfilled with the free version of GenerateBlocks.
Perhaps, if you want to add more flair to your website’s elements or sections, GenerateBlocks patterns is the solution, and that is available with the pro version.
A good GenerateBlocks alternative is Kadence blocks. If you are using Kadence blocks and are wondering how to create an affiliate box. Don’t worry, I have a post that shows all the steps about creating an affiliate box using Kadence blocks.